Archive for David Harlan

How to Insulate a Garage: A Complete Homeowner’s Guide

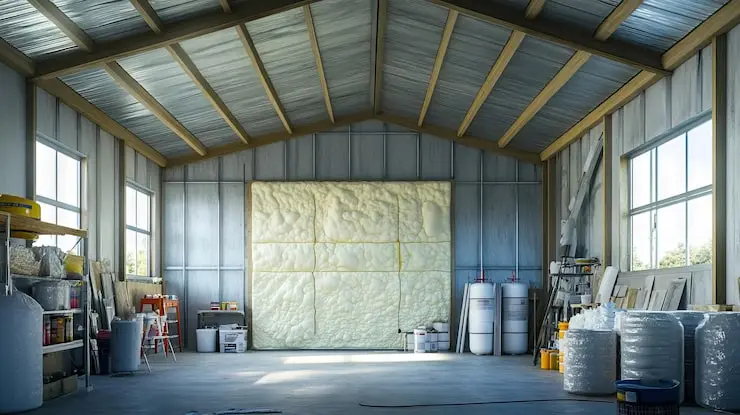
Insulating a garage is one of those home projects that sounds simple until you actually look into it. Some people do it to stay warm in winter. Others want to protect stored items, reduce energy bills, or turn the garage into usable space. The problem is that most advice online skips over the real questions homeowners have, like whether insulation is even worth it for their garage, what type actually works, and how much it really costs. This guide walks through everything you need to know about insulating a garage, from deciding if it makes sense to choosing materials, understanding R-values, and avoiding common mistakes. Whether you plan to do the work yourself or hire a professional, you’ll leave with a clear plan instead of guesswork. Do You Really Need to Insulate Your Garage? Before getting into materials and steps, it’s worth asking a simple question: do you actually need to insulate your garage? The answer depends on how your garage is built and how you use it. Attached vs detached garages If your garage is attached to your house, insulating it usually makes sense. Heat moves easily through shared walls and ceilings. A cold garage can make nearby rooms harder to heat in winter and hotter in summer. Insulating garage walls and ceilings can reduce that energy loss and improve comfort inside the home. Detached garages are different. If you only use the space for parking and basic storage, insulation may not provide much benefit. But if you spend time out there or store temperature-sensitive items, insulation can help stabilize conditions. How you use the space Insulating a garage makes the most sense if you: Use it as a workshop or home gym Store tools, paint, or electronics Have plumbing that could freeze Plan to convert it into living space Want better temperature control year-round If the garage is rarely used and completely separate from the house, insulation may not be a priority. How Much Does It Cost to Insulate a Garage? Budgeting is where most homeowners get stuck. In 2026, material prices have stabilized, but labor remains at a premium. Here is a breakdown of what you can expect for a standard 2-car garage (~400 sq. ft.). 2026 Cost Comparison Table Material Type Material Cost (per sq. ft.) Total DIY Cost (Est.) Professional Cost (Installed) Fiberglass Batts $0.40 – $1.50 $800 – $1,200 $1,800 – $2,500 Mineral Wool $1.40 – $3.50 $1,300 – $1,900 $2,400 – $3,200 Rigid Foam Board $1.00 – $2.50 $900 – $1,500 $2,000 – $3,000 Spray Foam (Closed Cell) $1.50 – $4.50 N/A (Pro only) $3,500 – $6,000 PRO TIP: When calculating how much does it cost to insulate a garage, don’t forget to budget $200–$400 for a dedicated garage insulation kit for your door. It is the single most important part of the project. How Do I Prepare to Insulate My Garage? Preparation is the difference between a project that lasts 30 years and one that rots your studs in five. Declutter the Perimeter: You need full access to the wall studs. Remove all shelving, hooks, and wall-mounted racks. The “Leak Audit”: Insulation stops heat transfer, but it doesn’t stop air. Use a can of expanding foam to seal gaps where wires penetrate the top plate and around window frames. This is a critical step in how to insulate a garage effectively. Moisture Check: Look for “efflorescence” (white powdery salt) on concrete walls. If your garage has moisture issues, you must fix the exterior drainage or apply a waterproof masonry sealer before installing batts. What Type of Insulation Should I Choose?   Choosing the right garage insulation r value depends entirely on your climate. R-value measures a material’s resistance to heat. Fiberglass Batts: The go-to for insulating garage walls. It’s DIY-friendly but requires a vapor barrier in cold climates. Mineral Wool: Brands like Rockwool offer superior fire resistance and soundproofing. It doesn’t sag over time and repels water. Reflective Foil: In places like Florida or Arizona, the best way to insulate a garage door is using radiant barriers to reflect the sun’s heat back outward. Recommended R-Values for 2026 Walls: Aim for R-13 to R-15 in the South; R-19 to R-21 in the North. Ceilings: Aim for R-30 to R-40. What Are the 6 Steps to Insulate a Garage? Follow this checklist to ensure a professional-grade finish. Step 1: Seal the Gaps Before you touch the insulation, seal every crack. Use high-quality caulk for small gaps and expanding spray foam for larger holes around plumbing and electrical outlets. Step 2: Install Attic Baffles (Ceiling Only) If you are insulating the ceiling, you must maintain airflow to your roof. Staple foam baffles (rafter vents) to the roof sheathing to prevent your new insulation from blocking the soffit vents. Step 3: Fit the Insulation Snugly When how to insulate garage walls, “snug” is the keyword. Cut your batts about a half-inch wider than the stud cavity. Tuck them in so they are flush with the studs. Crucial: Do not compress the material. Squishing insulation kills its R-value by removing the air pockets that trap heat. Step 4: Add the Vapor Barrier In colder regions, stapling a 6-mil poly vapor barrier over the studs prevents your breath and car exhaust moisture from condensing inside the walls, which leads to mold. Step 5: Insulate the Garage Door The door is a giant thermal hole. Use a specialized garage insulation kit or cut rigid foam boards to fit the panels. This is often cited as the best way to insulate a garage door because it significantly reduces the vibration and noise of the door as well. Step 6: Cover with Fire-Rated Drywall In most jurisdictions, you cannot leave insulation exposed. It is a fire hazard. Install 5/8-inch Type X drywall. Not only is this safer, but it also gives your garage a finished, professional look. Common Garage Insulation Mistakes Even good materials won’t help if installation is done poorly. Skipping air sealing: Insulation without air sealing allows

What to Do If You Miss Trash Day: Complete Guide

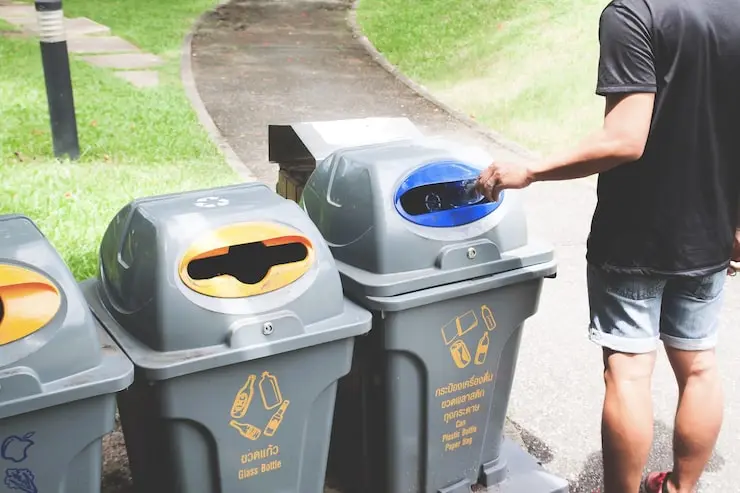
Forgetting trash day is more common than you might think. Life gets busy, schedules change, or maybe you simply lost track of time and suddenly your garbage is sitting by the curb, waiting for the truck that’s already come and gone. While it may seem like a small mistake, missing trash day can cause a lot of problems. Overflowing bins can attract pests, create unpleasant odors, and in some areas, even lead to fines if trash isn’t collected properly. The good news is that missing a trash day isn’t the end of the world. There are practical steps you can take immediately to manage the situation, prevent potential problems, and make sure it doesn’t happen again. In this guide, we’ll cover What to do If you miss trash day, 10 effective solutions for forgotten trash, and strategies to avoid missing trash day in the future. By the end, you’ll have a plan that keeps your home clean, safe, and stress-free. Immediate Steps to Take if You Miss Trash Day Realizing you’ve missed trash day can be frustrating, but acting quickly helps minimize the impact. Here are some immediate steps to take. 1. Check Your Trash Collection Schedule The first step is understanding how your trash service operates. Many cities or private waste management companies offer policies for missed pickups, especially for unavoidable circumstances like holidays or weather delays. Tips: Look for your municipality’s or provider’s official website. Many have schedules and guidelines for missed pickups. Call customer service if online information is unclear. Note any fees associated with rescheduled pickups 2. Contact Your Waste Management Provider If your schedule allows, contact your waste management provider as soon as you realize you missed trash day. Some companies can arrange same-day or next-day pickup, or advise you on alternative disposal options. Tips for contacting them: Use online forms or apps if available—they’re often faster than phone calls. Be ready with your account number and address to speed up the process. Ask specifically about “missed trash pickup what to do” options. 3. Secure Your Trash at Home If rescheduling isn’t possible immediately, make sure your trash is stored safely. Overflowing garbage can attract pests and produce strong odors. Use airtight containers or bins with secure lids and store them in a garage, shed, or covered area until collection day. 4. Consider Alternative Disposal Options Sometimes you can’t wait for the next scheduled pickup. Local transfer stations, recycling centers, or donation centers for certain items can be helpful alternatives. This is particularly useful for bulk items or hazardous waste that can’t stay outside. 5. Clean Up Any Overflow If trash has already spilled out of your bin or there’s scattered debris, clean it up promptly. Not only does this prevent health hazards, but it also avoids fines in some municipalities for improper waste disposal. 10 Things You Can Do If You Forgot to Take Out the Trash If you’ve missed trash day, don’t panic. Here are 10 practical solutions to get your garbage under control while waiting for the next pickup: 1. Store Trash in Airtight Containers Sealing your garbage in airtight containers reduces odor and prevents pests from getting into your trash. Plastic bins with tight-fitting lids work well for food waste and general household garbage. 2. Use a Temporary Trash Area If your usual trash spot is outdoors and the weather is bad, consider moving your trash indoors temporarily. A garage, shed, or even a laundry room corner can work as a short-term solution. 3. Contact Local Waste Facilities Many cities have transfer stations or drop-off points where residents can bring their garbage if they missed regular pickup. This can be particularly useful for bulky items or recycling materials. 4. Separate Food Waste Food waste can produce strong odors if left in a bin too long. Consider separating it from other trash and storing it in a sealed container in your refrigerator or freezer until collection day. 5. Compost if Possible For households with composting options, separating organic waste like food scraps and yard waste can reduce the amount of garbage that needs immediate disposal. 6. Ask Neighbors for Help Sometimes a neighbor with the same pickup schedule may be able to temporarily hold your trash with theirs. Always ask politely and ensure your trash is properly sealed. 7. Schedule a Special Pickup Check if your trash service allows special pickups for missed days. Some municipalities and private services will send a truck for a small fee. 8. Set Up Reminders Prevent future issues by setting up reminders on your phone, calendar, or digital assistant. Weekly notifications can keep you on track, even during busy weeks. 9. Check Municipal Alerts Municipal websites or social media pages often post alerts about schedule changes, holiday pickups, or service delays. Keeping an eye on these alerts can prevent missed trash days in the future. 10. Maintain a Clean Trash Area Even if you miss a day, keeping the area around your bins clean prevents pests and odor build-up. Regular cleaning helps reduce the stress of missed pickups and keeps your property sanitary. How to Avoid Missing Trash Day in the Future Prevention is always better than reaction. Here are strategies to make sure you never forget trash day again: 1. Establish a Routine Incorporate trash day into your weekly habits. For example, put bins out on the same day each week at the same time. Pairing trash duties with another regular activity, like checking mail or walking the dog, can make it easier to remember. 2. Set Up Digital Reminders Use your phone, calendar apps, or smart home devices to set reminders. Notifications a few hours or a day before trash day are particularly effective. 3. Coordinate with Household Members If you live with roommates or family, create a rotating schedule so that responsibility for taking out the trash doesn’t fall on one person. Communication is key to ensuring everyone knows when trash day is. 4. Subscribe to Municipal Alerts Many cities and towns

How to Recycle a Blender: A Complete Guide

Whether your blender has stopped working or you’ve upgraded to a newer model, you may be wondering how to recycle a blender responsibly. Many people assume they can simply toss it into the trash, but that isn’t always the best—or even the legal—option in some areas. Blenders contain a mix of plastic, glass, stainless steel, copper wiring, and electronic components. While many of these materials can be recovered and reused, throwing a blender into the garbage sends valuable resources to landfills and contributes to electronic waste (e-waste). Can You Recycle a Blender? Quick Answer Yes. Most blenders can be recycled, but they usually need to go to an electronic waste (e-waste) recycling facility or appliance recycling program instead of your curbside recycling bin. A typical blender combines several materials: Blender Component Recyclable? Plastic housing Usually Glass jar Yes Stainless steel blades Yes Aluminum parts Yes Electric motor Yes (e-waste) Copper wiring Yes Rubber seals Sometimes Power cord Yes (e-waste) Because these materials are permanently assembled together, recycling facilities separate them using specialized equipment. Can I Throw a Blender in the Garbage? Technically, you can throw a blender in the garbage in some locations, but it is not recommended. Because blenders contain electrical components and recyclable metals, they should be taken to an e-waste recycling center or appliance recycling facility whenever possible. Many homeowners ask: Can I throw a blender in the garbage? Can you throw a blender in the trash? The answer depends on your local waste regulations. Some municipalities allow small appliances in household trash, while others prohibit electronic devices from entering landfills. Even when allowed, trash disposal should always be the last option. Why Throwing a Blender Away Isn’t Ideal Sending a blender to the landfill means valuable materials cannot be recovered. These materials include: Steel Copper Aluminum Glass High-quality plastics Manufacturers use these raw materials to build new products. Recycling helps reduce mining, manufacturing emissions, and landfill waste. Why You Shouldn’t Throw Your Blender in the Trash Short Answer Recycling protects the environment, conserves natural resources, and keeps electronic waste out of landfills. A blender may seem like a simple kitchen appliance, but it contains several recyclable materials. Improper disposal can result in: Increased landfill waste Lost recyclable metals Wasted plastic materials Unnecessary resource extraction Higher environmental impact Professionals in appliance recycling carefully dismantle blenders so reusable materials can be processed into new products. Options for Recycling or Disposing of a Blender There are several avenues to get rid of your old or broken blender responsibly. 1. Local Recycling Programs Many cities and municipalities have special programs for e-waste or small appliances. These programs often provide: Drop-off locations for small electronics. Scheduled curbside pick-up days for e-waste. Guidelines for separating materials (plastics, metals, electronics). How to check: Visit your city’s waste management website or call your local recycling office. They can tell you if your blender qualifies for their program. 2. Electronic Waste Centers E-waste centers specialize in recycling electronics safely and efficiently. They: Properly dismantle motors, wiring, and electronic circuits. Recycle metals and plastics to create new products. Often accept items free of charge or for a small fee. Some e-waste centers also provide tax credits or trade-in incentives, making it easier to get rid of appliances responsibly. 3. Retail Take-Back Programs Many retailers and appliance brands offer take-back programs for old electronics and appliances. Examples include: Best Buy: Offers in-store drop-offs for small appliances and electronics. Major blender brands: Some accept old appliances through mail-in or in-store recycling. Check your local store or the manufacturer’s website to confirm whether your blender is eligible. This method is convenient if your appliance is too heavy or bulky to transport to a recycling center. 4. Donation or Repurposing If your blender is still functional but old, donation can be a great option: Donation options: Schools, shelters, or community centers. Goodwill accepts small appliances. Repurposing: Even broken blenders can be repurposed. Glass jars can become storage containers, or motors can be used in DIY projects. This not only keeps appliances out of landfills but also benefits communities or hobbyists looking for inexpensive materials. Step-by-Step Guide to Prepare Your Blender for Recycling Before taking your blender to a recycling facility or drop-off location, follow these steps to ensure safe and effective disposal: Unplug and disassemble: Remove the jar, lid, blades, and base. Clean thoroughly: Any leftover food can contaminate the recycling process. Separate components: Divide plastics, metals, glass, and electronic parts. Package safely: Wrap sharp blades and motors to prevent injury during transport. Choose the right recycling method: Take each part to the appropriate facility or program. Environmental and Practical Benefits of Recycling Blenders Recycling blenders has both environmental and practical benefits: Reduces landfill waste: Electronics and plastics take decades to decompose. Proper disposal prevents this buildup. Recovers valuable materials: Metals, plastics, and glass can be recycled into new products, reducing the need for virgin resources. Supports sustainable living: By properly disposing of appliances, you contribute to a circular economy where materials are reused rather than wasted. Even a small appliance like a blender can make a noticeable difference when disposed of responsibly. Common Mistakes to Avoid When recycling a blender, people often make mistakes that reduce efficiency or cause safety issues: Throwing it in the curbside bin: Most curbside programs do not accept electronics. Not cleaning the blender: Food residue can contaminate recycling streams. Leaving blades exposed: Sharp components can injure workers at recycling facilities. Mixing electronics with general plastics or metals: This complicates recycling and may lead to contamination. Following proper steps ensures your blender is recycled safely and effectively. We Take All kind of Junk At Junk Masterz, we make it simple to get rid of unwanted items, no matter the size or type. Whether it’s a broken blender, old kitchen appliances, furniture, electronics, or general household junk, we handle it all safely and responsibly. Our team ensures that everything we collect is recycled or disposed of properly, helping you declutter while protecting the environment. Wondering exactly

How to Dispose of a Dehumidifier Safely and Responsibly

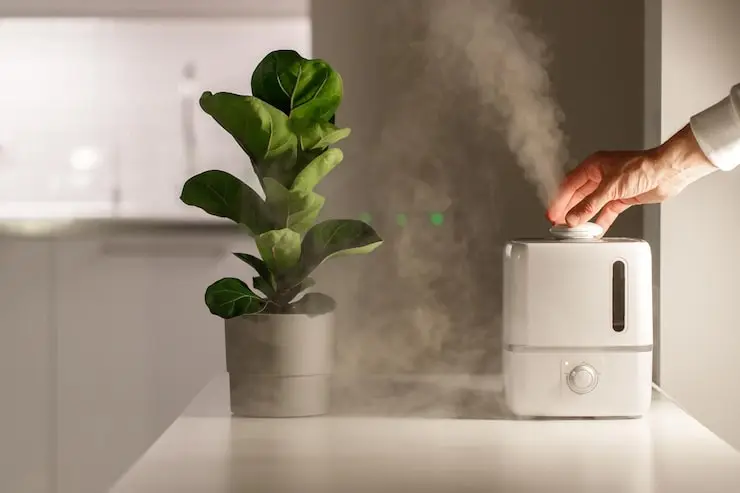
If your dehumidifier has stopped working or you’ve upgraded to a newer model, you may be wondering how to dispose of dehumidifier units properly. Unlike ordinary household waste, dehumidifiers often contain refrigerants, metals, electronic components, and plastics that require special handling. Many homeowners ask questions such as: Can you throw a dehumidifier in the trash? How do you recycle one? What should you do if it contains refrigerant? This guide explains everything you need to know about responsible dehumidifier disposal, including recycling options, environmental concerns, and local disposal programs. Quick Answer: What Is the Best Way to Dispose of a Dehumidifier? The best way to dispose of a dehumidifier is through an approved appliance recycling program, municipal e-waste collection service, or scrap metal recycler that accepts refrigerant-containing appliances. Key Steps Unplug and empty the unit. Check whether it contains refrigerant. Contact a local recycling facility or appliance disposal service. Avoid placing it in regular household trash unless local regulations specifically allow it. Ensure refrigerants are recovered by certified professionals. Why Dehumidifiers Require Special Disposal Refrigerants Can Harm the Environment Most older dehumidifiers contain refrigerants similar to those used in air conditioners and refrigerators. If released into the atmosphere, these chemicals can contribute to environmental damage. Electronic Components Need Recycling Modern units contain: Circuit boards Copper wiring Electric motors Plastic housing Steel and aluminum components Many of these materials can be recovered and reused. Local Regulations May Apply Many municipalities prohibit disposing of refrigerant-containing appliances in landfills due to environmental regulations. Ways to Dispose of a Dehumidifier Now that you understand why disposal matters, let’s explore your options. The right method depends on the condition of the unit and the resources available in your area. Donate or Sell If your dehumidifier still works, consider donating it or selling it. Local charities, thrift stores, or shelters often welcome functioning appliances. Online marketplaces like Craigslist, Facebook Marketplace, or local buy-and-sell groups can also be effective. Not only do you give your old dehumidifier a second life, but you also help someone in need while avoiding unnecessary waste. This approach is a practical answer for those searching for “how to get rid of a dehumidifier” quickly and responsibly. Recycling Options For units that are broken or too old to donate, recycling is the best option. Many regions have e-waste recycling facilities specifically designed to handle large appliances. These facilities safely extract metals, plastics, and refrigerants for reuse. Some manufacturers also offer take-back programs, accepting old appliances when you purchase a new unit. Step-by-step guide to recycling a dehumidifier: Check with your local municipality or waste management company for approved e-waste recycling centers. If available, contact the manufacturer for a take-back program. Prepare the dehumidifier by draining all water and removing filters. Transport the unit to the recycling center, ensuring any hazardous components are handled according to their instructions. Bulk Trash or Municipal Pickup Some cities allow large appliances to be picked up as part of scheduled bulk trash or curbside programs. The process usually involves scheduling a pickup and possibly paying a small fee. This option is convenient if you don’t want to transport the unit yourself, but it’s essential to verify your local rules. Some municipalities require certification that refrigerants have been safely removed, so check before placing your dehumidifier at the curb. Professional junk removal Junk removal services often recycle appliances correctly. This option works well for people handling multiple large items, though it usually costs more. Each option answers the question of how to dispose of dehumidifier units in a responsible way, without cutting corners. Utility company programs A few electric utility companies offer appliance recycling incentives. These programs focus on energy savings and may offer a small rebate for turning in old units. Can You Use Dehumidifier Water for Plants? Technically, dehumidifier water is distilled water, making it low in minerals. However, it may contain small amounts of dust, mold spores, or metals from the unit itself. If you decide to use this water for plants, it’s best for non-edible houseplants rather than vegetables or herbs. To be safe, consider filtering or boiling the water before use. Preparing Your Dehumidifier for Disposal This step-by-step guide breaks the process into simple actions. Follow these steps to avoid stress and mistakes. Step 1: Check if the dehumidifier still works Plug it in and test basic functions. If it removes moisture and runs without strange noises, donation or resale may work. Step 2: Clean the unit Empty the water tank and let it dry. Wipe dust from vents and coils. Clean units attract donors and recyclers alike. Step 3: Look up local rules Search your city or county waste authority page. Many areas list appliance disposal rules and approved recycling centers. This step matters since rules differ by location. Step 4: Choose a disposal method Pick recycling, donation, or professional removal based on your findings. Avoid curbside trash unless your local authority allows it, which remains rare for appliances with refrigerants. Step 5: Transport safely Keep the unit upright during transport. Tilting can cause oil or refrigerant movement inside the system. Step 6: Get proof if possible Some recycling centers provide a receipt or confirmation. This record helps if questions arise later. These steps answer how to dispose of a dehumidifier without confusion or risk. How to Recycle a Dehumidifier Properly Recycling answers both environmental and legal concerns. Knowing how to recycle dehumidifier units the right way makes the process smoother. Find certified recyclers Look for recycling centers certified to handle refrigerants. In the U.S., EPA-approved programs follow strict rules for refrigerant recovery. Ask about fees Some centers charge a small appliance recycling fee. This fee covers refrigerant removal and safe processing. Prepare the unit Remove loose parts like filters and water buckets if the recycler asks for it. Keep screws and internal parts intact unless instructed otherwise. Avoid DIY refrigerant removal Never try to remove refrigerant yourself. Federal law restricts this task to certified technicians due to safety and environmental risks.

How to Dispose of a Toaster Safely: Recycling, Donation, and Disposal Guide

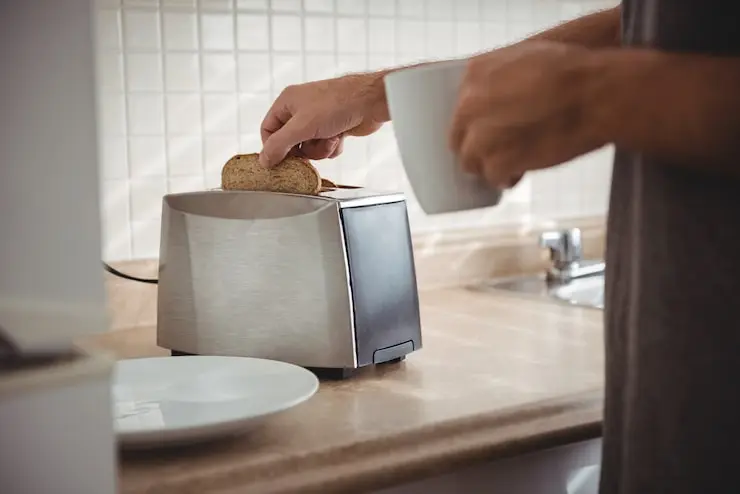
Old toasters are one of those household items many people forget about until they stop working. Once it burns toast unevenly, stops heating, or gets replaced by a newer model, the next question becomes: how to dispose of a toaster the right way. Many people simply place it in the garbage without thinking twice. Others wonder, can you put a toaster in the trash, or should it be recycled instead? The answer depends on your local waste rules, the condition of the appliance, and whether it still works. Toasters and toaster ovens contain metal, plastic, wiring, and electrical components. Because of that, throwing them away is not always the best option. In many places, recycling or donation is a smarter and more environmentally responsible choice. This guide explains everything you need to know about how to dispose of a toaster, including trash rules, recycling options, donation ideas, toaster oven disposal methods, and the best way to get rid of other small kitchen appliances. Can You Throw a Toaster in the Trash? Can You Put a Toaster in the Trash? The short answer is: sometimes. Some cities allow residents to place small appliances like toasters in regular household trash. Other locations classify them as electronic waste or require special disposal. Before throwing your toaster away, it is always best to check: Local city sanitation website Household waste guidelines Bulk trash rules E-waste collection programs Why Throwing It in the Trash Is Not Always Best A toaster may seem simple, but it often contains materials that can be reused or recycled, such as: Steel housing Copper wiring Aluminum components Plastic knobs or handles Heating elements When these materials go to a landfill, they are wasted. Quick Answer Can you throw a toaster in the trash?Yes, in some areas you can, but recycling or donating it is usually the better option. Before using the trash bin, check your city or county waste page or Earth911’s recycling locator. Many communities offer drop-off sites or special collection days for small appliances. Using those options keeps reusable materials in circulation and reduces landfill pressure. Step-by-Step: How to Dispose of a Toaster Getting rid of a toaster does not require special skills. A few clear steps make the process safe and responsible. Unplug and cool down: Always unplug the toaster and let it cool completely. Heating elements can stay warm longer than expected. Clean out crumbs: Shake out crumbs over a trash bin. This step reduces odors and pests if the toaster goes to recycling or donation. Check working condition: Plug it back in briefly. If it still heats and pops, reuse or donation may fit better than disposal. Look for recycling options: Search for small appliance recycling centers near you. Earth911 and local municipal sites list accepted items. Choose the best disposal method: Based on condition and local rules, decide between recycling, donation, resale, or trash as a last option. Following these steps answers how to recycle a toaster in a practical way while lowering risk and waste. Can I Throw a Toaster in the Garbage If It Is Broken? Yes, but only if local rules allow it and no better option is available. If your toaster is damaged beyond repair, trash disposal may be your final option. Before Throwing It Away Do these steps first: Unplug completely Empty crumb tray Remove food debris Tape loose cord safely Wrap sharp broken edges if damaged Confirm city trash rules Quick Answer Can I throw a toaster in the garbage?Yes, many cities allow it, but recycling is usually preferred. Toaster Oven Disposal: What You Need to Know A toaster oven is different from a regular toaster. Because it is larger and may contain more electrical parts, disposal rules can vary. Many toaster ovens contain: Glass doors Metal body panels Heating elements Internal wiring Control boards Timers That makes toaster oven disposal better suited for recycling in many cases. Can You Throw a Toaster Oven in the Garbage? Sometimes yes, but not always. Some cities allow small countertop ovens in trash pickup, while others classify them as bulky waste or e-waste. Always verify your local waste authority first. Better Options for Toaster Oven Disposal Appliance recycling center Bulk item pickup Scrap metal yard Retailer take-back programs Junk removal service How to Dispose of a Toaster Oven Safely If your toaster oven no longer works: Step 1: Clean It Out Remove: Grease trays Crumbs Food residue Step 2: Remove Glass Hazards If broken, tape shattered glass securely. Step 3: Use the Correct Disposal Method Choose recycling or approved pickup instead of dumping at random. Best Way to Dispose of Small Kitchen Appliances Like Toasters Many homes collect broken appliances over time, and it is important to learn how to get rid of small appliances properly. Examples include: Toasters Coffee makers Blenders Air fryers Mixers Microwaves Rice cookers Best Strategy If It Works: Donate or sell it. If It Is Broken: Recycle it. If It Is Unsafe: Trash only if permitted locally. Bundle Items Together If you have multiple appliances, one junk removal pickup may save time. Recycling E-Waste: Why It Matters Many people do not realize that small kitchen appliances often count as electronic waste. Even a toaster may include: Wiring Switches Heating systems Circuit components When these items go into landfill, useful materials are lost. Benefits of Recycling E-Waste Reduces pollution Saves raw materials Supports manufacturing reuse Keeps hazardous parts out of landfill Protects the environment That is why many communities now promote recycling e-waste instead of simple trash disposal. How to Prepare a Toaster for Disposal Before donating, recycling, or trashing your toaster, prepare it properly. Cleaning Checklist Empty crumb tray Shake out crumbs Wipe the grease from outside Coil cord neatly Remove stickers or food buildup Safety Checklist Do not donate if it has: Burn smell Exposed wires Smoke damage Sparks during use Broken plug Unsafe appliances should be recycled or discarded. When to Hire Junk Removal for Appliance Disposal Sometimes disposal is easier with a

How to Dispose of a Hot Tub: Safe and Easy Methods

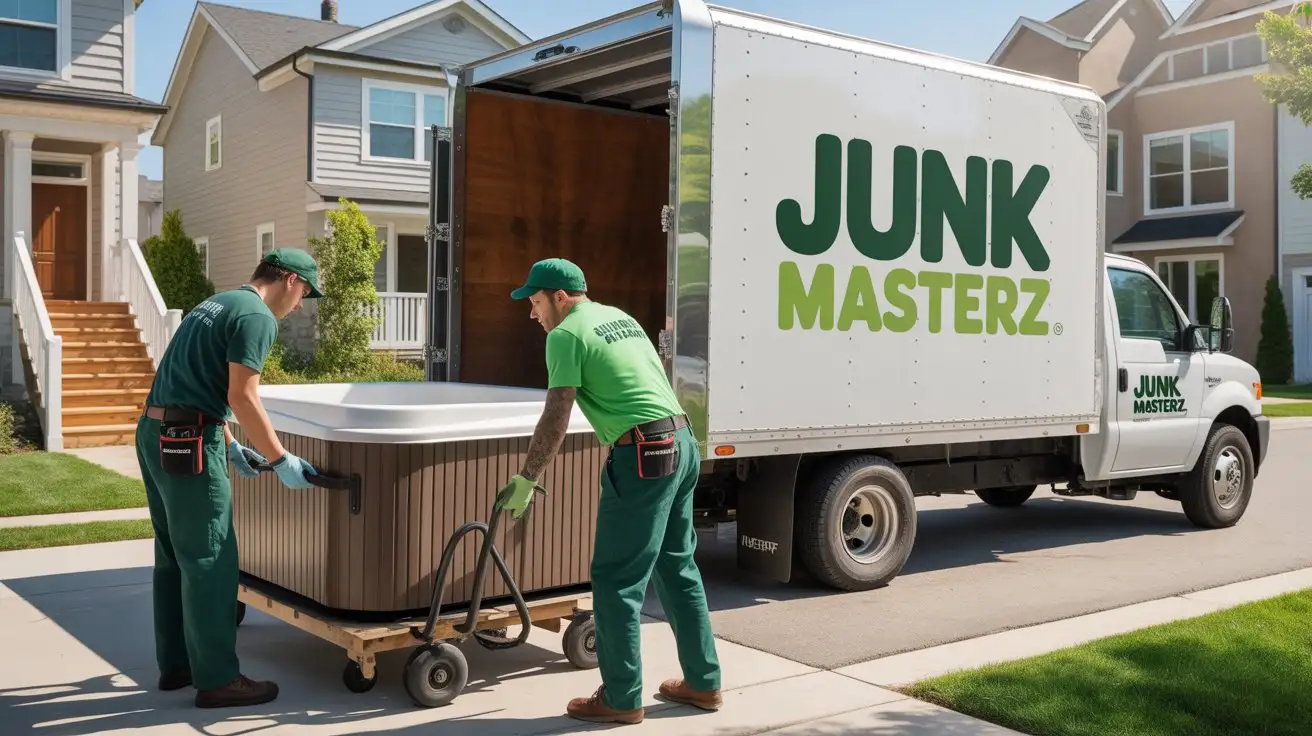
So, your backyard hot tub has outlived its glory days, and you’re staring at it thinking, “Now what?” Knowing how to dispose of a hot tub properly can save you a lot of hassle. These units are heavy, awkward, and made from a mix of plastics, metal, and foam materials that aren’t just “trash.” Mishandling them can lead to injuries, fines, or environmental headaches. In this guide, we’ll show you exactly how to get rid of a hot tub, whether you want to tackle it yourself, donate, recycle, or hire a professional. By the time you finish reading, you’ll have a clear, safe, and realistic plan to remove your old spa without stress or surprises. Think of it as your step-by-step roadmap to reclaiming your yard and disposing of your hot tub the right way. Why Hot Tub Disposal Is Challenging Hot tubs aren’t like old chairs you can toss onto the curb. Most of these units weigh hundreds of pounds and are full of complicated materials. Manufacturers build them with acrylic shells, metal frames, foam insulation and electrical components. That mix makes them awkward to lift and tricky to break down for disposal. Simply dumping an old unit at the landfill may not be allowed in your area, and leaving leftover water with chemicals like chlorine or bromine running into the soil can create real environmental problems. Most municipal garbage services don’t accept bulky items like hot tubs on regular pickup days. Some areas even require that water flushed from pools or spas drain only to specific sewer lines, not to storm drains or natural water sources. That’s why many homeowners who ask how to dispose of an old hot tub find themselves juggling rules, safety steps, and a lot of heavy pieces. How to Get Ready for a Hassle-Free Hot Tub Removal Preparing before your hot tub is removed makes the process smoother, safer, and faster. Whether you plan a DIY approach or are waiting for a professional team, taking a few careful steps upfront saves time, reduces risk, and prevents unexpected costs. Here’s a complete checklist to get ready for hassle-free hot tub removal. Clear the Surrounding Area Hot tubs are bulky and heavy. Remove all obstacles around the unit, including furniture, planters, decorative rocks, or garden features. Clearing a path of at least four feet ensures easy access for lifting equipment or moving the tub. Protect delicate surfaces with boards or blankets to prevent scratches or damage during the removal process. Turn Off Power and Water Electricity and water make hot tubs dangerous if handled carelessly. Switch off the dedicated breaker and unplug the hot tub if possible. Also, turn off any connected water lines. If your hot tub is hardwired, having a licensed electrician inspect the wiring ensures safety during removal. This is especially important for older tubs with unknown electrical modifications. Drain the Water Completely A full tub can weigh hundreds of pounds more than an empty one. Use the tub’s drainage valve or a submersible pump to remove all water. Make sure the water drains into a proper sewer line or approved area—never into storm drains or natural waterways. Residual chemicals like chlorine or bromine can contaminate soil and water if discharged improperly. Check Local Permits and Disposal Rules Many cities and municipalities require permits or scheduled bulky waste pickups for hot tub disposal. Check your local ordinances to confirm whether you need a permit or must use specific disposal facilities. Compliance avoids fines and ensures your hot tub ends up in a responsible, environmentally-friendly way. Communicate Special Access or Equipment Needs If your hot tub is in a tight corner, on a slope, or behind landscaping obstacles, let your removal team know in advance. They may need ramps, dollies, or additional personnel to safely handle the tub. Providing these details reduces delays, prevents damage, and keeps the removal process smooth. Additional tip: Taking photos of the tub and surroundings for your team can help them plan equipment and manpower needs ahead of time. Optional: DIY Prep Tips Even if hiring a team, doing small prep work like detaching removable panels, clearing debris, or organizing helpers can reduce labor time. These steps ensure a safer and quicker hot tub removal while giving you a chance to handle any unexpected obstacles before the team arrives. Hot Tub Disposal Methods There isn’t one single answer to how to get rid of a hot tub. The right choice depends on the tub’s condition, your budget, and how much effort you want to invest. Sell or Give It Away If the hot tub still works or only needs minor repairs, selling it can offset removal costs. Functional units can fetch a fair price on local classifieds sites, and willing buyers might handle removal themselves. Another idea is to offer it for free. Some people are happy to pick up a tub if they think they can fix or reuse it. Make sure they actually move it and don’t just leave it in your yard longer. Donate Some community groups or hobbyists accept hot tubs that are still operable. Donation centers might even offer pick-up services for large items. Always check first with the organization about condition and transport requirements. Professional Removal Service Paying for a removal crew is the easiest way to get rid of hot tub without handling the heavy work yourself. Professionals take care of disconnecting power, cutting apart the unit if needed, hauling it out, and disposing of materials in compliance with local regulations.  Typical costs range widely depending on where you live and how hard the job is, but most homeowners spend somewhere between $300 and $800 for full removal and disposal. Also Read: How Much Does It Cost to Remove a Hot Tub Recycling Hot tubs contain materials that recycling facilities will accept, such as metal frames and some plastics. Recycling keeps those materials out of landfills. It can take a bit of planning because different parts may need to go

How to Dispose of Lawn Mower? The Right Way (Safe & Eco-Friendly)

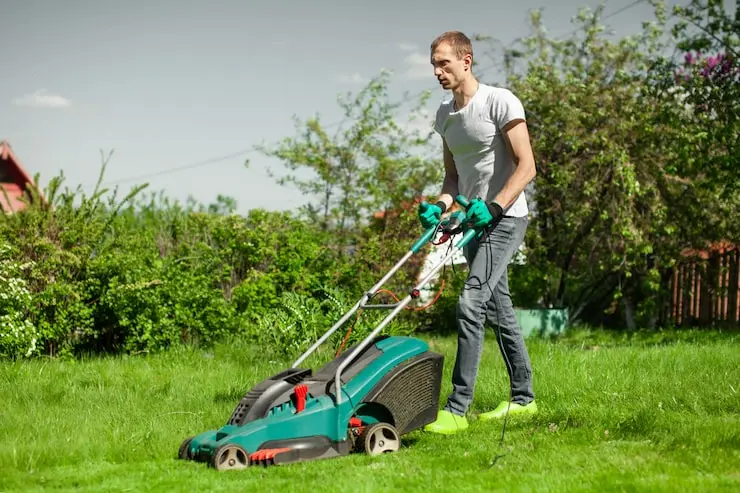
An old lawn mower can quickly turn into a problem. It’s heavy, messy, and not something you can leave on the curb like normal trash. That’s why many homeowners end up searching how to dispose of lawn mower after realizing it’s not as simple as it looks. Some try to dump it. Others leave it sitting in the garage for years. The truth is, lawn mowers need special handling because they contain fuel, oil, and metal parts. If you don’t deal with it properly, you could harm the environment or even break local waste rules. This guide will show you simple, realistic ways to handle the problem, whether your mower is broken, outdated, or still working. How To Dispose Of  Lawn Mower Throwing an old lawn mower out with regular trash isn’t a good idea. Lawnmowers often contain gasoline, oil, batteries, and metal parts that can harm soil and water if left in a landfill. Many towns treat them as bulky waste or hazardous materials, and they may not accept them curbside without preparation. Improper disposal sometimes leads to fines and environmental hazards. Also, most parts of a lawn mower are recyclable. Steel, aluminum, and some plastics can be broken down and used again. Knowing how to recycle old lawn mower parts gives them a second life and reduces waste. It also helps you find disposal options that might even pay a small amount for scrap metal.  Prepare the Mower for Disposal Before doing anything else, get your mower ready. This step makes sure disposal goes smoothly and follows local requirements. Remove Fluids Gasoline and oil are hazardous. They can contaminate soil and water if dumped improperly. Always drain them into proper containers and take them to a household hazardous waste facility or a recycling center that accepts used oil and fuel. Many auto parts stores also accept used oil. proper waste handling and recycling practices help reduce landfill waste and protect the environment. Drain the gas tank first. If there’s just a little fuel left, you might run the engine until it’s empty. Then drain the engine oil into a sealed container. This step keeps hazardous waste out of landfills. Disconnect Batteries If you have a riding mower or an electric mower, remove the battery. Lead-acid and lithium batteries contain chemicals that need special recycling, so take them to a battery recycling center or auto parts store that collects them. Clean and Disassemble Take off any grass, dirt, or debris. Sometimes removing plastic parts, rubber tires, or fiberglass makes it easier to recycle the metal portions. This also makes transporting your mower safer and simpler.  Common Mistakes People Make Before we talk about solutions, let’s look at what NOT to do. Many people: Throw the mower in regular trash Forget to remove fuel or oil Leave it outside to rust Dump it illegally These mistakes can lead to: Environmental damage Safety risks Possible fines If you’ve been wondering how do I get rid of an old lawn mower, avoiding these mistakes is the first step. Why Lawn Mowers Are Hard to Dispose Of A lawn mower is not just one item. It’s made of different materials: Metal frame Plastic covers Engine components Fuel and oil Battery (in some models) Each part needs a different type of handling. That’s why disposing of lawn mower requires more effort than normal junk. To avoid the hassle and ensure everything is handled safely, it’s best to hire a well-reputed company that can manage the entire process properly. Disposal Methods for Broken Mowers If your mower won’t run anymore, you still have good options. Scrap Metal Recycling Scrap yards accept old mowers because they’re mostly steel and other valuable metals. After you’ve drained fluids and removed hazards, many scrap yards will take the mower and might even pay you based on metal weight. This is a practical answer to how to get rid of a lawn mower when it’s just scrap. Call ahead to check what they accept and whether they pay for certain metals. In many places, metal recycling helps reduce landfill waste and supports local recycling programs. In the scrap metal recycling section, you can add that if you are not sure where to take your mower, you can find local recycling centers near you that accept lawn equipment. Municipal Recycling Centers Many cities have recycling centers or bulk waste drop-off events where you can bring items like lawn mowers. These centers often accept large metal items and either recycle them or dispose of them responsibly. Always call first to confirm the center can take a mower. Junk Removal Services If transporting your mower is hard, professional junk removal companies can make the process simple. They pick up bulky items directly from your home, carefully handle hazardous materials such as fuel, oil, and batteries, and sort the mower for recycling, donation, or proper disposal. These companies ensure that all materials are processed safely and in accordance with local disposal regulations, reducing environmental impact and saving you time and effort. Landfill or Bulk Waste Pickup Some households end up taking the mower to a landfill after preparing it. Others schedule a waste pickup through their city’s waste services. Many municipalities require you to schedule this in advance and will not pick up items with fluids still inside.  Options for Working Mowers If your mower still works or can be easily fixed, you have more options that keep it useful instead of sending it to a landfill. Donate to Charity Many organizations take working lawn mowers. Charities, community gardens, or nonprofit organizations often need lawn care equipment. Before dropping it off, make sure it’s clean and operational. Donation gives your mower a second life and helps someone else, which is one of the most responsible ways to handle old lawn mower disposal. Sell or Give Away Platforms like online marketplaces or local community boards can connect you with buyers or people who want it for parts or repair. Many people also post free items

How to Dispose of a Water Heater Safely and Legally

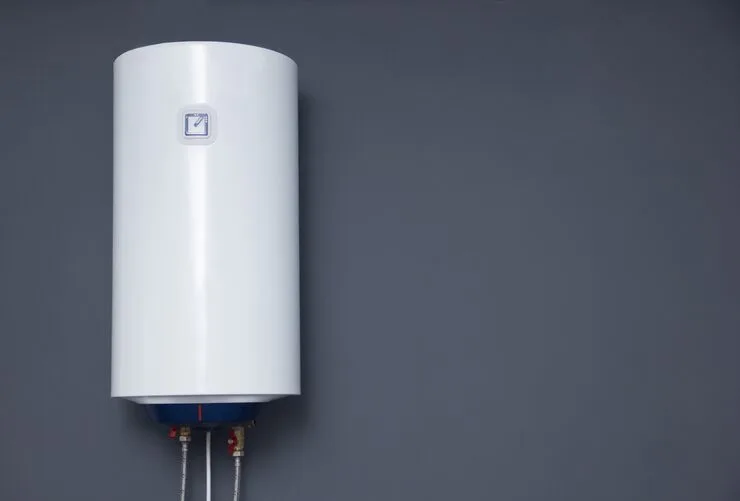
Replacing a water heater is a common home improvement project, but many homeowners are left wondering what to do with the old unit afterward. Water heaters are large, heavy appliances made from metal, insulation, and other materials that should not simply be thrown away. Proper disposal helps protect the environment, complies with local regulations, and may even put some money back in your pocket through recycling. Whether your water heater has stopped working or you’re upgrading to a more energy-efficient model, this guide explains how to dispose of an old water heater safely and responsibly. Quick Answer: Best Water Heater Disposal Methods The fastest way to handle an old water heater depends on your situation: Free removal: Most major retailers take your old unit when delivering a new one Earn money: Scrap metal recycling centers pay $7-$30 based on weight and metal content Most convenient: Professional junk removal services handle everything for $75-$150 Municipal option: Schedule bulk waste pickup with your local waste management (costs vary by city) Still functional: Donate to Habitat for Humanity or similar organizations The worst choice? Toss it on the curb with your regular trash. That’s illegal in most areas and could land you a fine. Can You Throw Away a Heater? No, you can’t simply toss a water heater in your regular garbage. Here’s why this matters: Most cities and counties ban water heaters from standard trash collection. According to recycling centers, water heaters may contain hazardous materials like asbestos insulation and mercury in older pilot sensors. Beyond safety concerns, these units take up massive space in landfills when 90% of their materials could be recycled. The steel tank alone can be melted down and reused. Copper wiring, brass fittings, and aluminum components all have value in the recycling market. Throwing away a water heater wastes these resources and violates environmental regulations in many states. Some areas allow water heaters in bulk waste programs, but you’ll need advance approval. Others require professional disposal through licensed contractors. Check your local waste management website or call their customer service line before doing anything else. 7 Best Ways to Dispose of an Old Water Heater 1. Retailer Haul-Away Programs When you buy a new water heater from major home improvement stores, they typically remove your old one at no extra charge. This option saves you time, effort, and potential injuries from moving a 150-pound tank. Most retailers take water heaters and ensure they’re recycled or disposed of responsibly. The delivery team disconnects your old unit, drains it if needed, and loads it onto their truck. You don’t touch it once. Home Depot, Lowe’s, and local plumbing supply companies offer this service. Some require you to request haul-away during purchase, while others include it automatically. Ask at checkout to confirm the details. The catch? You need to buy a replacement unit. If you’re switching to tankless or moving to a place with an existing heater, this option won’t work. 2. Scrap Metal Recycling Centers Your old water heater contains valuable metals that recycling centers will actually pay you for. Steel makes up the bulk of the tank, while copper wiring and brass valves add extra value. Most scrap yards accept water heaters after you drain them completely. Many recycling centers take water heaters for metal recovery, with scrap yards paying between $7-$30 depending on weight and metal content. The exact amount depends on current scrap metal prices, your tank’s size, and how much non-metal material you remove beforehand. Call ahead to confirm your local recycler’s requirements. Some want gas lines disconnected and plastic components removed. Others take units as-is but pay less per pound. 3. Professional Junk Removal Services Companies like Junk Masterz remove water heaters, appliances, and bulky items from wherever they’re located. They do all the heavy lifting, loading, and disposal while you watch from your couch. Professional removal costs $75-$150, depending on your location and the company you choose. They handle everything: disconnecting lines (if still attached), carrying the unit upstairs or from the basement, loading it into their truck, and disposing of it properly. This option makes sense when you lack the physical ability to move a heavy tank, don’t have truck access, or simply value your time and back health. Book online or call for a quote. Most services offer same-day or next-day appointments and honor the price they quote after seeing the item. 4. Municipal Bulk Waste Pickup Many cities and counties offer bulk waste collection as part of regular trash service or for a small fee. This option works well if you’re not in a hurry. Some cities offer scheduled bulk waste collection services where you can place your water heater at the curb during your pickup week. Requirements vary wildly by location. Some municipalities provide monthly bulk pickup days, others require advance scheduling, and a few charge $25-$50 per item. Call your waste management provider to learn their rules. They’ll tell you when to put the unit out, where to place it (curb or alley), and what preparation they require. Most want the tank drained and gas lines disconnected. The downside? You might wait days or weeks for pickup, and the heavy tank sits in your yard until then. Plus, you’re responsible for getting it to the curb. 5. Utility Company Rebate Programs Some electric and gas companies offer incentives when you upgrade to energy-efficient water heaters. These programs sometimes include free removal of your old unit as part of the deal. Check your utility provider’s website under “rebates” or “efficiency programs.” The best incentives combine cash rebates ($50-$300) with free professional installation and old unit removal. This varies significantly by state and utility company. Even if your provider doesn’t offer removal, the rebate money can offset disposal costs elsewhere. It’s worth a 5-minute phone call to find out. 6. Donation to Charity If your water heater still works and you’re simply upgrading, consider donating it. Habitat for Humanity ReStores accept functioning units in good condition (usually less than

How to Dispose of Small Appliances (Without Harming the Planet)

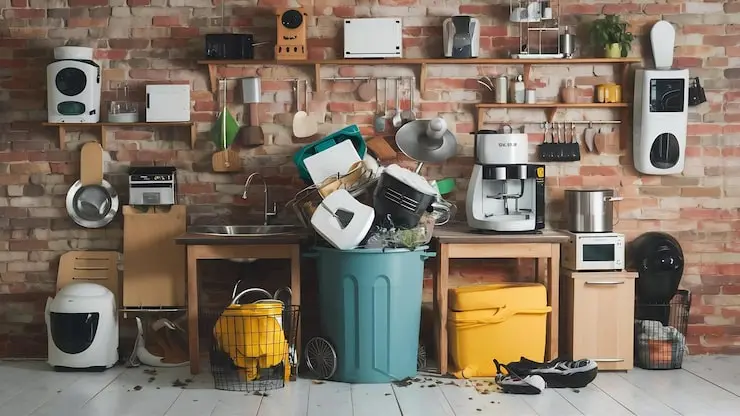
Every kitchen has a graveyard of dead toasters, a blender with a cracked base, and a coffee maker that stopped working sometime last winter. You know you should deal with it, but tossing it in the regular trash feels wrong, and you’re not sure what else to do. You’re not alone in this. Small appliances are one of the fastest-growing categories of household waste, and most people genuinely don’t know the rules. The good news: figuring out how to dispose of small appliances properly is easier than it looks once you know your options. This guide walks you through exactly how to dispose of Small Appliances, what to do whether the appliance still works, is broken beyond repair, or contains materials that need special handling. We’ll also cover how to get rid of small kitchen appliances responsibly, so you’re not contributing to the growing e-waste problem. Understanding Why Appliance Disposal Rules Exist It might seem like overkill to have rules around tossing a toaster, but there’s a real reason behind it. Small appliances often contain materials like lead, mercury, cadmium, and lithium, all of which can leach into soil and groundwater if buried in a landfill. Regulations like the WEEE Directive in the European Union and various U.S. state e-waste laws exist specifically to keep these materials out of regular waste streams. Manufacturers are increasingly required to offer take-back programs as part of “extended producer responsibility” laws, which is part of why so many retailers now accept old electronics. Knowing this context isn’t just trivia; it explains why some appliances need special handling, and others don’t, which makes the rest of this guide much easier to follow What Counts as Small Appliances? Small appliances are basically any plug-in gadgets that help you around the house. If it’s electrical, portable, and you can carry it yourself, it probably counts. Kitchen appliances include:   Toasters and toaster ovens Blenders and food processors Coffee makers and electric kettles Mixers (both hand and stand models) Air fryers and slow cookers Microwaves (the smaller ones) Rice cookers and electric grills Personal care items like:   Hair dryers and straighteners Curling irons Electric toothbrushes Electric razors and trimmers Around-the-house helpers such as: Vacuum cleaners (especially the smaller ones) Space heaters and fans Humidifiers and dehumidifiers Irons and garment steamers Electric alarm clocks Desk lamps Most of these contain recyclable materials like copper, aluminum, and steel. Some also have batteries or small electronic components that need special handling. Knowing what you have helps you figure out where to take it. How To Dispose Of Small Appliances: Eco-Friendly Ways If you want to protect the environment, these are the best options: 1. Recycling Centers Recycling is one of the safest ways to handle old appliances. You can use tools like Earth911 to find nearby recycling facilities. Recycling helps recover: Metal Plastic Electronic components 2. Donate Working Appliances If your appliance still works, consider donating it. Organizations like Goodwill Industries accept small household items. This helps: Families in need Reduce waste Extend product life 3. Retailer Recycling Programs Some stores accept old appliances. Retailers like Best Buy offer take-back programs for certain items. Always check what items they accept before visiting. 4. Junk Removal Services If you have multiple items, junk removal services can help. They: Pick up appliances from your home Sort items for recycling or disposal Save you time and effort This is the easiest option for busy homeowners. Always hire a certified junk removal company for disposing of appliances. Can You Put Small Appliances in the Trash? Short answer: Sometimes, but not always, and it depends on your city’s rules and what’s inside the appliance. Basic items like an old hand mixer with no battery or refrigerant may be accepted in regular trash in some areas. But many small appliances contain circuit boards, batteries, or coolant that count as electronic waste (e-waste), which is banned from landfills in a growing number of states and countries. The safest move is to check your city or county’s waste management website before assuming it’s trash-safe. Rules vary a lot by location, and getting it wrong can mean fines in some municipalities. Where Do You Get Rid of Kitchen Appliances? This is one of the most common questions people search, and the answer depends on the appliance’s condition: Municipal recycling centers — Most accept small electronics, though rules vary by material and size. Retailer take-back programs — Best Buy, in particular, has a well-known electronics recycling program that accepts many small appliances for free or a small fee. Certified e-waste recyclers — Look for facilities certified R2 or e-Stewards. These certifications mean the recycler follows responsible, environmentally sound practices rather than exporting waste illegally. Scrap metal yards — For larger small appliances (think stand mixers or bread machines), scrap yards will sometimes take them for the metal content. A quick search for “e-waste recycling near me” plus your ZIP code is usually the fastest way to find the closest verified option. What NOT to Do: Common Disposal Mistakes A few things to avoid, no matter how tempting the shortcut feels: Mistake Why It’s a Problem Burning an appliance Releases toxic fumes from plastics and coatings Removing batteries yourself Lithium batteries can spark or ignite if damaged Assuming curbside recycling takes electronics Most curbside programs are for paper, glass, and plastic only, not e-waste Dumping in regular trash without checking May be illegal in your area and harmful to the environment When in doubt, a five-minute call to your local waste management office will save you a headache later. How to Dispose of Small Household Appliances Sustainably Beyond simply getting rid of an old appliance, it’s important to think about how it’s being disposed of. Electronic waste is one of the fastest-growing waste streams in the world, and many small appliances still end up in landfills instead of being recycled properly. It’s also important to learn how to get rid of old appliances the right way. Whether you’re replacing a

How Much Does Shed Removal Cost? Prices and Tips Explained

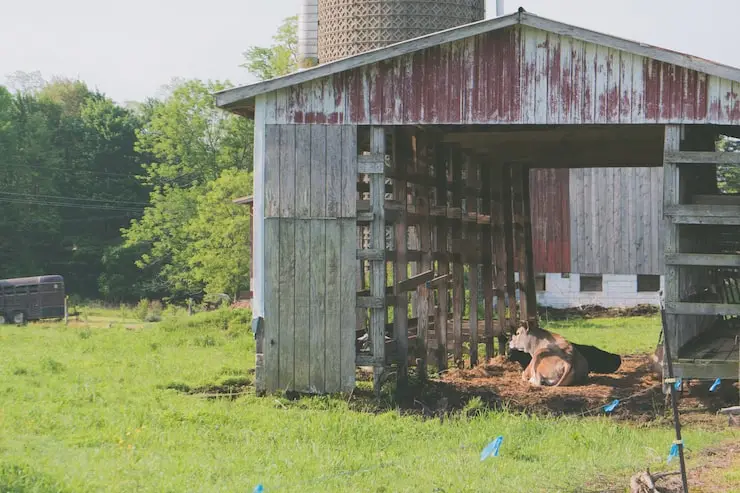
An old or damaged shed can take up valuable space in your backyard, become a safety hazard, and reduce your property’s curb appeal. Whether you’re replacing an aging storage shed, preparing your yard for landscaping, or simply clearing unwanted structures, understanding the shed removal cost is an important first step before starting the project. In the United States, the average shed removal cost ranges from $300 to $2,500, depending on the shed’s size, material, location, accessibility, and whether it sits on a concrete foundation. Smaller metal or plastic sheds usually cost much less to remove than large wooden structures with electrical wiring or concrete slabs. This guide explains everything homeowners need to know about shed demolition and removal, including average pricing, labor costs, disposal fees, factors that affect the final bill, and ways to save money. By the end, you’ll have a realistic estimate for your project and know when hiring a professional is worth the investment. Average Shed Removal Cost If you’re wondering how much does it cost to remove a shed, the answer depends on several factors. Most professional junk removal and demolition companies charge based on the amount of labor, debris volume, and disposal requirements. Shed Size Estimated Removal Cost Small (6×8 ft.) $250–$500 Medium (8×10 ft.) $400–$800 Large (10×12 ft.) $700–$1,200 Extra Large (12×16 ft. or larger) $1,000–$1,500+ These estimates generally include: Labor Demolition Loading debris Hauling Disposal Basic site cleanup If the shed has electricity, plumbing, or a concrete slab, additional charges may apply. What Affects Shed Removal Cost? The cost of removing a shed is not fixed; it depends on several practical and measurable factors. Understanding these factors can help homeowners make informed decisions and plan budgets accurately. 1. Size of the Shed The physical dimensions of a shed are one of the most significant determinants of cost. A small garden shed (around 50–100 square feet) can often be removed quickly with minimal labor, whereas a larger storage shed (200 square feet or more) requires more time, equipment, and manpower. Small sheds: Typically involve simple demolition, minimal hauling, and fewer disposal trips, reducing labor and transportation costs. Large sheds: May require heavy-duty tools, extra workers, or even a small crane if it’s elevated, which adds to the overall expense. Credible insight: Contractors often base their quotes on labor hours multiplied by team size and equipment usage, making shed size a direct cost driver. 2. Type of Materials The materials used to build the shed affect both demolition difficulty and disposal requirements: Wooden sheds: Generally easier to dismantle manually. Wooden panels can be broken down, stacked, or even recycled into mulch or firewood, which can offset disposal costs. Metal sheds: Heavier and harder to dismantle. Metal often requires specialized tools and must be transported to a recycling facility rather than a standard landfill, which increases fees. Composite or plastic sheds: Lightweight but can be awkward to handle and may need specific recycling methods. Credible insight: Disposal facilities may charge different fees depending on whether materials are considered wood, metal, or mixed debris, making the material type a key variable. 3. Accessibility How easily a shed can be reached significantly impacts the labor involved: Easy access: Sheds located near driveways or open yards allow workers to bring in tools, trucks, and dumpsters without obstruction. This lowers the cost and time required. Difficult access: If the shed is in a fenced backyard, up a slope, or behind landscaping, workers may need to navigate tight spaces, remove obstacles, or carry debris manually. Credible insight: Contractors often charge an accessibility fee because extra labor and time are required, and certain equipment like wheelbarrows or mini-cranes may be needed to transport materials safely. 4. Condition of the Shed The structural integrity and overall condition of a shed can affect removal complexity: Stable sheds: Can be disassembled efficiently. Panels can be removed systematically, reducing the chance of injury or accidental damage. Decaying or damaged sheds: Rotten wood, rusted metal, or warped components may collapse unexpectedly during removal, requiring additional precautions, labor, and safety measures. Credible insight: Removing a deteriorated shed safely may involve protective gear, bracing, or controlled demolition techniques, all of which increase costs. 5. Disposal Methods Finally, how the debris is disposed of is a major cost factor: Landfill: Directly hauling debris to a landfill incurs tipping fees, which vary by facility and material type. Recycling: Diverting materials to recycling centers may reduce environmental impact but can involve more sorting, transportation, and handling. Donation or resale: Sheds that are still structurally sound can be donated to charities or sold for parts, potentially offsetting some of the removal cost. Credible insight: Environmental considerations and local regulations can influence disposal fees. For example, some municipalities charge extra for treated wood, hazardous materials, or mixed debris, which contractors factor into their pricing. DIY Shed Removal vs Hiring a Pro If you’re wondering whether to do it yourself or book a shed removal service, here’s how the numbers and effort usually compare. DIY Shed Removal Doing it yourself can save money, especially on smaller sheds. Typical DIY costs include: Tool purchases or rentals: $200–$500 Dump trailer or dumpster rental: $300–$600 Permit fees (if required): $100–$500 Your time and effort: priceless (well, valuable) If your shed is a small wooden structure and you’re comfortable using tools, DIY can often save hundreds. Just make sure you’re equipped and able to dispose of the materials properly. Professional Old Shed Removal Service Pros handle everything: Demo and dismantle Haul debris Handle disposal Take care of permits (sometimes) Expect professionals to charge $50 to $100 per hour per worker, or base pricing tied to shed size.  Pros make sense when: The shed is large There’s a concrete base Limited yard access Hazardous materials need careful handling For situation like that, professionals actually save you time and potential injury risks. Hidden Costs People Don’t Expect It’s easy to look at a basic estimate and think that’s all you’ll pay. But here are common extra charges people often overlook:

Color Palette