Archive for David Harlan

How to Clean Out a House Full of Junk Step by Step

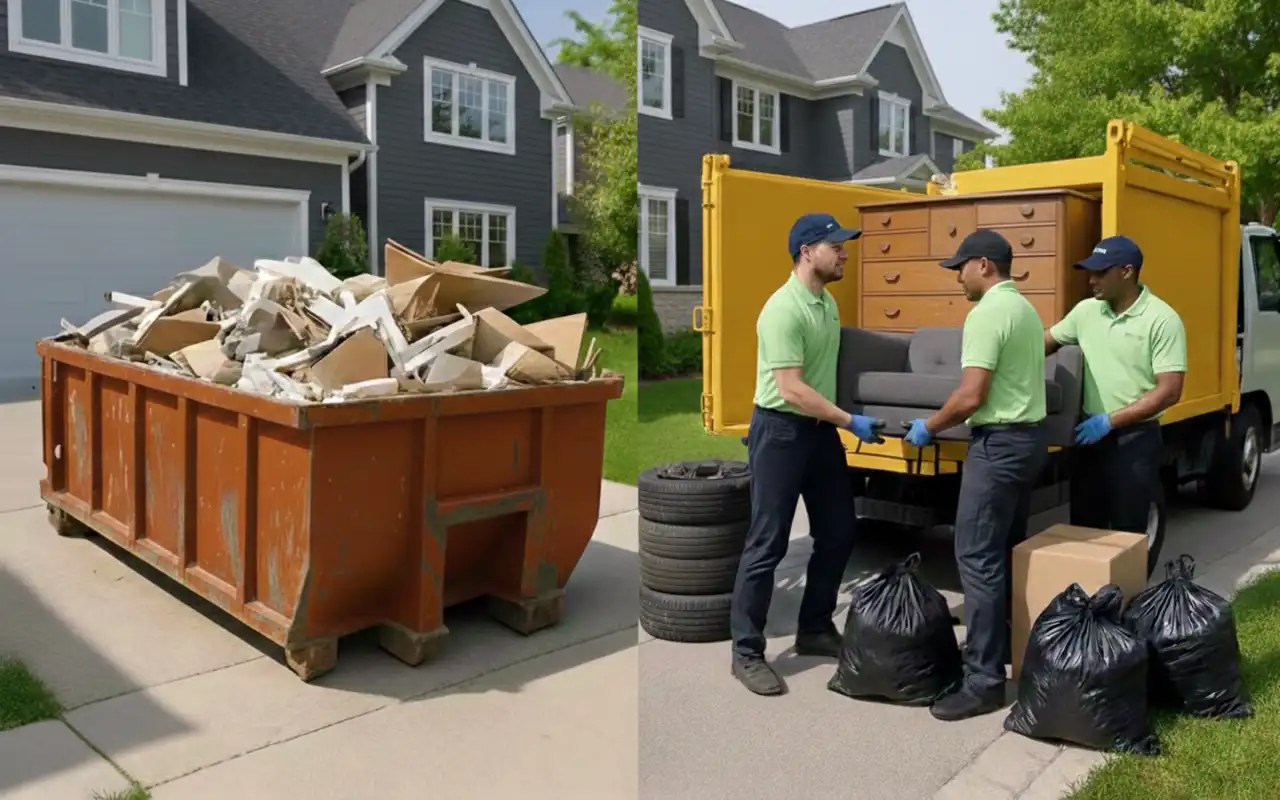
Cleaning out a house full of junk can feel heavy, stressful, and confusing, especially if clutter has built up for years. Many people face this task when moving, selling a home, handling an estate, or dealing with a major life change. Knowing where to start and how to move fast without making mistakes matters. This guide explains how to clean out a house full of junk in a clear and simple way. You will learn how to plan the work, remove trash, sort items, and handle bulky junk without wasting time or money. We also explain when help from companies that clean out houses makes sense. The goal is to help you finish the job with less stress and better results, while staying focused on what search engines and real people value today. What Does “Clean Out a House Full of Junk” Really Mean? When people talk about cleaning out a house full of junk, they are usually talking about a “whole-house” project. This is not just dusting shelves or sweeping the floor. It means going through every room, closet, and drawer to decide what stays and what goes. Sometimes, this happens because of a house cleanout sign from a landlord or a need to sell a property quickly. For some, it means clearing out a “hoarder” house where items have piled up to the ceiling. For others, it might be an estate cleanout after a loved one passes away. The goal is the same: to get the house back to a “blank slate” where you can see the floors and walls again. It involves physical work, like removing bulky household junk like old sofas or broken fridges. It also involves mental work, like deciding which old photos to keep and which broken toys to toss. How to Start: Planning Your Cleanout Before you pick up a single trash bag, you need a plan. If you just start grabbing things, you will get tired fast. To reach that top level of cleaning efficiency in your home, you must be organized. You cannot just run into a room and start throwing things. You will run out of energy before the first room is even half-done. 1. Set a Deadline If you don’t have a date in mind, the job might take months. Give yourself a weekend or a full week depending on the size of the house. If the house is very big, maybe take one room per day. A deadline keeps you moving when you want to stop. 2. Gather Supplies You will need heavy-duty trash bags. Do not buy the cheap ones, as they will rip and make a bigger mess. You also need sturdy boxes, thick markers, and strong tape. Gloves are a must-have to protect your hands from sharp edges or dirt. You might even want a few plastic bins for things you want to keep forever. 3. Find Help Don’t do this alone. It is too much for one person. Ask friends or look for companies that clean out houses. Professional teams like Junk Masterz have the tools to do the heavy lifting for you. Having a team makes the time go by faster and keeps you from getting hurt. 4. Think About Safety If a house has been full of junk for a long time, there might be dust or mold. Wear a mask so you don’t breathe in bad air. Wear boots to protect your feet. If you find old paint cans or chemicals, set them aside. You cannot just throw those in the regular trash. Step 1: Initial Trash Removal The fastest way to clean the house is to get rid of the obvious garbage first. This is what we call the “trash sweep.” Do not look at old mail, books, or photos yet. If you start reading old papers, you will stop working. Just look for things that are 100% garbage. This includes: Kitchen Waste: Old food boxes, expired cans, and empty jars. Paper Scraps: Junk mail, old flyers, and shredded paper. Damaged Items: Anything that is broken beyond repair, like a chair with three legs or a shattered vase. Actual Trash: Tissues, old wrappers, and bits of plastic. Walk through every room with a giant black trash bag. If it is dirty or broken, bag it. This “first pass” makes a huge difference. When the floor is clear of actual trash, you can see the items that actually need your attention. It creates a path for you to move around. You will feel better when you see five or ten bags of trash sitting on the curb. It shows that you are making progress. During this stage, don’t overthink. If you have to ask “Is this trash?” for more than three seconds, put it in a “maybe” pile and move on. The goal here is speed. This phase is about high-volume removal. If you have a huge amount of debris, look for removing bulky household junk services early so you don’t have piles of bags blocking your hallways. Sometimes people see a house cleanout sign and panic, but this first step of bagging the trash helps calm the mind. Step 2: Sorting Items (Keep, Donate, Sell, Recycle) Now that the trash is gone, you are left with things that might still have value. This is where most people get stuck. You need a system for sorting items: keep, donate, recycle. The best way to do this is to set up four stations in a large room, the garage, or even the driveway if the weather is nice. The “Keep” Station These are things you use every day or things that are very special to you. Be careful here. If you keep everything, the house will stay full of junk. Ask yourself: “Have I used this in the last year?” If the answer is no, you probably don’t need it. Put the “Keep” items in clear bins and move them to a safe spot. The “Donate” Station Many things are still

How to Clean Out a Storage Unit: Step-by-Step Guide

Cleaning out a storage unit can feel stressful, especially if it has been packed for months or years. Boxes pile up, items lose value, and costs keep adding up. Knowing how to clean out a storage unit the right way saves time, money, and effort. A good plan helps you stay safe, make smart choices, and avoid feeling stuck halfway through the job. This guide explains the full storage unit clean out process in simple steps. You will learn how to prepare, sort items, clean safely, and handle junk the right way. Whether you are decluttering for good or just organizing, this approach works for small units and large ones. The goal is to leave the unit clean, empty, and stress-free while making smart decisions about what stays and what goes. What You Need Before You Start Success starts with a solid plan and schedule. You cannot simply show up at the facility and hope for the best. Most people underestimate how much stuff they have. A small 5×5 unit can take three hours, while a large 10×20 unit might take two full days. Mark a weekend on your calendar. Check the weather to make sure it is not too hot or rainy, as you will be moving items outside to sort them. Your Safety First A storage facility can be a dirty place. Dust, bugs, and even mold can hide in old boxes. You need protective gear (gloves, mask). Thick work gloves protect your hands from sharp edges or rusty metal. A high-quality mask keeps you from breathing in old dust. This is the only way to ensure a safe clean self storage experience. The Tool Kit You need a specific cleaning supplies checklist to get your deposit back. Most rental contracts say you must leave the unit broom clean. A sturdy broom and dustpan: To get every bit of dirt off the concrete. Heavy-duty trash bags: Standard kitchen bags will rip. Buy the thick black contractor bags. Cleaning spray and rags: To wipe down the walls or any shelving you own. Packing supplies: Bring extra tape and markers. You might find boxes that are falling apart and need to be fixed before you transport belongings. Flashlight or headlamp: Many units have one dim bulb or no light at all. You need to see into the dark corners to make sure you didn’t leave anything behind. Moving and Hauling Think about how you will move the items. Do you have a van or a moving truck? If you are taking items to recycling centers or the dump, a small car will not be enough. You might also want to look into storage unit cleanout services if you have items that are too heavy for one person to lift. Companies like Junk Masterz specialize in this type of work. They know how to handle junk removal from storage unit spaces, so you don’t have to deal with the physical pain. Step-by-Step Process Following a set order helps you stay focused. If you just grab random boxes, you will get tired fast. Use these steps to keep moving forward without getting overwhelmed. Step 1: Take Inventory (Why it helps plan time) First, go to the unit and do an inventory of storage contents. Do not move anything yet. Just open the door and look at what you have. This is a very important part of the storage unit cleanout process. Write down a list of big items like furniture, appliances, or large plastic bins. This inventory helps you plan your time because you will see exactly how much work is waiting for you. If you see ten big boxes, you know you need at least two hours. If the unit is packed to the ceiling, you know you need a team. Taking photos of the unit is also a good idea. You can look at the photos later when you are at home to decide what might fit in your garage or spare room. Knowing what you have stops you from feeling surprised halfway through the day. Step 2: Set a Schedule Once you know what is inside, set a timeline. A small 5×5 unit can usually be done in three hours if you move fast. A 10×20 unit might take two full days of work. Pick a weekend with good weather. You want to avoid rain because you will likely be putting items on the ground outside the unit while you sort through them. Break your day into chunks. Work for two hours, then take a fifteen-minute break. This keeps your energy up. Tell the storage office when you plan to be done. This keeps you moving. If you tell them you will be out by Sunday, you are more likely to finish the job. If you find the job is too big as you get started, you can always look into storage unit cleanout services to help you finish on time. Step 3: Sort Items This is where the real work happens. You need to sort items into groups. The best way to do this is the Four-Box Method. This method keeps you from getting confused about where things go. The Four-Box Method Explained: Keep: These are the items you truly love and will use at home. Sell/Donate: These are good items that are still in working order but you no longer want. Recycle: This is for old papers, magazines, plastics, and metals that can be processed at recycling centers. Toss: This is for true junk. If it is broken, stained, moldy, or missing pieces, put it in the heavy-duty trash bags. The Sorting Setup: Imagine your unit door is the start line. Clear a space on the ground outside. Label four areas with your tape and markers. As you pull a box out, put it in one of those four areas right away. Do not let “maybe” piles happen. A “maybe” pile just means you have to do the work twice. Be firm with yourself. Step 4:

Box Truck Weight Capacity: How Much Can You Legally Haul?

Box trucks are widely used in logistics, moving services, and commercial transportation. However, many drivers and business owners overlook one critical factor box truck weight limits. Understanding how much a box truck can safely carry is not just about efficiency, but also about safety, legal compliance, and long-term vehicle performance. In this guide, we will break down everything from box truck GVWR (Gross Vehicle Weight Rating) to box truck weight capacity, helping you make informed decisions whether you are a fleet operator or an independent driver 2. What Is a Box Truck? (Basic Overview for Beginners) A box truck is a medium-duty vehicle with a separate cargo area shaped like a box. It is commonly used for: Local deliveries Moving furniture Commercial freight transport E-commerce logistics Key Characteristics Enclosed cargo area Fixed rectangular storage space Available in multiple sizes (10ft to 26ft commonly) Understanding the structure is important because the weight of a box truck varies based on size, material, and configuration. Box Truck Weight Limits and GVWR GVWR stands for Gross Vehicle Weight Rating, and it’s the most important number you need to know about your box truck. This rating tells you the maximum total weight your truck can safely handle when it’s fully loaded. The GVWR includes everything: the truck itself, the driver, passengers, fuel, and all the cargo you’re hauling. Every box truck has a GVWR assigned by the manufacturer based on the vehicle’s design, frame strength, suspension system, and braking capacity. You’ll find this number on a sticker inside the driver’s side door frame or in your owner’s manual. This isn’t a suggestion—it’s a hard limit set for safety. Here’s how GVWR works in practice. If your box truck has a GVWR of 14,000 pounds and the empty truck weighs 8,000 pounds, you can only load 6,000 pounds of cargo. That 6,000 pounds includes everything you put in the truck bed, plus the weight of fuel, the driver, and any passengers. Go over that limit, and you’re breaking the law and risking serious safety issues. Understanding your GVWR helps you plan jobs better. When you know exactly how much weight your truck can handle, you can avoid overloading and make smarter decisions about what equipment or materials to bring on each trip. The curb weight (empty weight) of your truck is subtracted from the GVWR to give you your actual payload capacity. The difference between GVWR and actual payload capacity confuses many people. Your payload is what you can actually haul after accounting for the truck’s own weight. A 26,000-pound GVWR doesn’t mean you can load 26,000 pounds of junk or furniture. If the truck weighs 14,000 pounds empty, you only have 12,000 pounds available for cargo. Why GVWR Matters for Your Safety Exceeding your GVWR creates multiple dangers. Your brakes take much longer to stop the vehicle. The tires can overheat and blow out, especially on highways or in summer heat. Your suspension system gets damaged faster, leading to expensive repairs. Steering becomes harder, and the truck doesn’t handle turns or lane changes well. Insurance companies won’t cover accidents that happen when you’re overweight. If you crash while hauling more than your GVWR allows, you’re personally responsible for all damages. Police can impound your truck at the scene, and you’ll face fines that start at several hundred dollars and go up from there. Box Truck Weight Classifications Box trucks fall into different weight classes based on their GVWR. The U.S. Department of Transportation uses these classifications to set regulations and requirements. Knowing which class your truck falls into helps you understand what rules apply to you. Light-Duty Box Trucks (Class 1-3) These are the smaller trucks you see for local deliveries. They drive a lot like a big SUV or a pickup truck. Class 1: These are very small, usually under 6,000 pounds. Most box trucks start higher than this. Class 2: These weigh between 6,001 and 10,000 pounds. Many “step vans” or small delivery trucks are in this group. Class 3: This is a very common group. These weigh between 10,001 and 14,000 pounds. These are often called light-duty box trucks. They are great for small jobs because they can fit into tight driveways. Medium-Duty Box Trucks (Class 4-6) This is where most box trucks live. If you rent a truck to move your house, it will likely be in this group. Class 4: 14,001 to 16,000 pounds. These are getting bigger and often have dual rear wheels to help hold the weight. Class 5: 16,001 to 19,500 pounds. Class 6: 19,501 to 26,000 pounds. This is a huge category. Most 26-foot trucks are built to be right at 26,000 pounds. This is because of a special rule about licenses that we will talk about later. Heavy-Duty Box Trucks (Class 7-8) These are the giants of the box truck world. Class 7: 26,001 to 33,000 pounds. These trucks are very big and very strong. Class 8: Anything over 33,001 pounds. While most Class 8 trucks are semis, some very large straight trucks (trucks where the box and engine are on one frame) fall here. When you look for the weight limit for box truck use, you must know your class. It tells you if you have to stop at scales or if you need special insurance. It also changes how much you pay for tags and plates. Different Types of Box Trucks, Weight Limits, and Sizes The size of the box on the back usually tells you how much it can carry, but not always. You have to look at the box truck sizes and the frame separately. A long truck doesn’t always carry more weight than a short one; it might just have more room for light things like pillows. 10 Foot Box Truck This is the smallest size. It is great for a studio apartment or a small office move. It is often built on a van frame. Average GVWR: Around 8,600 to 10,000 lbs. Cargo capacity: About 2,000 to 3,000

How Much Does an Estate Cleanout Cost in 2026?

Clearing out a loved one’s home is never just a hauling job. It’s boxes that haven’t been opened in twenty years, furniture nobody has the heart to throw out, and a closing date that doesn’t care how anyone feels. If you’re trying to figure out how much an estate cleanout costs, you’re probably standing in the middle of exactly that situation right now. At Junk Masterz, we’ve walked into more of these homes than we can count across Fresno and the Central Valley, and pricing depends on far more than square footage alone. Most estate cleanouts fall between $900 and $6,000, though small apartments can start around $600 and large or heavily cluttered properties can run past $8,000. The exact number comes down to how much is inside the home, how it needs to be handled, and how fast it all has to go. Key Takeaways Estate cleanout cost typically lands between $900 and $6,000 for most homes. Labor hours and disposal volume drive the price more than square footage does. Hidden charges like stair fees and long carry fees can add hundreds of dollars if not discussed upfront. Selling or donating usable items can lower the final invoice, and some donations may qualify for a tax deduction. Hoarding, biohazards, or structural damage raise estate cleanout services cost significantly. What Is an Estate Cleanout and Who Needs One? An estate cleanout is the full removal of belongings from a property, usually triggered by a death in the family, a move into assisted living, or a foreclosure. It’s different from a standard junk pickup, where someone points at a pile, and a crew loads it up. An estate cleanout means going through an entire household, room by room, including closets, garages, attics, and every corner where things have quietly accumulated over the decades. People usually need this service while managing probate for a parent, preparing an inherited property for sale, or downsizing a family member into a smaller living situation. Real estate agents also request cleanouts often, since a fully emptied home shows better and gets listings ready for market faster. Average Estate Cleanout Cost Property Type Average Cost Why Studio or 1-Bedroom $600 to $1,300 Fewer rooms, usually one truckload 2-Bedroom Home $900 to $2,200 Moderate furniture and garage items 3-Bedroom Home $1,500 to $3,800 Multiple rooms plus garage or attic 4 to 5 Bedroom Home $2,800 to $5,800 Larger volume, multiple truckloads Hoarder Estate $4,000 to $10,000+ Extreme item density, extra labor hours Luxury Estate $5,500 to $12,000+ Specialty items, careful handling These ranges reflect labor, hauling, and standard disposal. Specialty work like biohazard cleanup or document shredding is usually quoted as its own line item once a crew has seen the property. The Truckload Formula: How Your Final Price Gets Calculated Here’s something most pricing guides skip. When a company builds your quote, they aren’t just eyeballing your square footage. In practice, nearly every estimate comes down to three parts added together, and understanding this formula helps you double-check any quote you receive. Truckloads x hauling rate. A typical estate cleanout fills one to four full truckloads. Each load carries its own hauling and disposal cost, usually between $300 and $600 depending on what’s in it. Labor hours x crew size x hourly rate. A two-person crew clearing a tidy two-bedroom apartment might finish in four hours. A four-person crew tackling a packed five-bedroom house with a finished basement could need two full days. Multiply the hours by the number of workers, and you get the labor portion of the bill. Specialty surcharges. Anything outside a normal household load- think pianos, gun safes, hazardous chemicals, or biohazard situations- gets added on top as a flat fee. Once you understand this breakdown, a $2,900 invoice stops looking arbitrary. It’s the sum of what actually left the house, how many hands it took to move it, and anything unusual the crew dealt with. Any estate cleanout company worth hiring should be able to walk you through this math, not just hand you a flat number. What Factors Affect Estate Cleanout Cost? Property Size A one-bedroom condo might clear out in half a day with a single truckload. A five-bedroom home with a finished basement can take three or four trips, multiplying both labor hours and disposal fees. Volume and Content Density This is where a lot of families get surprised. Two homes with identical square footage can have wildly different price tags depending on what’s actually inside them. A property lived in for forty years almost always holds far more furniture and stored belongings than one occupied for five, even if the two houses look the same size on paper. A heavily packed one-bedroom apartment can sometimes cost more to clear than a lightly furnished four-bedroom house, because density, not floor plan, drives labor hours. Labor Requirements Heavy or awkward items such as pianos, gun safes, and pool tables need extra crew members and sometimes specialized equipment. A light cleanout might only need two people, while a packed garage could call for four workers or more. Accessibility Stairs, narrow hallways, and limited truck parking slow down every part of the job. A ground-floor home with a driveway clears out faster and cheaper than a third-floor walk-up apartment where every item has to be carried down manually. Disposal and Recycling Fees Landfill tipping fees vary by region and material type. Electronics, appliances containing refrigerant, and mattresses often carry their own separate disposal charges on top of standard rates. Timing and Urgency Same week or weekend requests typically carry a rush fee. Booking a few weeks ahead usually secures better pricing and wider crew availability. Junk Masterz also handles Commercial Junk Removal Fresno CA for property managers and executors dealing with multi-unit estates or rental turnovers, where several units need to be cleared on the same timeline. Specialty Item Cost Guide Certain items come with their own surcharges regardless of job size: Item Typical Additional Cost Piano $300 to $600 Hot

How to Dispose of Drywall

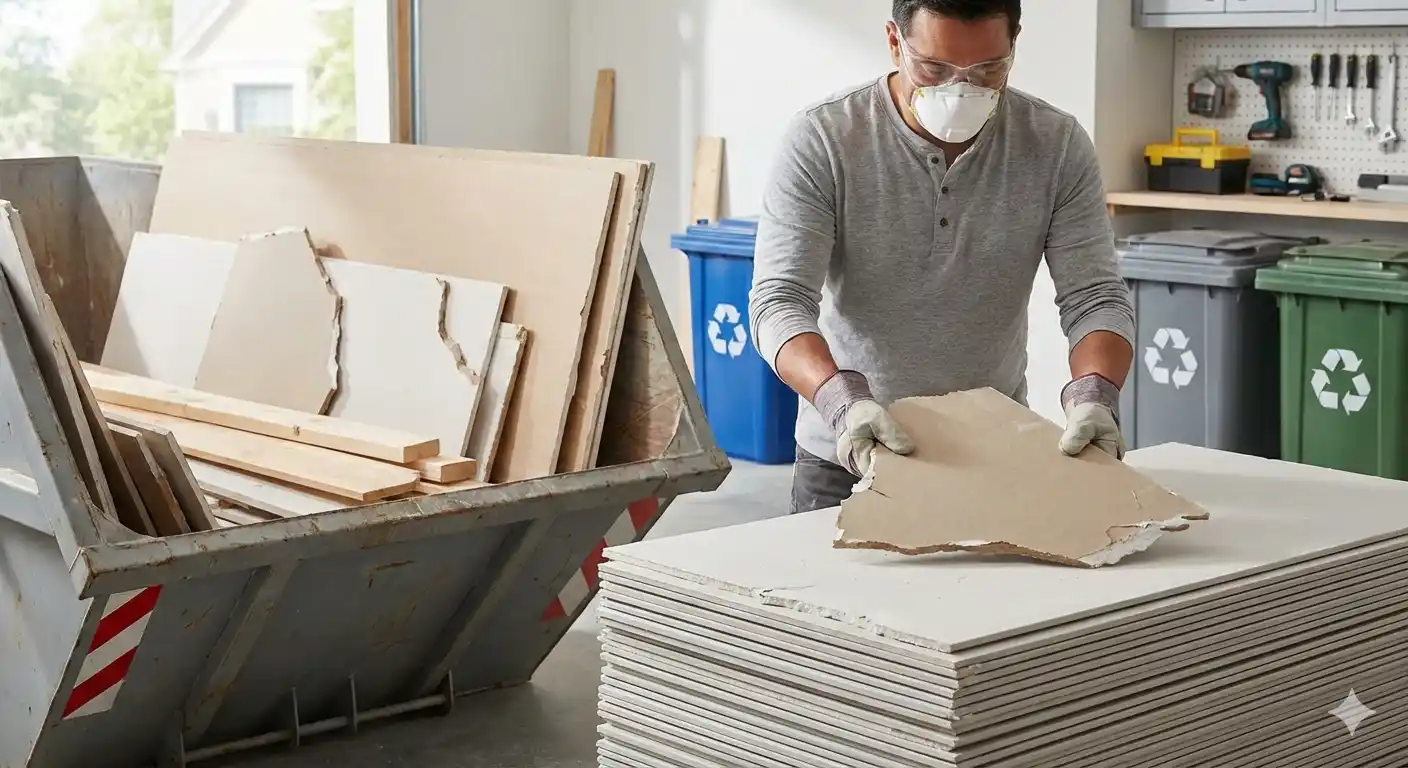
Drywall is one of the most common building materials used in homes, offices, and commercial buildings. Whether you’re remodeling a room, removing damaged walls, or completing a demolition project, you’ll likely end up with leftover drywall that needs to be disposed of properly. Simply throwing drywall into the regular trash isn’t always the best option. Depending on where you live, local regulations may require drywall to be recycled or taken to a designated construction and demolition (C&D) disposal facility. Proper drywall disposal helps reduce landfill waste, conserves natural resources, and protects the environment. In this guide, you’ll learn how to dispose of drywall, when it can be recycled, and the best disposal methods for homeowners and contractors. Is Your Drywall Safe to Remove? Before you begin removing drywall, it’s essential to ensure it’s safe. Not all drywall is created equal, and some older boards may contain hazardous materials. Here’s what to check before you start: Check for Hazardous Materials Some drywall in homes built before the 1980s may contain asbestos. Disturbing asbestos can release dangerous fibers into the air, posing serious health risks. If you suspect your drywall may contain asbestos, it’s best to hire a professional to handle removal. Beware of Dust and Gas Drywall dust is not just messy; it can irritate your eyes, skin, and lungs. In rare cases, old or wet drywall can release hydrogen sulfide gas. This makes wearing a dust mask and eye protection essential. Long sleeves and gloves are also recommended. Turn Off Utilities Before removing drywall, turn off electricity in the area. Cutting into drywall without checking for hidden wires can be dangerous. Similarly, be aware of plumbing behind walls to prevent accidental damage. Decide DIY vs. Professional Help Small projects may be handled safely at home, but larger demolition or renovation projects benefit from professional services. Junk Masterz specializes in safe drywall removal, helping you avoid injuries and ensuring your drywall is disposed of correctly. Taking these precautions first can prevent accidents and make your drywall disposal process smoother. How to prepare drywall for disposal Getting your waste ready is the most important step. If you just throw everything in a pile, it will be much harder to move later. Proper drywall prep for disposal also helps you save money at the dump. Removing Metal and Hardware Drywall is usually held up by nails or screws. Before you take it to a recycling center, you should pull all of those out. Use a hammer or a pry bar. Also, look for metal corner beads. These are the long metal strips on the corners of walls. Recycling centers want clean gypsum. If there is too much metal, they might treat it like regular trash, which costs more. Sorting by Type and Condition Not all drywall is the same. You should make three different piles: Clean Scraps: These are brand-new pieces that have never been painted. These are the best for recycling. Painted Pieces: These are old pieces from your walls. They are harder to recycle but still okay for some landfills. Wet or Moldy Pieces: These must be kept separate. They are heavy and can contaminate other materials. Cutting and Bagging If you are taking the waste to the dump yourself, you need to make it easy to carry. Large sheets of drywall are hard to handle. Use a utility knife to cut them into squares that fit into contractor bags. Do not use thin kitchen bags. They will rip and leave a mess on your floor. For drywall mud disposal, make sure the mud is totally dry. If you have half-full buckets of wet mud, leave the lids off for a few days until they turn into solid blocks. Step‑by‑Step Disposal Methods There are many drywall disposal methods to choose from. Your choice depends on your budget and how much time you have. Using a Roll-Off Dumpster This is the most common way for big jobs. A company drops a big metal box in your driveway. You fill it up over a week or two. This is perfect for construction waste disposal. Just be careful not to overfill it. Drywall is very heavy, and dumpsters have weight limits. If the box is too heavy, the truck might not be able to pick it up. Read More: How Much to Rent a Dumpster? Hire Professional Junk Removal If you don’t want to spend your weekend carrying heavy bags, a pro service is best. The junk removal guy will come into your home or garage. They pick up the heavy pieces and load them into their own truck. This is a fast way to get your space back. You don’t have to worry about driving to the dump or getting your own truck dirty. You can Contact Us to find out how much it would cost for your specific pile of debris. Local Curbside Pickup Some towns have a “bulk waste” day once a month. You can put large items on the curb. However, you must check your local disposal regulations first. Many cities will take a sofa but will not take bags of sheetrock. If you put it out without checking, it might sit there and get wet, making it even harder to move later. Donation If you bought too much and have full sheets left over, do not throw them away. You can donate drywall to groups that build low-cost housing. As long as the sheets are clean and not broken, they are very useful. This is the best way to help someone else while cleaning up your own home. Landfill Disposal As a last resort, drywall can be taken to a landfill. Keep in mind that many areas have drywall landfill restrictions to prevent environmental hazards like hydrogen sulfide gas. Contact your local landfill to understand any limits or special procedures. By evaluating these options, you can choose the method that balances cost, convenience, and environmental impact. Can You Recycle Drywall? Many people ask this question because they want to

How to Dispose of Box Spring Quickly and Legally

Disposing of an old box spring may seem simple, but throwing it in the trash isn’t always the right—or legal—solution. Many cities have strict rules about disposing of bulky furniture, and because box springs are made from wood, metal, and fabric, they often require special handling. Whether you’re replacing your bed, moving to a new home, or clearing out unwanted furniture, knowing how to dispose of  box spring properly can save you time, prevent fines, and reduce environmental waste. The good news is that there are several convenient ways to get rid of an old box spring. If it’s still in good condition, you may be able to donate or sell it. If it’s damaged beyond repair, recycling is often the most environmentally friendly option. Many communities also offer bulk waste collection, while professional junk removal companies provide fast and hassle-free pickup services. This guide explains how to properly dispose of a box spring, the best disposal methods, estimated costs, recycling options, and common mistakes to avoid. You’ll also learn how to get rid of a box spring responsibly while following local disposal regulations and keeping recyclable materials out of landfills. Table of Contents How Do You Dispose of a Box Spring? Can You Throw a Box Spring in the Trash? 8 Best Ways to Dispose of a Box Spring How to Break Down a Box Spring for Disposal Mattress and Box Spring Disposal How Much Does Box Spring Disposal Cost? Common Mistakes to Avoid Frequently Asked Questions Conclusion How Do You Dispose of a Box Spring? The best way to dispose of a mattress depends on its condition and your local waste disposal regulations. If it’s clean and structurally sound, consider donating or selling it. If it’s broken or heavily worn, recycling is usually the most environmentally responsible option. Whenever possible, separate recyclable materials like metal springs and wood before disposal to reduce landfill waste and improve recycling opportunities. Can You Throw a Box Spring in the Trash? In most cases, no. Box springs are considered bulky household waste and are too large for regular curbside garbage collection. Many municipalities prohibit placing oversized furniture in standard trash bins because these items require special handling. Some cities offer scheduled bulk waste collection days, while others require residents to make an appointment for pickup. If you leave a box spring on the curb without following local guidelines, it may not be collected, and you could even receive a fine. Before disposing of your box spring, check your city’s waste management website or contact your local sanitation department to learn about the available disposal options and any preparation requirements. 8 Best Ways to Dispose of a Box Spring 1. Recycle Your Box Spring Recycling is one of the best answers to how to properly dispose of a box spring because it keeps reusable materials out of landfills. Traditional box springs are made from steel coils, wood frames, and fabric coverings. Recycling facilities can recover the metal and wood, reducing waste and conserving natural resources. If a recycling center isn’t available nearby, a professional mattress recycling service is the next best option, ensuring your box spring is recycled responsibly. Some recycling centers accept whole box springs, while others require you to remove the fabric and separate the materials before dropping them off. Although this takes a little extra time, recycling is one of the most environmentally friendly disposal methods available. For additional guidance on recycling box springs and mattresses, you can also refer to the Mattress Recycling Council (MRC). If you’re unsure whether your local recycling center accepts box springs, call ahead to confirm their requirements. 2. Schedule a Municipal Bulk Waste Pickup Many cities provide bulk item collection for furniture, mattresses, and box springs. Depending on where you live, this service may be free or require a small fee. Some municipalities offer scheduled pickup dates throughout the year, while others require residents to make an appointment. You may also need to wrap or prepare the box spring according to local regulations before placing it at the curb. Bulk pickup is an excellent option if you don’t have a truck or trailer to transport the box spring yourself. 3. Hire a Professional Junk Removal Company If convenience is your priority, hiring a junk removal service is often the easiest solution. Professional crews handle all the heavy lifting, loading, transportation, and proper disposal. Many reputable junk removal companies recycle or donate usable furniture whenever possible, making this option both convenient and environmentally responsible. This method is especially useful if you’re disposing of multiple bulky items, cleaning out an entire home, or replacing bedroom furniture during a renovation. 4. Donate a Usable Box Spring If your box spring is still clean, sturdy, and free from stains, mold, odors, or bed bugs, donating it may help someone in need while reducing landfill waste. Some charities, shelters, churches, and nonprofit organizations accept gently used box springs, although many have strict health and safety guidelines. Always contact the organization before dropping off your donation to confirm they currently accept box springs. Donating is one of the most sustainable ways to get rid of a box spring, giving it a second life instead of sending it to a landfill. Donating is one of the best ways to give your box spring a second life while helping someone in need. You can understand how to donate an old mattress by following the simple steps above. 5. Sell Your Box Spring If the box spring remains in excellent condition, consider selling it through local online marketplaces or community groups. Many people look for affordable bedroom furniture, especially when furnishing apartments, guest rooms, or temporary housing. Clean the box spring thoroughly, take clear photographs from multiple angles, and provide accurate dimensions and condition details. Honest listings typically attract more buyers and reduce unnecessary questions. Selling your box spring not only prevents waste but can also help offset the cost of purchasing a new one. 6. Repurpose the Materials Instead of disposing

How to Dispose of a Gas Grill Safely (Step-by-Step Guide)

If your gas grill has seen better days, you may be wondering how to dispose of a gas grill safely and responsibly. Whether it’s rusted, broken, or you’re upgrading to a new model, simply placing it in your regular trash is usually not the best option. Gas grills contain recyclable metals, plastic components, electronic ignition systems, and propane connections that require proper handling. In many areas of the United States, recycling or professional removal is the safest and most environmentally friendly way to dispose of an old grill. This guide explains the best ways to dispose of a gas grill, how to recycle its parts, what to do with the propane tank, and how to avoid common disposal mistakes. Quick Answer: How Do You Dispose of a Gas Grill? To dispose of a gas grill safely: Turn off and disconnect the propane tank. Remove any remaining grease and debris. Separate recyclable metal components if possible. Take the grill to a scrap metal recycling facility, schedule a junk removal service, donate it if it’s still functional, or arrange municipal bulk waste pickup. Dispose of the propane tank through an approved recycling or exchange program. Following these steps helps ensure safe disposal and keeps recyclable materials out of landfills. Step-by-Step Disposal Guide The biggest mistake people make is treating a gas grill as one item. In reality, it is a collection of different materials, and each one must be handled correctly. Following these steps will make grill disposal easier and safer. Step 1: Clean the Grill Before Disposal Before doing anything else, clean the grill. Scrape off food residue, grease, and carbon buildup. Empty the grease trap and wipe down surfaces. Many recycling centers and scrap yards will reject dirty items due to contamination concerns. Cleaning the grill also protects you while handling it. Old grease can hide sharp, rusted edges and makes the grill harder to disassemble. Step 2: Turn Off and Disconnect the Gas Supply Make sure the propane valve is fully closed. Disconnect the hose from the propane tank. Never try to move or dispose of a gas grill while the tank is attached. Propane tanks are pressurized and considered hazardous waste. They must always be handled separately. Step 3: Remove the Propane Tank Once disconnected, set the tank aside in a shaded, well-ventilated area. Do not store it indoors or near heat sources. Even empty tanks can contain residual gas. We will cover safe propane tank disposal in detail in the next section. Step 4: Separate Non-Metal Parts Remove plastic parts such as: Control knobs Side shelves Wheels Plastic handles These parts are usually not recyclable and should be disposed of according to local trash rules. Step 5: Remove Electronics and Batteries Many gas grills include electronic igniters, wires, or battery packs. These are classified as electronics or e-waste and should not be mixed with metal recycling. Place these items aside for proper electronic disposal. Step 6: Break Down Metal Components The grill body, lid, burners, and frame are usually made from steel or aluminum. These metal parts are valuable to recycling centers and scrap yards. Disassembling the grill makes transport easier and increases the chance that all recyclable materials are accepted. What to Do With an Old Gas Grill That No Longer Works Not every grill is suitable for donation or resale. If the grill is beyond repair, you may still be able to salvage valuable components. Reuse Individual Parts Useful parts often include: Cast iron grates Wheels Side tables Thermometers Ignition systems These components can sometimes be used for repairs on other grills. Repurpose the Grill Creative homeowners sometimes transform old grills into: Garden planters Outdoor storage units Decorative yard features Tool organizers Repurposing can be a fun and environmentally friendly alternative to disposal. One of the most common questions homeowners ask is how to dispose of a propane tank safely. How Junk Removal Companies Handle Old Grills Professional junk removal services typically follow a structured disposal process. Inspection The grill is assessed to determine recyclable and non-recyclable components. Transportation The grill is loaded and transported safely. Material Sorting Metals and reusable parts are separated whenever possible. Responsible Disposal Items are directed toward recycling facilities rather than landfills whenever feasible. For homeowners with limited time or transportation options, this can be one of the easiest disposal methods available. Gas Grill Disposal Checklist Use this checklist before disposing of your grill: Safety Preparation Turn off gas supply Disconnect propane tank Remove grease and debris Clean cooking grates Disposal Preparation Separate recyclable materials Check local regulations Schedule pickup if needed Contact recycling facilities Choose a Disposal Method Recycling center Junk removal service Donation Sale or giveaway Municipal bulk pickup Extra Tip Always hire a certified junk removal company for disposal. What Gets Recycled vs. What Doesn’t Understanding the “anatomy of a grill” helps you be a better environmental steward. Not every piece of your BBQ grill disposal can be saved from the landfill. The Recyclables Metal Parts: Aluminum hoods, stainless steel bowls, and brass valves are highly recyclable. Grates: Whether they are cast iron or steel, these are always accepted at a scrap yard. Wiring: The copper inside the ignition wires is valuable. The Non-Recyclables Plastic Knobs and Handles: These are often made of “Bakelite” or other heat-resistant plastics that most recycling center facilities cannot process. Hoses: The rubber fuel lines are usually not recyclable and should be disposed of in the regular trash once they are disconnected. Grease Trays: If they are heavily coated in burnt-on carbon and fat, they may be rejected by recyclers and have to go to the landfill. The E-Waste Category Modern grills often have battery-operated igniters or digital meat probes. These are e-waste. They contain heavy metals that can leak into the soil if tossed in a trash can. Always pull these small components out and take them to a dedicated electronics drop-off. Final Thoughts Learning how to dispose of a gas grill properly protects your safety and keeps harmful materials

How to Dispose of Fire Extinguisher: Complete Guide

Fire extinguishers are essential safety tools in every home and business. But what happens when your extinguisher expires, is damaged, or is partially used? Simply tossing it in the trash can be dangerous. Pressurized cylinders can explode, chemicals can harm the environment, and improper disposal may lead to fines. Knowing how to dispose of old fire extinguishers safely is crucial for your safety, your family, and the environment. In this guide, we’ll walk you through fire extinguisher lifespan, inspection tips, disposal options, safety precautions to make the process simple and safe. Why Proper Disposal Matters Fire extinguishers contain pressurized gases and chemicals. If they are punctured, crushed, or mishandled, they can explode or release harmful substances. Improper disposal can: Harm sanitation workers Cause environmental contamination Violate local waste rules Lead to fines The U.S. Environmental Protection Agency (EPA explains that pressurized containers are a household hazardous waste (HHW) category and should be handled carefully. ( How To Dispose Of Old Fire Extinguishers? Fire extinguishers don’t last forever. Most home units are rated for around 10–12 years. But age isn’t the only sign you need to dispose of it. Signs It’s Time to Dispose 1. Too OldIf the manufacturing date on the label is more than 10 years old, it’s generally time to retire the unit. 2. Pressure IssuesLook at the pressure gauge: Green zone: Good pressure Red or no gauge: Pressure lost — needs attention 3. Visible Damage Bulges, rust, cracks, loose parts, or dents in the cylinder mean it’s no longer safe. 4. Already Used Any extinguisher that has been discharged — even partially — should be considered for disposal or professional servicing. The National Fire Protection Association (NFPA) provides standards for inspecting and maintaining extinguishers. (NFPA Fire Extinguisher Safety: Types of Fire Extinguishers & Type-Specific Disposal Different fire extinguisher types contain various extinguishing agents and require specific disposal approaches. Understanding your extinguisher type ensures safe handling and proper environmental disposal practices. ABC Dry Chemical Extinguishers ABC dry chemical extinguishers combat Class A (combustibles), Class B (flammable liquids), and Class C (electrical) fires using monoammonium phosphate. While not highly toxic, the pressurized cylinder requires careful handling. Never open pressurized ABC extinguishers powder irritates eyes and lungs. These should go to household hazardous waste facilities unless completely depressurized. Steel cylinders offer excellent scrap metal recycling value once properly emptied. CO2 Extinguishers Carbon dioxide extinguishers operate at extremely high pressures, often exceeding 800 PSI. This makes DIY depressurization dangerous. Always contact certified fire extinguisher technicians or fire extinguisher service companies for CO2 disposal. Professionals safely release gas and handle cylinders. After professional emptying, heavy-duty aluminum or steel cylinders can be recycled. Also Read: How to dispose of old gas cylinders Wet Chemical (Class K) Wet chemical extinguishers designed for kitchen fires use potassium-based solutions. The alkaline chemical classifies these as hazardous waste. These units must always go to household hazardous waste facilities; never attempt curbside disposal. Commercial kitchens follow stricter disposal regulations through licensed hazardous waste collection services. Water & Foam Based Water and foam extinguishers are the simplest to dispose of safely. Once depressurized, water or foam can be drained safely and cylinders recycled as scrap metal. Foam units may contain surfactants that shouldn’t enter storm drains. Consult local waste management guidelines. Extinguisher Type Disposal Difficulty HHW Required? Can Be Recycled? DIY Depressurization? ABC Dry Chemical Moderate Preferred Yes (metal only) Yes (with caution) CO2 High Recommended Yes No – Professional only Wet Chemical (Class K) High Required Limited No Class D Very High Required Limited No – Professional only Water/Foam Low Optional Yes Yes Understanding these differences helps you choose the appropriate disposal method and ensures you follow OSHA requirements and local fire codes. When in doubt, contacting a fire extinguisher service company provides expert guidance for your specific situation. How to Remove Pressure Safely? Removing pressure from a fire extinguisher is dangerous and should only be done if necessary and in a safe environment. Required Safety Gear: Safety goggles or a face shield Chemical‑resistant gloves Long pants and long sleeves Dust mask or respirator An outdoor open area away from people Step‑by‑Step: Choose a Safe Site: Outdoor, flat surface, no people or pets nearby Stand Upwind: Point the nozzle toward the ground in a clear area Remove Safety Pin: Only when ready to operate Squeeze the Handle: Discharge until no more agent comes out Wait at least 48 Hours: Some units retain pressure even after discharge Verify Zero Pressure: Listen carefully and gently squeeze again If at any point something feels wrong — stop and seek professional help. Safety Rules to Follow Every Time Handling fire extinguishers improperly can cause serious injury. Always follow these safety precautions:  Never depressurize indoors  Wear protective equipment Avoid inhaling dust or chemicals Don’t drill, puncture, or heat the canister Keep them out of direct sunlight and heat before disposal The Occupational Safety and Health Administration (OSHA) provides general safety standards you can review for additional hazard guidance: Safety Precautions & Best Practices Handling fire extinguishers, even old ones, requires serious attention to safety. Pressurized cylinders and extinguishing agents pose real risks that increase during disposal. Personal Protective Equipment Always use appropriate protection when handling fire extinguishers. Minimum required PPE includes chemical-resistant gloves to protect against skin irritation, safety goggles to prevent eye exposure to chemicals, dust mask (N95 or better) for dry chemical types, long-sleeved shirt and pants to minimize skin contact, and closed-toe shoes to protect feet from dropped cylinders. Chemical Exposure Risks Different extinguishing agents pose various health hazards: Dry Chemical (Monoammonium Phosphate): Causes eye and respiratory irritation, can create temporary breathing difficulties, may trigger asthma in sensitive individuals, and requires immediate eye flushing if contact occurs. CO2 (Carbon Dioxide): Displaces oxygen in confined spaces, can cause suffocation, is extremely cold upon release (frostbite risk), and creates loud noise during discharge. Wet Chemical (Potassium-Based): Highly alkaline, causes chemical burns, severe eye hazard, requires immediate medical attention if contact occurs, and should never be mixed with acids. Pressure Explosion Risks Understanding

How to Dispose of Styrofoam Safely (Recycling, Reuse & Disposal Tips)

Styrofoam is everywhere—protecting fragile shipments, insulating food containers, and filling packaging boxes. But once you’re done using it, a common question arises: how to dispose of styrofoam? Unlike regular household waste, Styrofoam requires careful handling due to its environmental impact and limited recycling options. In this detailed guide, you’ll learn the best way to dispose of styrofoam, whether you can burn it, how recycling works, and smart alternatives that are safer for the environment. What Is Styrofoam and Why Is Disposal Difficult? Styrofoam is a type of expanded polystyrene (EPS), a lightweight plastic material made from petroleum. It is widely used because it is cheap, durable, and an excellent insulator. However, disposing of Styrofoam is challenging because: It is not biodegradable It breaks into tiny pieces, polluting land and water Most recycling centers do not accept it It takes hundreds of years to decompose Because of these factors, understanding how to dispose of styrofoam correctly is essential for reducing environmental harm. Can You Burn Styrofoam Packaging? One of the most frequently asked questions is: Can you burn styrofoam packaging? The Short Answer: No Burning Styrofoam is dangerous and strongly discouraged. Why Burning Is Unsafe Releases toxic chemicals like styrene and carbon monoxide Produces thick, black smoke, harmful to the lungs Contributes to air pollution and health risks Illegal in many areas due to environmental laws So if you’re wondering, “Can you burn styrofoam to get rid of it?”—the answer is a firm no. It is neither safe nor environmentally responsible. Styrofoam Recycling: Is It Possible? Yes, But Limited Styrofoam recycling is possible, but not widely available. Unlike paper or glass, EPS requires specialized facilities. How Recycling Works Recycling centers: Clean and shred the foam Compress it into dense blocks Melt and reuse it to create new plastic products Where to Recycle Styrofoam You can recycle Styrofoam at: Specialized recycling facilities Certain municipal waste programs Drop-off locations (often for clean packaging only) Tips Before Recycling Remove tape, labels, and food residue Keep it clean and dry Check local regulations or recycling directories. Also Read: Best Methods to Get Rid of Junk How to Dispose of Styrofoam: Best Way to Dispose of Styrofoam If recycling is not an option, you still have responsible disposal methods. 1. Reuse It Whenever Possible Before throwing it away, consider reusing Styrofoam: Packing material for shipping Cushioning for storage Insulation for small DIY projects This is one of the simplest and most eco-friendly solutions. 2. Donate Packing Materials Many businesses and individuals need packaging materials. You can donate clean Styrofoam to: Shipping stores Local online sellers Community groups 3. Check Local Waste Guidelines Different areas have different rules for disposal. Some municipalities: Accept Styrofoam in designated bins Require special pickup services Ban it from landfills entirely Always verify local waste regulations before disposal. 4. Use Specialized Disposal Services If you have large quantities, hiring a junk removal or waste management service is often the best way to dispose of Styrofoam safely and efficiently. How to Break Down Styrofoam for Trash If you must throw Styrofoam in the trash, reducing its size can make handling and disposal much easier. However, it’s important to do this carefully to avoid creating environmental or safety issues. Safe Methods to Break It Down Manual breaking: Snap it into smaller, manageable pieces Bagging: Place pieces in sealed garbage bags to prevent scattering Compacting: Apply gentle pressure to reduce volume without crumbling it Important Safety Tips Avoid crushing it into tiny particles, as they spread easily and create mess Never use chemicals like gasoline or acetone to dissolve it Wear gloves to prevent static cling and irritation If you’re searching for how to break down styrofoam for trash, the key is to keep everything controlled, contained, and as clean as possible. Consider Professional Disposal for Large Amounts If you’re dealing with a large volume of Styrofoam, the most practical and responsible approach is to contact a certified waste management or junk removal company. These professionals are equipped to handle bulky materials and ensure proper disposal in compliance with local regulations. Using a licensed service not only saves time and effort but also ensures that your waste is managed in an environmentally responsible way—making it one of the best ways to dispose of Styrofoam safely and efficiently. Can You Put Styrofoam in the Recycling Bin? In most cases, no. Regular curbside recycling programs usually do not accept Styrofoam because: It contaminates other recyclables It is costly to process It is too lightweight for efficient transport Always check your local recycling rules before placing it in the bin. Environmental Impact of Improper Disposal Improper Styrofoam disposal has serious consequences: 1. Land Pollution It accumulates in landfills and does not break down naturally. 2. Water Pollution Small particles enter rivers and oceans, harming marine life. 3. Wildlife Danger Animals may ingest Styrofoam, mistaking it for food. 4. Microplastic Formation Over time, it breaks down into microplastics, contaminating ecosystems. Understanding these risks highlights why proper styrofoam recycling and disposal matter. Eco-Friendly Alternatives to Styrofoam Reducing Styrofoam use is just as important as proper disposal. Fortunately, several sustainable alternatives offer similar protection while being far less harmful to the environment. Below are the best eco-friendly alternatives, explained clearly with trusted insights from high-authority sources. 1. Biodegradable Packing Peanuts Biodegradable packing peanuts are made from natural materials like corn starch or wheat instead of petroleum-based plastic. They dissolve in water and break down naturally Non-toxic and safe for the environment Can be composted after use According to Biodegradable Packing Peanuts Explained, these peanuts are made from plant-based materials and can decompose within weeks under the right conditions, making them a much better alternative to traditional Styrofoam. 2. Recycled Cardboard Packaging Recycled cardboard is one of the most widely used and effective alternatives. 100% recyclable and biodegradable Easily available and cost-effective Can be reused as protective packaging As highlighted in the Eco-Friendly Cardboard Packaging Guide, cardboard can be repurposed into cushioning material and is considered a sustainable substitute for Styrofoam packaging. Additionally,

How to Dispose of Old Mattress in 2026

Every year, Americans throw away more than 20 million mattresses. That’s a lot of old beds taking up space in landfills! But here’s the thing – most people don’t know the right way to get rid of their old mattress. When you dump a mattress illegally, you could face fines up to $1,000 in many cities. Plus, mattresses take up valuable landfill space and can release harmful chemicals into the soil. The good news? There are smart, legal, and even free ways to dispose of your old mattress. Whether you’re upgrading to a better bed, moving to a new home, or dealing with damage from bed bugs or water, this guide will show you exactly how to handle mattress disposal the right way. We’ll cover everything from free donation options to professional mattress removal cost so you can make the best choice for your situation and budget. Ready to say goodbye to that old mattress responsibly? Let’s dive in. When Should You Replace Your Mattress? Before we talk about disposal, let’s make sure you actually need a new mattress. The average mattress lifespan is 7-8 years, but this varies by type. Different mattress types last different amounts of time: Innerspring mattresses: 7-10 years Memory foam mattresses: 6-8 years Latex mattresses: 10-15 years Hybrid mattresses: 7-10 years Here are clear signs it’s time to replace your mattress: Your mattress sags in the middle or has visible indentations where you sleep. This means the internal support has broken down. You’ll notice your body sinking deeper than it used to. You wake up with back pain, neck pain, or stiff joints that weren’t there before. An old mattress stops supporting your spine properly. You hear squeaking or creaking sounds when you move. This happens when the springs or foam/springs break down inside. You see tears, rips, or exposed materials. These damage points can’t be fixed and compromise the mattress structure. You notice stains that won’t come out, or there’s a musty smell. These indicate moisture damage or mold growth inside the mattress. You have allergy symptoms like sneezing or itchy eyes, mainly at night. Old mattresses collect dust mites, dead skin cells, and allergens over years of use. Special situations requiring immediate replacement: Bed bugs or infestation: Never try to salvage an infested mattress. The bugs live deep in the materials and are nearly impossible to fully eliminate. Water damage from flooding:  Even if it dries out, moisture creates mold and bacteria growth inside the mattress. Fire damage: Smoke and heat ruin the mattress materials and fire safety properties. If your mattress shows any of these problems, it’s time to start planning for disposal and replacement. The good news is you have options for getting rid of it responsibly. 6 Ways to Dispose of a Mattress Let’s explore proven mattress disposal options, from completely free methods to convenient full-service solutions. Each method works better for specific situations and budgets. Method 1: Donate to Charity If your bed is still in great shape, giving it a second life is the most helpful option. It keeps usable items out of the trash and helps a family in need. National organizations that accept mattress donations: Groups like the Salvation Army, Habitat for Humanity, and Goodwill often accept beds. Local homeless shelters or women’s refuges are frequently in need of beds in good condition. Check with a non-profit organization in your area to see if they offer a mattress pickup for donations. What makes a mattress donation-ready: The mattress must be completely hygienic and sanitary. It must be free from any stains, odors, or structural damage. The fire safety label must be firmly attached. There must be absolutely no history of bed bugs to ensure mattress reuse is safe. Method 2: Retailer Take-Back Programs When you buy a brand-new mattress, the easiest way to get rid of the old one is to let the store handle it. This saves you from having to find a separate mattress disposal service. How Retailer Programs Work: Many companies offer a mattress retailer take-back when you purchase a new bed. They often include the mattress removal cost in your delivery fee. The delivery team performs the heavy lifting and takes the old bed away when they drop off the new one. This is part of a mattress stewardship program designed for responsible disposal. Method 3: Municipal Curbside Pickup Most local governments have a system for picking up heavy items that don’t fit in your regular trash can. This is often the most affordable way to handle bulky waste. How To Use Local Rules: Contact your local waste management office to see if they allow curbside mattress pickup. You usually have to book a scheduled pickup in advance. The city will provide a specific pickup window or collection window for your bulky item. Preparation Requirements: Most cities require the mattress to be placed in a plastic mattress bag. This keeps the item hygienic for the waste collector. Failure to follow mattress disposal rules and regulations can result in the city leaving the item behind. Method 4: Mattress Recycling Centers Recycling is the best choice for the environment because it recovers valuable materials like steel and foam. It is a key part of maintaining a circular economy. Finding Recycling Centers: Look for a household waste recycling centre (HWRC) or a civic amenity centre in your area. Use the Bye Bye Mattress program or the Mattress Recycling Council website to find a drop-off facility. Check if there is a recycling facility that specializes in mattress recycling near you. What happens during mattress recycling: The bed is cut open to separate the mattress materials. Metal springs are sent for scrap metal recycling. Foam is cleaned and turned into carpet underlay or pillows. Fabric and wood are recycled into fuel or mulch. Method 5: Junk Removal Services If you are short on time or cannot move the bed yourself, hiring professionals is the way to go. A service like Junk Masterz takes all the stress

Color Palette