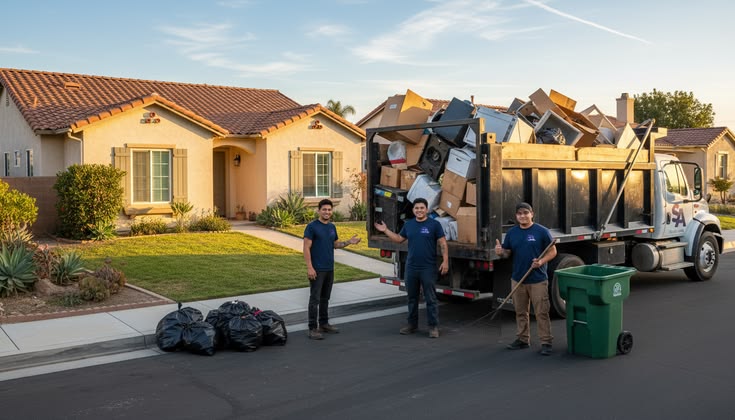
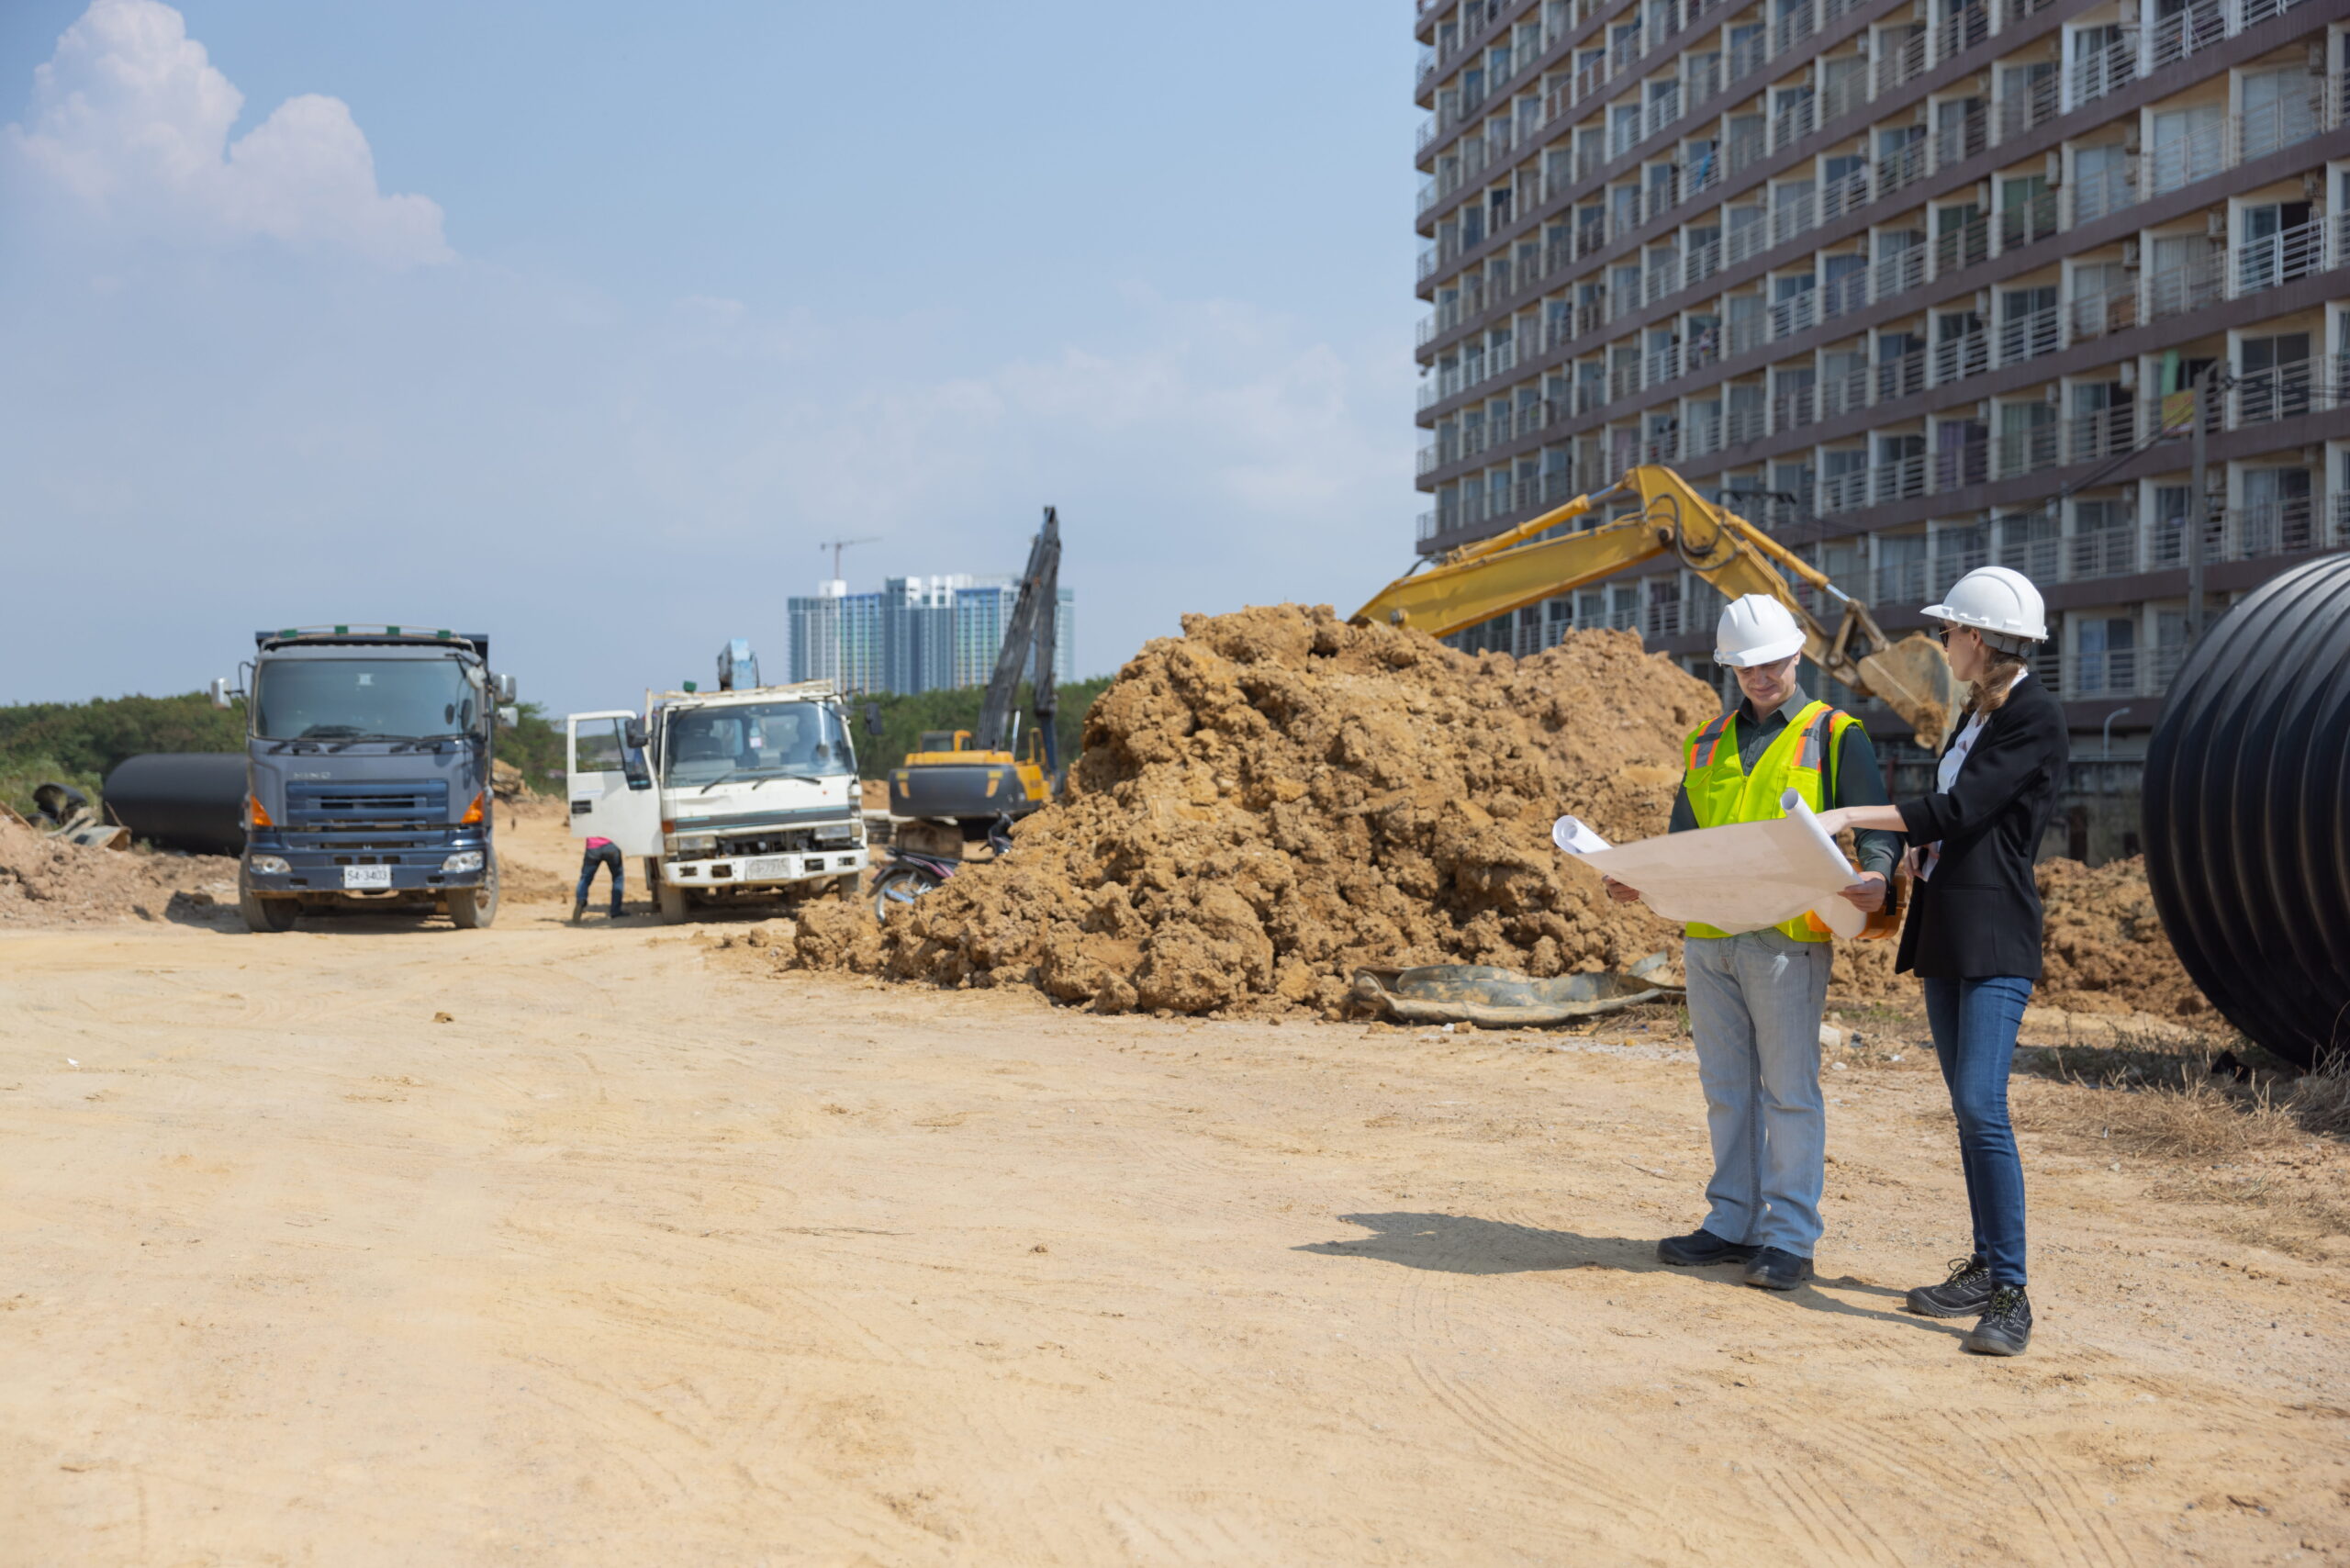
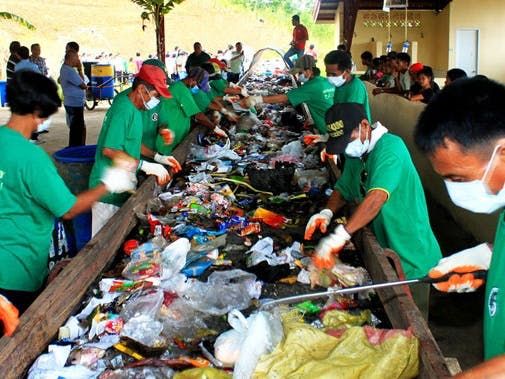
Archive for David Harlan

Where Does Garbage Go After the Dump? A Complete Guide to What Happens Next

Most people throw trash away without thinking twice about where it ends up. Once the garbage truck picks it up and leaves the neighborhood, many assume the story is over. But in reality, trash goes through a long process after it leaves your home. It may be sorted, recycled, buried in a landfill, burned for energy, or processed into compost, depending on the type of waste and local systems. If you have ever wondered where does garbage go after the dump, you are not alone. It is one of the most common waste-related questions people ask today. Understanding what happens to waste can help households and businesses make smarter disposal choices, reduce pollution, and support recycling efforts. In this guide, we will explain what happens to trash when you throw it away, how landfills work, where recyclable materials go, and why responsible waste disposal matters more than ever. What Happens to Trash When You Throw It Away? Once trash is placed in your garbage bin, it usually follows a collection route managed by local sanitation workers or private waste companies. After pickup, the waste is transported to one of several destinations: Transfer stations Recycling centers Composting facilities Waste-to-energy plants Landfills The final location depends on what type of waste it is and how your city handles garbage. To learn more about modern landfill systems and waste disposal methods, visit the U.S. EPA Landfill Basics For example: Food scraps may go to composting centers Plastic bottles may go to recycling plants Mixed household trash often goes to landfills Some waste is burned to create electricity So when people ask where does our trash go, the answer is not always simple. Different materials follow different paths. The First Stop: Transfer Stations Before garbage reaches its final destination, it often goes to a transfer station. A transfer station is a facility where smaller garbage trucks unload waste. The waste is then compacted and moved into larger trucks for transport. This saves fuel, time, and labor costs. Why Transfer Stations Matter They help cities: Reduce truck traffic Lower transportation costs Organize waste streams Separate recyclables from mixed trash Transfer stations play a key role in modern waste management systems. Where Does All Trash Go? The Role of Landfills A large amount of garbage still ends up in landfills. These are specially engineered sites designed to contain waste safely. What Is a Landfill? A landfill is not just an open hole in the ground. Modern landfills include: Protective liners to stop leakage Drainage systems for liquids Gas collection systems Soil covers to reduce odor Monitoring systems for groundwater Trash is layered, compacted, and covered daily to reduce pests and smell. What Happens Inside a Landfill? Over time, waste breaks down slowly and creates: Methane gas Carbon dioxide Leachate (liquid runoff) Many modern landfills capture methane and convert it into energy. So if you ask where does all trash go, a significant percentage still goes to landfills, especially non-recyclable materials. What Happens to Recyclable Waste? Items such as paper, aluminum, cardboard, glass, and certain plastics often go to Material Recovery Facilities (MRFs). How Recycling Works At recycling centers: Waste is sorted by machine and by hand Materials are separated by type Items are cleaned and processed Raw materials are sold to manufacturers Examples: Old paper becomes new packaging Aluminum cans become new cans Plastic bottles become containers or fibers Recycling helps reduce landfill use and saves natural resources. Where Does Garbage Disposal Waste Go? Many homeowners ask how to clean the garbage disposal waste after using a kitchen sink disposal. The answer depends on your plumbing and city wastewater system. After Using a Garbage Disposal Food waste travels through pipes into: Municipal sewer systems Wastewater treatment plants Septic systems (in some homes) At treatment plants: Solids are removed Water is cleaned Organic material may be converted into fertilizer or biogas Garbage disposals are convenient, but large amounts of grease, bones, and fibrous foods can still cause plumbing issues. Waste-to-Energy Plants: Turning Trash into Power Some cities burn non-recyclable waste in controlled incineration plants. Benefits of Waste-to-Energy Facilities They help: Reduce landfill volume Generate electricity Lower dependence on fossil fuels Concerns They must be carefully managed to reduce emissions and protect air quality. These facilities are common in places with limited landfill space. What Happens to Food Waste? Food waste is one of the largest parts of household garbage. Instead of sending food scraps to landfills, many cities now use composting systems. Composting Turns Waste into Soil Accepted items may include: Fruit peels Vegetable scraps Coffee grounds Yard waste These materials break down naturally into nutrient-rich compost used in landscaping and farming. Composting is one of the best ways to reduce landfill waste. Why So Much Trash Still Ends Up in Landfills Even with recycling programs, millions of tons of waste still go to dumps and landfills every year. Main Reasons Contaminated recyclables Lack of recycling access Improper sorting Cheap landfill costs Consumer overconsumption For example, greasy pizza boxes, food-covered plastics, and mixed materials often cannot be recycled. Environmental Impact of Poor Waste Disposal When waste is not handled correctly, it can create serious environmental issues. Common Problems Soil contamination Water pollution Greenhouse gas emissions Harm to wildlife Increased pests and odors That is why understanding where garbage goes after the dump matters for everyone. How You Can Reduce the Trash You Send Away The best waste solution is creating less trash in the first place. Easy Ways to Reduce Household Waste Recycle correctly Compost food scraps Donate usable items Buy reusable products Avoid single-use plastics Repair instead of replacing Use professional junk removal when needed Even small changes can make a major difference over time. How Businesses Handle Large Amounts of Waste Commercial properties, offices, construction sites, and retail stores often need specialized waste removal. Professional junk removal companies can help with: Bulk item pickup Appliance disposal Construction debris Furniture removal Recycling services Property cleanouts Businesses that manage waste responsibly improve sustainability and reduce liability risks. The

How to Remove a Deck: Complete Step-by-Step Guide for Safe and Easy Removal

Removing an old deck can instantly improve your backyard, create space for a new outdoor project, and eliminate safety hazards caused by rotting wood, rusted fasteners, or unstable framing. Many homeowners ask how to remove a deck without causing damage to the house, yard, or nearby structures. The good news is that with proper planning, the right tools, and a safe step-by-step process, deck removal can be managed efficiently. Whether you need to learn how to remove old deck boards, how to remove a deck board, or how to tear down a deck completely, this guide explains everything in simple language. We’ll cover preparation, tools, safety tips, disposal options, and mistakes to avoid so you can handle the project with confidence. Why You May Need to Remove a Deck Decks do not last forever. Weather exposure, moisture, insects, and age can weaken the wood and structural supports over time. In some cases, repairs become more expensive than full removal. Industry guides note that older decks often develop rot, loose connections, and structural deficiencies that can make replacement the safer long-term option. Common reasons to remove a deck include: Rotten or cracked boards Loose railings or stairs Rusted nails and screws Structural instability Water damage near the house Preparing for a new patio or upgraded deck Selling a home and improving curb appeal Replacing worn outdoor features with updated patios, decks, or landscaping can also improve curb appeal and overall property appeal to buyers. If the frame is still in good shape, you may only need to replace boards. But if the foundation is damaged, full removal is often the smarter long-term solution. For more details, visit the Trex Deck Demolition Guide on professional deck demolition and replacement options. Tools and Safety Gear You’ll Need Before starting, gather the right tools to make the process safer and faster. Basic Tools Pry bar Hammer Drill or impact driver Circular saw Reciprocating saw Adjustable wrench Shovel Ladder Safety Equipment Work gloves Safety glasses Dust mask Steel-toe boots Long sleeves and pants Wearing protective gear is important because deck removal often involves nails, splinters, loose boards, and heavy materials. How to Remove a Deck: Step-by-Step Process Removing a deck is easier when done in reverse order of how it was built. Start from the top and work downward. Step 1: Clear the Deck Area Remove all furniture, grills, planters, lighting, and decorations. This gives you room to work safely and prevents items from getting damaged. Step 2: Disconnect Utilities If the deck has electrical outlets, lighting, gas lines, or plumbing nearby, shut them off before starting. Contact a licensed professional if needed. Step 3: Remove Railings and Stairs Start with handrails, balusters, and stairs. Use a drill or pry bar to remove screws and fasteners. This opens the deck area and makes board removal easier. Step 4: Remove Deck Boards This is where many people ask how to remove old deck boards safely. Begin at the outer edge of the deck and work inward. Use a pry bar to lift boards carefully. If screws are present, remove them first using a drill. If nails are rusted or boards are stuck, cut sections using a circular saw. Work slowly to avoid damaging reusable lumber. Step 5: Remove Joists and Frame Once the surface boards are gone, remove joists connected to the main frame. Unscrew metal hangers or cut damaged fasteners with a reciprocating saw. Take apart the outer frame in sections rather than trying to remove everything at once. Step 6: Remove Posts and Footings Support posts are usually secured in concrete footings. Dig around the base and pull them out if possible. For stubborn posts, cut them at ground level or break up the concrete with a sledgehammer. Step 7: Clean the Area After removal, collect nails, screws, wood scraps, and debris. Rake the ground and inspect the siding or wall where the deck was attached. How to Remove a Deck Board Without Damaging Nearby Boards Sometimes, only one board needs replacement. If you want to know how to remove a deck board, use this method: Locate screws or nails securing the damaged board Remove visible fasteners Cut the board lengthwise with a circular saw Pry up the center strip first Remove the remaining side pieces carefully This method reduces pressure on adjacent boards and helps preserve the rest of the deck. Also Read: How to remove a shed How to Tear Down a Deck Attached to a House Attached decks require extra caution because the ledger board connects directly to your home. Removing it the wrong way can damage siding, wall framing, or create water entry points. According to experts at This Old House, careful removal and inspection of the attachment area is important before starting demolition. Important Tips: Inspect flashing and siding before removal Remove lag bolts or structural screws carefully Check for water damage behind the ledger board Seal the holes left in the wall after removal Replace damaged siding if necessary Once the deck is detached, inspect the exposed wall for hidden rot or moisture damage. The team at Family Handyman recommends sealing openings quickly and repairing damaged siding to protect your home. If you are unsure about structural connections, hiring a licensed contractor is the safest option. You can also review deck safety and repair guidance from Nachiorg for deck inspection. Common Mistakes to Avoid During Deck Removal Avoiding simple mistakes can save time, money, and injuries. Removing Boards Too Quickly Pulling boards aggressively can damage nearby framing or create flying debris. Ignoring Rusted Fasteners Old nails and screws can snap unexpectedly. Use cutting tools when needed. Not Wearing Safety Gear Splinters, dust, and sharp metal are common hazards. Forgetting Waste Disposal Deck removal creates a large amount of wood and concrete waste. Plan disposal before starting. Damaging House Siding Use caution around attachment points and walls. Can You Reuse Old Deck Materials? Yes, depending on condition. You may reuse: Pressure-treated boards in good shape Metal brackets and hardware (if rust-free) Posts

How to Remove Kitchen Cabinets Without Damage – Step-by-Step Guide 2026

Thinking about giving your kitchen a fresh look? One of the first and most impactful steps in any kitchen renovation is tearing out the old cabinetry. Whether you’re upgrading to modern units, reclaiming wall space, or simply clearing the room before a full remodel, knowing how to remove kitchen cabinets the right way can save you hundreds of dollars in contractor fees — and a whole lot of frustration. Learning how to remove kitchen cabinets is an essential first step. While it may seem like a complex task, the process can be straightforward when done carefully and with the right tools. The good news? This is a project that most homeowners with basic DIY skills can tackle over a weekend. You don’t need a construction background or a truckload of tools. What you do need is a clear plan, some patience, and the right information. In this guide, we’ll walk you through everything — from the tools you’ll need to gather to how to remove old kitchen cabinets without damaging your walls or floors. We’ll also cover some common mistakes people make and how to avoid them. By the end, you’ll feel confident enough to get started on your own. What You Need to Know Before Removing Kitchen Cabinets Removing kitchen cabinets involves more than just unscrewing them from the wall. Cabinets are often secured with multiple fasteners, sealed with caulk, and sometimes connected to plumbing or electrical systems. To remove kitchen cabinets, first empty them, disconnect utilities, unscrew mounting hardware, cut caulk seals, and carefully detach them from the wall, starting with the upper cabinets to prevent injury or damage. For additional safety guidelines and best practices, you can refer to U.S. Consumer Product Safety Commission resources on home improvement safety. There are two main types of cabinets: Wall cabinets (mounted above counters) Base cabinets (installed on the floor) Wall cabinets should always be removed first to avoid working underneath heavy structures. Tools Required to Remove Kitchen Cabinets Safely Before you begin, gather all necessary tools. Having the right equipment makes the process smoother and prevents damage. Essential tools: Screwdriver or drill Pry bar Utility knife Hammer Stud finder Safety gloves and goggles Optional tools: Reciprocating saw Drop cloths or protective sheets Pro Tip:Using a power drill instead of a manual screwdriver can significantly speed up the process, especially when dealing with multiple cabinets. How to Remove Old Kitchen Cabinets Without Damaging Your Walls One of the biggest concerns homeowners have when learning how to remove old kitchen cabinets is wall damage. Here’s the truth: some minor drywall damage is almost inevitable — but you can keep it to a minimum. Tips to Minimize Wall Damage Always score the caulk lines first. This is the single most effective way to prevent large chunks of drywall from tearing away with the cabinet. Don’t skip this step, even if the caulk line looks thin. Go slow on the last screws. The closer you get to fully removing a cabinet, the more controlled and deliberate you should be. Rushing the final moments is when accidents happen. Use a pry bar properly. If a cabinet won’t budge after all screws are out, use a pry bar gently between the cabinet and wall — don’t just yank it. Stubborn cabinets are often stuck from old paint or adhesive, not hidden screws. Patch promptly. Once cabinets are off, fill holes and smooth rough patches as soon as possible. Dried spackle is much easier to sand smooth than hardened, settled compound. How to Prepare Before Removing Kitchen Cabinets Preparation is key when learning how to take out kitchen cabinets safely. Start with these steps: Turn off utilities: Shut off the water supply if working near sinks and cut the electricity near outlets. Empty all cabinets: Remove dishes, shelves, and loose items. Protect your space: Cover floors and countertops to prevent scratches. Label components: If you plan to reuse cabinets, label doors and hardware for easy reinstallation. Proper preparation reduces risks and ensures a cleaner removal process. For detailed home safety recommendations, you can review guidelines from the Occupational Safety and Health Administration to understand safe working practices during renovation projects. How To Remove Kitchen Cabinets Step-by-Step Guide   Follow this detailed process to understand how to take off kitchen cabinets efficiently. Step 1: Remove Cabinet Doors and Shelves Start by unscrewing the hinges and removing cabinet doors. Take out shelves and store all hardware in labeled bags. This step reduces weight and makes cabinets easier to handle. Step 2: Cut Caulking and Paint Seals Use a utility knife to slice through any caulk or paint sealing the cabinet to the wall. This prevents tearing drywall when removing the cabinet. Step 3: Locate and Remove Screws Look inside the cabinet for screws attaching it to the wall studs. These are usually found at the back panel or near the top. Use a drill to remove them quickly and safely. Step 4: Detach Wall Cabinets First When learning how to remove kitchen cabinets, this step is critical. Always remove upper cabinets first. Have a helper support the cabinet while you unscrew it to prevent it from falling. Carefully lift it away from the wall once detached. Step 5: Remove Base Cabinets Next, move to base cabinets. If they are connected to plumbing: Disconnect sink pipes Turn off the water supply Unscrew cabinets from the wall and floor before gently pulling them away. Step 6: Lift and Remove Cabinets Carefully Avoid using excessive force. If the cabinet resists, check for hidden screws or nails. Slow and steady removal prevents wall damage and keeps cabinets intact if you plan to reuse them. Also Read: How to get rid of things when moving Mistakes to Avoid When Removing Kitchen Cabinets Many DIYers make simple mistakes that lead to costly repairs. Here are the most common ones: Skipping utility shut-off: This can lead to accidents or water damage Forcing cabinets off the wall: Causes drywall damage Missing hidden screws: Cabinets won’t come off

Dumpster Rental for Roofing Shingles: Complete 2026 Guide (Costs, Sizes, and Tips)

Roof replacement projects generate more waste than most homeowners expect. A single roofing job can produce thousands of pounds of debris, especially when removing old asphalt shingles. Without a proper disposal plan, this waste can quickly become overwhelming, unsafe, and even illegal to handle incorrectly. That’s where dumpster rental for roofing shingles becomes essential. Whether you’re a homeowner tackling a DIY roof replacement or a contractor managing multiple projects, having the right dumpster simplifies cleanup, saves time, and keeps your site organized. In this guide, you’ll learn everything you need to know about roofing dumpster rentals, including how to choose the right size, understand pricing, avoid hidden fees, and follow proper disposal practices. The goal is simple: help you complete your roofing project efficiently while staying compliant with local regulations and avoiding unnecessary costs. Understanding Roofing Waste: Why Proper Disposal Matters What Are Roofing Shingles Made Of? Most residential roofs use asphalt shingles, which are made from a mix of fiberglass, asphalt, and mineral granules. While durable, these materials are heavy and not biodegradable. Other roofing types like wood, slate, or metal also require specialized disposal methods. Environmental Impact of Improper Disposal Improper disposal of shingles contributes to landfill overcrowding and environmental damage. Many regions now encourage or require recycling, as old shingles can be reused in road construction and other applications. According to the U.S. Environmental Protection Agency, recycling asphalt shingles helps reduce landfill waste and supports sustainable infrastructure development. Why You Should Never Use Regular Trash Services Standard garbage services are not designed for roofing debris. Shingles are too heavy, and exceeding weight limits can lead to fines or rejected pickups. Renting a dedicated dumpster ensures safe and legal disposal. It’s also very important to understand the correct method of disposal for shingles, as improper handling can create environmental issues and may violate local regulations. What Is a Dumpster Rental for Roofing Projects? A dumpster rental for roofing projects is a temporary waste container specifically designed to handle heavy materials like shingles, underlayment, and nails. How Roofing Dumpsters Work The dumpster is delivered to your location You fill it during your project The company picks it up and disposes of the waste Types of Dumpsters for Roofing Jobs Roll-off dumpsters (most common for roofing) Construction dumpsters for larger commercial jobs Who Needs a Roofing Dumpster? Homeowners replacing a roof Roofing contractors Property managers handling renovations Using a dumpster for roofing helps contain debris, making your job site safer and more efficient. Choosing the Right Dumpster Size for Roofing Shingles Selecting the correct size is critical to avoid overpaying or running out of space. Quick Size Guide 10-yard dumpster: Small roofs (1,000–1,500 sq ft) 20-yard dumpster: Medium roofs (1,500–3,000 sq ft) 30-yard dumpster: Large roofs or multi-layer tear-offs How Many Shingles Fit in a Dumpster? Roofing shingles are dense. Even if a dumpster looks half full, it may already be near its weight limit. For example, one roofing square (100 sq ft) can weigh 200–400 pounds. Why Weight Limits Matter More Than Size With roofing dumpsters, weight limits are often more important than volume. Overloading can result in expensive overage fees, so choosing the right size upfront is key. Cost of Dumpster Rental for Roofing Shingles in 2026 Here’s your improved sentence with your idea added naturally and SEO-friendly: Understanding pricing helps you budget your project more effectively. Understanding dumpster cost is also important because it helps you choose the right size, avoid hidden fees, and plan your roofing project without unexpected expenses. Average Price Breakdown Small projects: $250–$400 Medium projects: $400–$600 Large projects: $600–$900+ Factors That Affect Pricing Location Dumpster size Rental duration Weight allowance Disposal fees Hidden Fees to Watch Out For Overweight charges Extended rental periods Prohibited material penalties How to Save Money Choose the correct dumpster size Avoid overfilling Schedule your rental carefully A well-planned dumpster rental for shingles can significantly reduce overall project costs. How to Load a Dumpster with Roofing Shingles Properly Step-by-Step Guide Place the dumpster close to your work area Start loading evenly across the container Break shingle bundles into smaller loads Safety Tips Wear gloves and protective gear Avoid lifting excessive weight at once Use proper tools to remove shingles What NOT to Put in a Roofing Dumpster Hazardous chemicals Electronics Liquids Following these steps ensures safe and efficient use of your roofing dumpster rentals. Local Regulations and Permits You Should Know Do You Need a Permit? If you plan to place a dumpster on a public street, you may need a permit. Requirements vary by city. It’s a good idea to review general guidelines from trusted sources like HomeAdvisor and Angi, which explain when permits are required and how local rules can vary. Disposal Regulations Some areas require recycling of roofing materials or restrict landfill disposal. Regulations can differ significantly depending on your location, so confirming local waste management rules ahead of time can help you avoid fines and delays. Who Is Responsible? Contractors often handle permits, but homeowners should always confirm before renting. A reliable dumpster rental company will guide you through local requirements and help ensure everything is handled correctly. Recycling Roofing Shingles: Eco-Friendly Options Can Shingles Be Recycled? Yes. Asphalt shingles are commonly recycled into road materials. Benefits of Recycling Reduces landfill waste Supports sustainable construction May lower disposal costs How to Find Recycling Centers Check with your dumpster provider or local waste facilities to see if recycling is available in your area. Dumpster Rental vs Junk Removal for Roofing Projects Key Differences Dumpster rental: You load the waste yourself Junk removal: A team handles everything Which Is Better? For roofing jobs, dumpsters are usually more cost-effective because of the large volume of debris. Cost Comparison Dumpster rentals typically offer better value for full roof replacements, while junk removal is better suited to smaller repairs. Pro Tips from Roofing and Waste Management Experts Common Mistakes to Avoid Renting a dumpster that’s too small Ignoring weight limits Overloading beyond the fill line Contractor Insights Most professionals

Waste Audit: A Complete Guide to Reducing Waste and Cutting Costs in 2026

Most homes and businesses throw away more than they realize. From recyclable plastics to reusable materials, a significant portion of what ends up in the trash could have been handled more efficiently. That’s where a waste audit comes in. A waste —also known as a trash disposal or garbage audit—is a simple but powerful way to understand exactly what you’re throwing away and how you can reduce it. Whether you’re a homeowner trying to cut clutter or a business looking to lower disposal costs, this process gives you clear, actionable insights. At Junk Masterz, we’ve seen firsthand how a proper waste audit can help customers reduce waste removal costs, improve recycling rates, and make smarter decisions about disposal. In this guide, you’ll learn what waste management is, how to conduct one step by step, and how to turn your findings into real savings. What Is a Waste Audit? This is a systematic process used to analyze the type and quantity of waste generated in a specific location. It helps identify what materials are being discarded, how much waste is produced, and where improvements can be made. In simple terms, a garbage audit answers three key questions: What are you throwing away? How much are you throwing away? What could be reduced, reused, or recycled? Waste  trash can be done in different settings, including: Homes (to reduce household waste) Offices (to improve recycling programs) Construction sites (to manage heavy debris like concrete and wood) Understanding this data is the first step toward lowering costs and improving sustainability. Why Waste Audits Are More Important Than Ever in 2026 Waste management has changed significantly in recent years. Rising costs, stricter regulations, and increased environmental awareness have made waste garbage more valuable than ever. Rising Disposal Costs Landfill fees and hauling expenses are increasing. Reviewing a junk removal company’s cost guide can help you understand how waste volume directly impacts pricing. Environmental Regulations Many regions are tightening rules around waste disposal and recycling. Businesses, in particular, must meet compliance standards or face penalties. Conducting waste management helps you stay ahead of these requirements. Sustainability Expectations Customers today prefer environmentally responsible companies. A well-documented waste garbage demonstrates your commitment to sustainability and can strengthen your brand reputation. Data-Driven Decisions Rather than guessing where waste is coming from, rubbish management provides real data. This allows you to make informed decisions that improve efficiency and reduce costs. Key Benefits of Conducting a Waste Audit A garbage assessment process isn’t just about analyzing trash—it’s about unlocking opportunities. Cost Reduction By identifying unnecessary waste, you can lower expenses and reduce reliance on affordable junk removal near you. Improved Recycling Efficiency Many audits reveal that recyclable materials are being thrown away. Fixing this can significantly reduce landfill use. Better Resource Management You may discover over-purchasing or inefficient use of materials, especially in businesses and construction projects. Operational Efficiency Streamlining how waste is handled can save time, labor, and effort. Regulatory Compliance A documented waste analysis and sorting guide helps ensure you meet local waste management laws and standards. How Do You Conduct a Waste Audit? (Step-by-Step Guide) If you’ve been wondering how to conduct a garbage assessment process, the process is simpler than it sounds. Here’s a practical step-by-step approach used by professionals like Junk Masterz. Step 1: Define Your Goals Start by identifying what you want to achieve: Reduce waste volume Increase recycling rates Cut disposal costs Clear goals will guide the entire garbage assessment process Step 2: Gather Materials and Safety Equipment Prepare: Gloves and masks Sorting bins Labels A weighing scale For workplace safety practices, refer to the Occupational Safety and Health Administration recommendations. Step 3: Collect Waste Samples Choose a time period (typically 1–7 days). Make sure the sample represents normal waste generation. For businesses, this might include daily operations. For homes, it could include regular household trash. Step 4: Sort Waste Into Categories Separate waste into clear categories such as: Organic waste (food scraps) Plastics Paper and cardboard Metals Glass Hazardous materials This step helps identify items that could be redirected using a guide to disposing of construction debris or recycling systems. Step 5: Measure and Record Data Weigh each category and record the results. Accuracy matters here, as this data will guide your decisions. Step 6: Analyze the Results Look for patterns: Are recyclables being thrown away? Is there excessive food waste? Are certain materials dominating your waste stream? Step 7: Create an Action Plan Turn your findings into action: Add recycling bins Reduce unnecessary purchases Train staff or household members This is where real savings begin. Waste Audit Process Explained (Simple Framework) It is essential to understand waste management and the causes of waste generation to reduce environmental impact and improve sustainability. Planning Define scope and goals. Collection Gather waste samples. Sorting and Analysis Categorize and evaluate. Implementation Apply improvements. Monitoring Track progress over time. For additional frameworks, resources from Zero Waste International Alliance provide deeper guidance. Tools and Equipment Needed for Waste Trash You don’t need expensive tools to get started, but having the right equipment makes the process easier. Basic Tools Gloves Safety masks Sorting bins Labels Measurement Tools Digital or manual weighing scale Data recording sheets Digital Tools Spreadsheets Waste tracking software (for businesses) Using the right tools improves accuracy and efficiency. Common Mistakes to Avoid During a trash evaluation Even a simple waste trash can go wrong if you overlook key details. Not Using Representative Samples If your sample doesn’t reflect normal waste patterns, your results will be misleading. Ignoring Safety Protocols Handling waste without proper protection can be risky. Poor Data Recording Incomplete or inconsistent data makes analysis difficult. No Follow-Up Plan A trash evaluation without action is just wasted effort. Always implement changes based on your findings. Garbage Waste Example: Real-World Scenario Let’s look at a simple example to see how garbage waste works in practice. Small Office Audit A small office conducted a garbage audit and found: 40% paper waste 30% recyclable plastics 20% organic waste 10% miscellaneous Action

How To Dispose Of Old Bed Frame: Complete Step-by-Step Guide

Old furniture can take up valuable space fast, especially when it is broken, rusty, or no longer useful. If you are wondering how to dispose of old bed frame pieces the right way, you are not alone. Many homeowners struggle with bulky furniture removal because bed frames are large, heavy, and often made of mixed materials like metal, wood, or upholstered parts. The good news is that getting rid of an unwanted bed frame does not have to be stressful. Whether you want to recycle it, donate it, haul it away, or break it down for trash pickup, there are several smart options available. In this guide, you will learn how to dispose of bed frame parts safely, what disposal method works best, and how to avoid illegal dumping or expensive mistakes. d. Can You Throw Away a Bed Frame? In most cases, the answer is no—you cannot simply throw a bed frame in your regular trash. Here’s why: Bed frames are too large for standard bins Many are made of metal, wood, or mixed materials Local waste systems often have strict bulk disposal rules However, some areas offer bulk waste pickup, but you usually need to: Schedule in advance Disassemble the frame Follow size or weight limits If you’re wondering, “How do I get rid of my bed frame?”, don’t worry—there are better, more efficient options below. Best Ways to Dispose of an Old Bed Frame 1. Donate Your Bed Frame (Best for Usable Furniture) You can donate to organizations like Habitat for Humanity ReStore or The Salvation Army, which often accept gently used furniture. You can donate to: Local charities Shelters Furniture banks Benefits: Helps someone in need Keeps furniture out of landfills May qualify for a tax deduction This is a great answer to: “What do I do with my old bed frame?” 2. Sell or Give It Away Online Another quick way to solve the problem of how to get rid of a bed frame is to list it online. Popular options include: Facebook Marketplace Craigslist Local community groups Pro tips: Clean the frame before listing Take clear photos Price it low or offer it free for faster pickup Often, someone will pick it up the same day—saving you time and effort. 3. Recycle the Bed Frame (Eco-Friendly Choice) If your bed frame is broken or no longer usable, recycling is a responsible solution. Here’s how it works: Metal frames → scrap metal recycling centers Wood frames → wood recycling or reuse facilities Mixed materials → may require separation Recycling reduces landfill waste and supports sustainable practices, making it one of the best long-term solutions. 4. Hire a Junk Removal Service If you’re short on time or dealing with a heavy frame, hiring professionals is often the easiest option. Why choose this: No lifting or disassembly required Fast and convenient Safe handling of bulky items This is ideal if you’re asking, “How do you get rid of bed frames quickly and without hassle?” 5. Schedule Bulk Waste Pickup Some municipalities offer bulk item collection services. Before choosing this option: Check your local guidelines Confirm accepted materials Schedule pickup in advance Keep in mind that not all areas accept bed frames, especially if they are not disassembled. How to Break Down an Old Bed Frame (Step-by-Step) If you plan to recycle or dispose of your bed frame, breaking it down makes the process much easier. Tools You May Need: Screwdriver Wrench Gloves Step-by-Step Process: Remove the mattress and slats Unscrew all bolts and joints Separate the headboard, footboard, and side rails Sort materials (metal vs. wood) Bundle parts for easy transport This directly answers: “How to break down an old bed frame?” Safety Tip: Always wear gloves to avoid cuts from sharp edges. How to Dispose of Old Bed Frame Adjustable bed frames require extra care because they include electrical components. Here’s what you should do: Check if the manufacturer offers a take-back program Some manufacturers provide return or recycling programs for their products. This means they will either collect the bed frame or guide you to an approved recycling partner. These programs ensure that electronic parts, metals, and other materials are handled safely and in an environmentally responsible way. Check the brand’s website or contact their customer support to see if this option is available. Contact e-waste recycling centers Adjustable bed frames contain motors, wiring, and sometimes control units, which fall under electronic waste (e-waste). Specialized recycling centers are equipped to safely dismantle and process these components. They separate reusable materials like metal and properly dispose of hazardous parts, preventing environmental contamination. Always confirm that the facility accepts large items like bed frames before visiting. You can check certified recycling options through resources like the EPA. Avoid sending it directly to landfills Disposing of an adjustable bed frame in a landfill is not recommended because the electrical components can release harmful substances over time. Motors, circuit boards, and wiring may contain materials that can pollute soil and water. Many areas also have regulations that restrict dumping electronic items in landfills, so improper disposal could lead to fines. Eco-Friendly Bed Frame Disposal Options If sustainability matters to you, there are better choices than simply throwing your bed frame away. Top eco-friendly methods: Donate usable frames Recycle metal and wood components Repurpose parts for DIY projects Improper disposal contributes to landfill overflow and environmental damage. When considering how to dispose of old furniture, choosing greener options—such as donation, recycling, or reuse—helps reduce waste and supports a circular economy. Common Mistakes to Avoid Many people make simple mistakes when figuring out how to dispose of an old bed frame. Avoid these: Leaving it on the curb without permission Not disassembling the frame Ignoring recycling options Dumping it illegally These mistakes can lead to fines, wasted resources, and unnecessary stress. Cost of Bed Frame Disposal The cost depends on the method you choose. Free Options: Donation Selling or giving away Low-Cost Options: Recycling centers Bulk pickup services Paid Options:

How to Get Rid of Everything and Move: The Ultimate Stress-Free Guide

Moving sounds simple—pack your things and go. But in reality, it quickly becomes overwhelming when you realize how much stuff you’ve accumulated over the years. From unused clothes to bulky furniture, the challenge isn’t just moving—it’s figuring out how to get rid of things when moving without stress. The truth is, the more you move, the more it costs—both financially and mentally. That’s why decluttering before moving is not just helpful, it’s essential. In this guide, you’ll learn exactly how to get rid of stuff before moving, how to decide what stays, and what items are not worth moving at all. Whether you’re relocating across town or starting fresh somewhere new, this step-by-step approach will help you move smarter, lighter, and with less stress. How to Get Rid of Everything and Move  If you’re short on time, here’s the simplest way to approach it: Sort your belongings into keep, donate, sell, and discard Identify what items are not worth moving Declutter one room at a time Use donation centers or junk removal services Pack only what you truly need This method helps reduce clutter quickly and keeps your move organized. Why Decluttering Before Moving Matters The Hidden Costs of Moving Too Much Stuff Many people underestimate how expensive it is to move unnecessary items. Movers typically charge based on weight, volume, and labor. The more you have, the more you pay. Even if you’re moving yourself, extra items mean: More boxes More trips More time and energy Mental and Lifestyle Benefits Decluttering isn’t just about saving money—it’s about creating a fresh start. Moving into a new home without clutter can improve focus, reduce stress, and help you stay organized long-term. Professionals in the moving industry often recommend reducing your belongings by at least 25%. That alone can significantly simplify the entire process. How to Decide What to Keep When Moving One of the hardest parts of moving is deciding what actually deserves to come with you. The process can feel overwhelming, but a few straightforward strategies make it much easier to separate the essentials from the excess. The 12-Month Rule If you haven’t used something in the past year, chances are you won’t need it in the future. This is one of the simplest and most effective decluttering rules. Apply it broadly to clothes, kitchen gadgets, books, and hobby supplies—items sitting unused for that long rarely become suddenly indispensable after the move. The Value vs. Cost Test Ask yourself: Is this item worth paying to move? If the cost of transporting it is higher than replacing it, it’s probably not worth keeping. Factor in packing materials, labor, fuel surcharges, and insurance—many people discover that selling or donating bulky items and buying replacements at the new location saves both money and hassle. Avoid Emotional Clutter It’s easy to hold onto items for sentimental reasons, but not everything needs to move with you. Keep meaningful items, but don’t let guilt or nostalgia take over your decision-making. For deeper guidance on balancing sentiment with practicality, check out this helpful resource from Wirecutter on culling possessions before a move: The Ultimate Moving Checklist. Quick Decision Checklist Do I use this regularly? Would I buy this again today? Does it fit my new space? This process will help you confidently decide what to keep when moving. Start early, tackle one room at a time, and you’ll arrive at your new home feeling lighter and more organized. What Items Are Not Worth Moving Not everything deserves a spot in your moving truck. Some items are simply more trouble than they’re worth. Common Items to Let Go Cheap or worn-out furniture Old mattresses Broken electronics Expired or unused household products Duplicate items Think Cost vs Convenience For example, moving a low-cost bookshelf across cities may cost more than buying a new one. Simple Rule If it’s bulky, low-value, or easily replaceable, it’s better to leave it behind. Understanding what items are not worth moving can save you both time and money. Step-by-Step Decluttering Plan A clear system makes everything easier. Start Early Begin decluttering at least 4–6 weeks before your move. Waiting until the last minute leads to rushed decisions and unnecessary stress. Declutter Room by Room Focus on one area at a time: Bedroom: clothes, accessories Kitchen: unused gadgets, duplicates Living room: décor, old furniture Storage areas: forgotten clutter Use the Four-Box Method For every item, assign it to one of four categories: Keep Donate Sell Trash This method is simple, and it also helps you learn the best methods for cleaning a foreclosure cleanout more efficiently, but extremely effective for getting rid of stuff when moving.  How to Get Rid of Stuff Before Moving Once you’ve sorted your items, it’s time to remove them efficiently. 1. Sell What You Can Selling is a great way to recover some value: Online marketplaces Local community groups Garage sales Price items reasonably if you want them gone quickly. 2. Donate Usable Items Many charities accept: Clothing Furniture Appliances Household goods, books, and more Donating not only helps others but may also provide tax benefits. Before your move, research local organizations that offer free pickup services for larger items—this can save you significant time and effort while ensuring your gently used belongings go to good use. For practical advice on where and how to donate, check out this comprehensive guide from AARP: Where You Can Donate Your Unwanted Things. Popular options include Goodwill, The Salvation Army, and Habitat for Humanity ReStores, which often accept a wide range of items in good condition. Always confirm current acceptance policies, as they can vary by location. Taking clear photos and keeping a simple donation log will also make claiming any potential tax deductions much easier at tax time. This step turns decluttering into a positive impact while lightening your moving load. 3. Recycle Responsibly Items like electronics and batteries should never be thrown in regular trash. Look for proper recycling options in your area. 4. Hire a Junk Removal Service If

How to Dispose of Bricks: Smart, Safe, and Eco-Friendly Methods

Bricks are one of the most durable construction materials out there—but that durability becomes a challenge when it’s time to get rid of them. Whether you’re renovating your home, clearing a construction site, or removing an old patio, figuring out how to dispose of bricks properly is important for both safety and environmental reasons. Many people assume bricks can simply be thrown in the trash. In reality, disposal depends on factors like condition, quantity, and local regulations. This guide breaks down practical, legal, and eco-friendly ways to handle brick waste, including options for reuse, recycling, and professional removal. By the end, you’ll know exactly how to get rid of bricks efficiently, whether you have a small pile or a full truckload.  What’s the Best Way to Dispose of Bricks?  The best way to dispose of bricks is to reuse, donate, recycle, or take them to a construction and demolition (C&D) facility. For large amounts, hiring an affordable waste removal service or renting a dumpster is often the most efficient solution. Why Proper Brick Disposal Matters Improper disposal of bricks can lead to: Environmental damage (illegal dumping) Fines or penalties Safety hazards due to sharp edges and heavy weight Bricks are classified as construction and demolition (C&D) debris, meaning they require specific disposal methods. Understanding your options helps you stay compliant and reduce waste. For comprehensive, general guidance on best practices for managing construction and demolition materials (including bricks), recycling, reuse, and waste reduction strategies, visit the Whole Building Design Guide (WBDG) on Construction Waste Management: How to Dispose of Bricks: Step-by-Step 1. Reuse Bricks: The Most Sustainable Option Before throwing anything away, consider reuse. Bricks are incredibly durable and can often be repurposed. Ways to Reuse Bricks Garden edging or pathways Raised garden beds Fire pits or outdoor seating Landscaping features If the bricks are intact, this is the easiest answer to how to dispose of old bricks without actually disposing of them. Pro Tip Clean bricks with a hammer and chisel to remove old mortar, making them reusable and more valuable. 2. Donate or Give Away Bricks If you don’t need the bricks, someone else probably does. Donating is one of the best ways to keep usable materials out of landfills while helping your community. Where to Donate Local builders or contractors Community projects and schools Habitat for Humanity ReStores (and similar reuse centers) Online marketplaces (Facebook Marketplace, Craigslist, or Freecycle groups) For more information, visit the official Habitat for Humanity ReStore to find a local donation center that accepts bricks and other building materials. 3. Recycle Bricks at Approved Facilities Recycling is one of the most environmentally responsible methods. How Brick Recycling Works Bricks are crushed into aggregate Used for road base, landscaping, or construction fill This method is ideal for those asking how to dispose of brick and concrete responsibly. Where to Recycle Construction and demolition recycling centers Local landfills with recycling programs Always call ahead to confirm acceptance, as not all facilities take brick materials. 4. Dispose of Bricks at a Landfill or Transfer Station If reuse or recycling isn’t an option, landfill disposal is the fallback. Important Considerations Bricks are heavy, so expect weight-based fees Some landfills require separation from other waste Permits may be needed for large loads This is a common solution for how to dispose of broken bricks that cannot be reused. 5. Rent a Dumpster for Large Quantities For renovation or demolition projects, a dumpster is often the most efficient route. Benefits Handles large volumes Saves multiple trips Convenient for ongoing projects Things to Know Choose a heavy debris dumpster Avoid mixing with prohibited materials Be mindful of weight limits This method works best for brick pavers and bulk disposal, especially when dealing with large amounts of post-construction debris. It’s always wise to understand post-construction debris costs in advance to avoid unexpected charges. 6. Hire a Junk Removal Service If convenience is your priority, hiring professionals is the easiest solution. Advantages No heavy lifting Fast and efficient Handles sorting and disposal When to Consider This Option Large volumes of bricks Limited time or equipment Mixed debris (brick + concrete + soil) Professionals also ensure proper handling when figuring out how to dispose of brick pavers or mixed materials safely. 7. Special Considerations for Different Types of Bricks Not all bricks are the same, and disposal methods can vary depending on their condition, use, and material type. Understanding these differences helps you choose the safest and most cost-effective solution. 1. How to Dispose of Brick Pavers Often reusable due to their uniform shape High demand in landscaping and patio projects Easy to clean and resell or donate If you’re wondering how to dispose of brick pavers, reuse or resale is usually the best option. 2. How to Dispose of Broken Bricks Not ideal for reuse in construction Best suited for recycling or landfill Can be reused as base material or fill This is the most practical approach for how to dispose of broken bricks efficiently. 3. How to Dispose of Brick and Concrete Together Most C&D recycling centers accept both materials Must be clean and free of contaminants Often processed into aggregate for reuse A common solution for how to dispose of brick and concrete responsibly. 4. How to Dispose of Old Bricks Can often be salvaged and reused Valuable for restoration or vintage-style projects Donate or sell if in good condition This is a key method when considering how to dispose of old bricks without waste. 5. How to Get Rid of Bricks from Demolition Projects Usually involves large volumes Best handled with dumpsters or junk removal services Requires compliance with local disposal regulations Ideal for those searching for how to get rid of bricks quickly and in bulk. 6. How to Dispose of Painted or Treated Bricks May not be accepted at all recycling centers Could require special handling depending on the coating Check local guidelines before disposal These bricks can’t always be recycled like standard ones. 7. How

How to Dispose of Roofing Shingles Properly: Safe, Legal & Affordable Disposal Methods

Replacing a roof is one of the biggest home improvement projects most homeowners will face. But once the new shingles arrive, another important question comes up: How to Dispose of Roofing Shingles. Many homeowners ask questions like “can you put shingles in the trash” or “can you take shingles to the dump,” especially after a roof replacement project creates piles of heavy debris. Roofing shingles disposal can quickly become complicated because shingles are bulky, extremely heavy, and often subject to local disposal regulations. The good news is that there are several safe and affordable ways to get rid of roof shingles. Whether you plan to rent a dumpster, haul debris to a landfill, recycle asphalt shingles, or hire a junk removal service, understanding your options can save time, money, and unnecessary stress. This guide explains everything you need to know about how to dispose of roofing shingles properly, including recycling options, landfill rules, disposal costs, and important safety tips. What Are Roofing Shingles Made Of? Before deciding how to dispose of roofing shingles, it helps to understand what they are made from. Different materials require different disposal methods. Asphalt Shingles Asphalt shingles are the most common residential roofing material in North America. They are typically made from: Fiberglass matting Asphalt coating Mineral granules These shingles are durable but extremely heavy once removed from a roof. Wood Shingles Wood shingles and shakes are often made from cedar or redwood. Untreated wood shingles may biodegrade naturally, but treated wood may require special disposal. Metal Roofing Shingles Metal roofing materials are often recyclable and may even have scrap value depending on the type of metal. Slate and Tile Roofing Slate and tile roofs are very heavy and usually require specialized hauling equipment during disposal. Knowing the roofing material helps determine whether shingles can be recycled, taken to a landfill, or handled as special construction debris. Pro Tip If your roof has multiple layers (common on older homes), removal gets heavier and slower. Consider hiring a licensed company; they often include disposal in their quote. Best Ways to Dispose of Roofing Shingles There is no single best solution for every homeowner. The right disposal method depends on the size of your roofing project, your budget, and your local regulations. Rent a Roofing Dumpster Dumpster rentals are one of the most popular solutions for large roofing projects. A roofing dumpster allows shingles, nails, underlayment, and other debris to be loaded directly from the roof into a designated container. Recommended Dumpster Sizes 10-yard dumpster: small roof repairs 20-yard dumpster: full residential roof replacements 30-yard dumpster: large or multi-layer roof tear-offs Benefits of Dumpster Rentals Convenient cleanup Faster project completion Reduced hauling trips Better job site safety Potential Downsides Roofing shingles are heavy, so exceeding weight limits may result in additional fees. Hire a Junk Removal Company If you do not have a truck or simply want to avoid the heavy lifting, hiring a junk removal company is another effective option. Junk removal crews will: Load shingles Haul debris away Dispose of materials properly This option works especially well for: Elderly homeowners Emergency roofing projects Small roofing jobs Homes with limited parking or driveway space Although junk removal services are more expensive than self-hauling, they save time and reduce physical strain. Recycle Asphalt Shingles Many homeowners are surprised to learn that asphalt shingles can often be recycled. Instead of sitting in a landfill, recycled shingles are commonly processed into material used for: Road paving Asphalt pavement Construction products How Asphalt Shingle Recycling Works Recycling facilities grind shingles into reusable material that can be mixed into asphalt products. Benefits of Recycling Roofing Shingles Reduces landfill waste Conserves natural resources Supports sustainable construction practices May lower disposal costs Materials Usually Accepted Most facilities accept: Asphalt shingles Roofing tear-offs Manufacturing scrap shingles Materials Often Rejected Facilities may reject: Asbestos-containing shingles Excessive wood contamination Large amounts of trash mixed with roofing debris Ask local recycling centers or roofing contractors about asphalt shingle recycling programs in your area. Use Construction Debris Facilities Some areas have specialized construction and demolition disposal facilities designed specifically for renovation waste. These facilities often provide: Faster unloading Easier debris sorting Better handling for heavy materials Construction debris services help homeowners, contractors, and businesses safely remove and dispose of renovation and demolition waste. These services commonly handle materials such as roofing shingles, wood, drywall, concrete, metal, bricks, and asphalt. Eco-Friendly Roofing Shingles Disposal Tips Reducing roofing waste benefits both homeowners and the environment. Order Materials Carefully Buying accurate quantities can help minimize leftover shingles after a roofing project. Reuse Extra Shingles Unused shingles may be useful for: Future roof repairs Shed roofs Small outdoor structures Donate Unused Materials Some community organizations or local contractors may accept unopened roofing materials for reuse. Avoid Illegal Dumping Dumping roofing shingles illegally can damage the environment and lead to significant fines. Improper disposal may contaminate soil, waterways, and public property. Always use approved disposal methods. How to Dispose of Old Roof Shingles Through Recycling (The Smart Choice) How to dispose of old roof shingles? Disposing of old roof shingles responsibly often means recycling—and 2026 is a great time to do it. Asphalt shingles can be repurposed into new pavement, road base, or even used in manufacturing brand-new shingles, reducing landfill waste and supporting sustainable construction practices. You can take shingles to a local recycling facility, construction debris landfill, or hire a professional junk removal service to handle the process efficiently. Many services will also ensure materials are sorted properly for recycling. If you’re planning broader home upgrades, you may also have to learn how to remove popcorn ceiling, especially when renovating older properties alongside roofing projects. Big benefits: Diverts up to 13 million tons of waste yearly from landfills. Saves raw materials (asphalt and aggregate). Many programs now pay lower tipping fees or even offer rebates. How to find a recycler near you: Visit Earth911’s recycling search and enter your ZIP code. Check ShingleRecycling.org—the most comprehensive directory for asphalt shingle programs.

How to Clean Out a House Full of Junk Step by Step

Cleaning out a house full of junk can feel heavy, stressful, and confusing, especially if clutter has built up for years. Many people face this task when moving, selling a home, handling an estate, or dealing with a major life change. Knowing where to start and how to move fast without making mistakes matters. This guide explains how to clean out a house full of junk in a clear and simple way. You will learn how to plan the work, remove trash, sort items, and handle bulky junk without wasting time or money. We also explain when help from companies that clean out houses makes sense. The goal is to help you finish the job with less stress and better results, while staying focused on what search engines and real people value today. What Does “Clean Out a House Full of Junk” Really Mean? When people talk about cleaning out a house full of junk, they are usually talking about a “whole-house” project. This is not just dusting shelves or sweeping the floor. It means going through every room, closet, and drawer to decide what stays and what goes. Sometimes, this happens because of a house cleanout sign from a landlord or a need to sell a property quickly. For some, it means clearing out a “hoarder” house where items have piled up to the ceiling. For others, it might be an estate cleanout after a loved one passes away. The goal is the same: to get the house back to a “blank slate” where you can see the floors and walls again. It involves physical work, like removing bulky household junk like old sofas or broken fridges. It also involves mental work, like deciding which old photos to keep and which broken toys to toss. How to Start: Planning Your Cleanout Before you pick up a single trash bag, you need a plan. If you just start grabbing things, you will get tired fast. To reach that top level of cleaning efficiency in your home, you must be organized. You cannot just run into a room and start throwing things. You will run out of energy before the first room is even half-done. 1. Set a Deadline If you don’t have a date in mind, the job might take months. Give yourself a weekend or a full week depending on the size of the house. If the house is very big, maybe take one room per day. A deadline keeps you moving when you want to stop. 2. Gather Supplies You will need heavy-duty trash bags. Do not buy the cheap ones, as they will rip and make a bigger mess. You also need sturdy boxes, thick markers, and strong tape. Gloves are a must-have to protect your hands from sharp edges or dirt. You might even want a few plastic bins for things you want to keep forever. 3. Find Help Don’t do this alone. It is too much for one person. Ask friends or look for companies that clean out houses. Professional teams like Junk Masterz have the tools to do the heavy lifting for you. Having a team makes the time go by faster and keeps you from getting hurt. 4. Think About Safety If a house has been full of junk for a long time, there might be dust or mold. Wear a mask so you don’t breathe in bad air. Wear boots to protect your feet. If you find old paint cans or chemicals, set them aside. You cannot just throw those in the regular trash. Step 1: Initial Trash Removal The fastest way to clean the house is to get rid of the obvious garbage first. This is what we call the “trash sweep.” Do not look at old mail, books, or photos yet. If you start reading old papers, you will stop working. Just look for things that are 100% garbage. This includes: Kitchen Waste: Old food boxes, expired cans, and empty jars. Paper Scraps: Junk mail, old flyers, and shredded paper. Damaged Items: Anything that is broken beyond repair, like a chair with three legs or a shattered vase. Actual Trash: Tissues, old wrappers, and bits of plastic. Walk through every room with a giant black trash bag. If it is dirty or broken, bag it. This “first pass” makes a huge difference. When the floor is clear of actual trash, you can see the items that actually need your attention. It creates a path for you to move around. You will feel better when you see five or ten bags of trash sitting on the curb. It shows that you are making progress. During this stage, don’t overthink. If you have to ask “Is this trash?” for more than three seconds, put it in a “maybe” pile and move on. The goal here is speed. This phase is about high-volume removal. If you have a huge amount of debris, look for removing bulky household junk services early so you don’t have piles of bags blocking your hallways. Sometimes people see a house cleanout sign and panic, but this first step of bagging the trash helps calm the mind. Step 2: Sorting Items (Keep, Donate, Sell, Recycle) Now that the trash is gone, you are left with things that might still have value. This is where most people get stuck. You need a system for sorting items: keep, donate, recycle. The best way to do this is to set up four stations in a large room, the garage, or even the driveway if the weather is nice. The “Keep” Station These are things you use every day or things that are very special to you. Be careful here. If you keep everything, the house will stay full of junk. Ask yourself: “Have I used this in the last year?” If the answer is no, you probably don’t need it. Put the “Keep” items in clear bins and move them to a safe spot. The “Donate” Station Many things are still

Color Palette