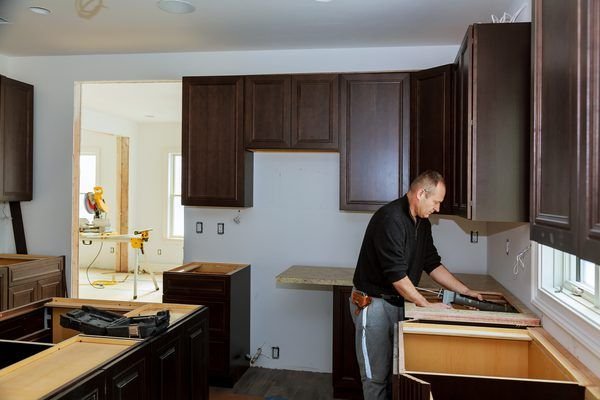
Thinking about giving your kitchen a fresh look? One of the first and most impactful steps in any kitchen renovation is tearing out the old cabinetry. Whether you’re upgrading to modern units, reclaiming wall space, or simply clearing the room before a full remodel, knowing how to remove kitchen cabinets the right way can save you hundreds of dollars in contractor fees — and a whole lot of frustration. Learning how to remove kitchen cabinets is an essential first step. While it may seem like a complex task, the process can be straightforward when done carefully and with the right tools. The good news? This is a project that most homeowners with basic DIY skills can tackle over a weekend. You don’t need a construction background or a truckload of tools. What you do need is a clear plan, some patience, and the right information. In this guide, we’ll walk you through everything — from the tools you’ll need to gather to how to remove old kitchen cabinets without damaging your walls or floors. We’ll also cover some common mistakes people make and how to avoid them. By the end, you’ll feel confident enough to get started on your own. What You Need to Know Before Removing Kitchen Cabinets Removing kitchen cabinets involves more than just unscrewing them from the wall. Cabinets are often secured with multiple fasteners, sealed with caulk, and sometimes connected to plumbing or electrical systems. To remove kitchen cabinets, first empty them, disconnect utilities, unscrew mounting hardware, cut caulk seals, and carefully detach them from the wall, starting with the upper cabinets to prevent injury or damage. For additional safety guidelines and best practices, you can refer to U.S. Consumer Product Safety Commission resources on home improvement safety. There are two main types of cabinets: Wall cabinets (mounted above counters) Base cabinets (installed on the floor) Wall cabinets should always be removed first to avoid working underneath heavy structures. Tools Required to Remove Kitchen Cabinets Safely Before you begin, gather all necessary tools. Having the right equipment makes the process smoother and prevents damage. Essential tools: Screwdriver or drill Pry bar Utility knife Hammer Stud finder Safety gloves and goggles Optional tools: Reciprocating saw Drop cloths or protective sheets Pro Tip:Using a power drill instead of a manual screwdriver can significantly speed up the process, especially when dealing with multiple cabinets. How to Remove Old Kitchen Cabinets Without Damaging Your Walls One of the biggest concerns homeowners have when learning how to remove old kitchen cabinets is wall damage. Here’s the truth: some minor drywall damage is almost inevitable — but you can keep it to a minimum. Tips to Minimize Wall Damage Always score the caulk lines first. This is the single most effective way to prevent large chunks of drywall from tearing away with the cabinet. Don’t skip this step, even if the caulk line looks thin. Go slow on the last screws. The closer you get to fully removing a cabinet, the more controlled and deliberate you should be. Rushing the final moments is when accidents happen. Use a pry bar properly. If a cabinet won’t budge after all screws are out, use a pry bar gently between the cabinet and wall — don’t just yank it. Stubborn cabinets are often stuck from old paint or adhesive, not hidden screws. Patch promptly. Once cabinets are off, fill holes and smooth rough patches as soon as possible. Dried spackle is much easier to sand smooth than hardened, settled compound. How to Prepare Before Removing Kitchen Cabinets Preparation is key when learning how to take out kitchen cabinets safely. Start with these steps: Turn off utilities: Shut off the water supply if working near sinks and cut the electricity near outlets. Empty all cabinets: Remove dishes, shelves, and loose items. Protect your space: Cover floors and countertops to prevent scratches. Label components: If you plan to reuse cabinets, label doors and hardware for easy reinstallation. Proper preparation reduces risks and ensures a cleaner removal process. For detailed home safety recommendations, you can review guidelines from the Occupational Safety and Health Administration to understand safe working practices during renovation projects. How To Remove Kitchen Cabinets Step-by-Step Guide Follow this detailed process to understand how to take off kitchen cabinets efficiently. Step 1: Remove Cabinet Doors and Shelves Start by unscrewing the hinges and removing cabinet doors. Take out shelves and store all hardware in labeled bags. This step reduces weight and makes cabinets easier to handle. Step 2: Cut Caulking and Paint Seals Use a utility knife to slice through any caulk or paint sealing the cabinet to the wall. This prevents tearing drywall when removing the cabinet. Step 3: Locate and Remove Screws Look inside the cabinet for screws attaching it to the wall studs. These are usually found at the back panel or near the top. Use a drill to remove them quickly and safely. Step 4: Detach Wall Cabinets First When learning how to remove kitchen cabinets, this step is critical. Always remove upper cabinets first. Have a helper support the cabinet while you unscrew it to prevent it from falling. Carefully lift it away from the wall once detached. Step 5: Remove Base Cabinets Next, move to base cabinets. If they are connected to plumbing: Disconnect sink pipes Turn off the water supply Unscrew cabinets from the wall and floor before gently pulling them away. Step 6: Lift and Remove Cabinets Carefully Avoid using excessive force. If the cabinet resists, check for hidden screws or nails. Slow and steady removal prevents wall damage and keeps cabinets intact if you plan to reuse them. Also Read: How to get rid of things when moving Mistakes to Avoid When Removing Kitchen Cabinets Many DIYers make simple mistakes that lead to costly repairs. Here are the most common ones: Skipping utility shut-off: This can lead to accidents or water damage Forcing cabinets off the wall: Causes drywall damage Missing hidden screws: Cabinets won’t come off
- (559) 908-2189
- junkmasterz@yahoo.com
- Fresno, CA 93725
- (239)-543-217-0108