Residential Junk Removal

Fence Removal Cost Guide: How Much Does It Cost to Remove a Fence?

If your fence is leaning, rotting, or just standing in the way of a new project, the first question you’re probably asking is simple: what will it actually cost to get it gone? Fence removal cost isn’t a single fixed number. It shifts based on the material you’re tearing out, how the posts were set, how much access a crew has to your yard, and what happens to the debris once the fence is down.  At Junk Masterz, we get this question daily from homeowners across the Central Valley, so this guide breaks down real 2026 pricing, what drives it up or down, and how to avoid paying more than you should. Average Fence Removal Cost in 2026 Most homeowners pay between $400 and $1,500 for professional fence removal, with pricing typically landing at $3 to $10 per linear foot. Small residential jobs (under 100 feet, wood or chain link, easy access) sit at the low end. Larger properties, heavier materials, and concrete-set posts push the total toward the higher end. Project Size Typical Fence Removal Cost Small backyard section (under 50 ft) $200 to $500 Standard residential yard (100 to 150 ft) $500 to $1,200 Large property or commercial fence $1,500 to $4,000+ These figures reflect standalone removal jobs where a crew is dispatched specifically to demolish and haul away the fence. If you’re bundling removal with a new installation, the math changes considerably, which we’ll cover shortly. Fence Removal Cost by Fence Type Wood Fence Removal Cost Wood is the most common residential fencing material, and it’s usually the least expensive to remove. Expect $3 to $7 per linear foot. Rotted or storm-damaged wood can actually go faster (and cheaper) because panels break apart with minimal effort, though brittle wood that splinters into small pieces sometimes takes longer to bag and haul than intact sections. Vinyl Fence Removal Cost Vinyl panels lift off their rails quickly, but the posts are almost always set deep in concrete. That combination puts vinyl fence removal cost at $4 to $9 per linear foot, with the concrete extraction being the real time sink rather than the panels themselves. Chain Link Fence Removal Cost Chain link fence removal cost typically runs $3 to $7 per linear foot, making it one of the more affordable options. The mesh rolls up easily, and steel posts often pull out without much resistance unless they’re anchored in deep concrete footings. Because the material is scrap steel, some contractors will quote a slightly lower chain link fence removal cost when they plan to recycle it rather than landfill it. Aluminum Fence Removal Cost Aluminum fencing is lightweight and corrosion-resistant, which keeps labor time down. Removal generally costs $4 to $8 per linear foot, and like chain link, the scrap value can offset part of the bill. Wrought Iron / Metal Fence Removal Cost Wrought iron and heavy ornamental metal fencing are the most expensive to remove, usually $6 to $12 per linear foot. The weight alone requires more labor, and many older installations were poured into oversized concrete footings that need to be broken up with power tools. Barbed Wire & Farm Fence Removal Cost Rural and agricultural properties often deal with barbed wire or field fencing strung across long distances. Pricing here is different from residential fencing because it’s charged more by total footage than by complexity. Expect $0.50 to $2.50 per linear foot for wire removal alone, with total project costs ranging from $1,000 to $3,000 for several hundred feet, especially if wooden T-posts or line posts need to be pulled and hauled along with the wire. Fence Removal Cost by Region (Labor Rate Differences) Labor rates account for a large share of any fence removal cost, and they vary meaningfully by region. As a general guide: Region Typical Hourly Labor Rate West Coast $50 to $85/hour Northeast $45 to $75/hour Midwest $35 to $60/hour South $30 to $55/hour A 150-foot wood fence removal in a higher-labor-cost region can run several hundred dollars more than the identical job in a lower-cost market, even though the material and linear footage are exactly the same. If you’re getting quotes from multiple companies, ask whether their pricing reflects local labor rates or a flat national average, since that gap explains a lot of the variation homeowners see between estimates. Fence Removal Cost Per Linear Foot Contractors almost always price by linear foot rather than by the hour, since it gives homeowners a predictable number upfront. Here’s how that scales: Fence Length Estimated Cost (at $3 to $10/ft) 50 feet $150 to $500 100 feet $300 to $1,000 150 feet $450 to $1,500 200 feet $600 to $2,000 One detail worth knowing: cost per foot usually drops slightly as total length increases. A crew that’s already on-site and set up doesn’t lose much efficiency covering an extra 50 feet, so longer jobs often come in a bit cheaper per foot than short ones. Standalone Removal vs. Bundled With New Fence Installation This is one of the most overlooked ways to save money. If you’re planning to replace your fence anyway, the cost to remove and replace fence sections together is almost always lower than paying for removal and installation as two separate projects. When a fence installation crew is already mobilized on your property with tools, a dump trailer, and labor scheduled, removing the old fence becomes a marginal add-on rather than a full standalone job. Bundled removal typically adds $1 to $5 per linear foot to an installation quote, compared to $3 to $10 per linear foot for a dedicated removal-only visit. If your fence is coming out either way, ask any installer for a combined quote before booking removal separately. It’s one of the simplest ways to lower your total cost to remove and replace fence sections on the same property. What’s Actually in Your Quote: Labor, Disposal & Equipment Cost Breakdown Homeowners often assume the entire fence removal cost is labor, but a typical quote breaks

What Size Dumpster Do I Need? A Practical Guide

You have a pile of debris, a project start date, and one question that shapes the whole week: what size dumpster do I need? Choose too small, and you pay for a second haul. Choose too big, and you pay for space that eats your driveway. Junk Masterz helps Fresno homeowners clear out junk and debris, and this guide focuses on the three things that cause most sizing mistakes: guessing volume, ignoring weight, and forgetting about space. The short version: most home projects fit a 10 to 20 yard container, and big remodels often need a 30 yard. The sections below show you how to confirm that for your own job. Quick Answer: Which Dumpster Size Fits Your Project? If you are asking how big of a dumpster do I need, start with this table, then confirm the result with the checks later in this guide. Project Typical size Approx. pickup loads Garage or single room cleanout 10 yard 3 to 4 One bathroom remodel 10 yard 3 to 4 Kitchen remodel 15 to 20 yards 5 to 8 Whole house cleanout 20 to 30 yards 6 to 12 Roof tear-off 10 to 20 yards, limited by weight See the weight section Large remodel or addition 30 yard 9 to 12 One pickup truck load is roughly 2 to 3 cubic yards, which is how the load counts above were estimated. What Does Dumpster Size Mean? Dumpster size is a measure of volume in cubic yards. One cubic yard is 27 cubic feet, or a cube about 3 feet on each side, so a 20-yard container holds roughly 540 cubic feet of debris filled level with the walls. Size does not tell you weight. Every rental comes with a weight allowance in tons, and that allowance is separate from volume. So when you wonder what dumpster size do I need, you are really answering three questions: how much volume, how much weight, and how much room you have on site. Dumpster Size Chart: Dimensions, Capacity and Typical Weight Limits Size Typical exterior (L x W x H) Pickup loads Typical included weight 10 yard 14 x 7.5 x 3.5 ft 3 to 4 1 to 3 tons 12 yard 14 x 7.5 x 4 ft 4 to 5 1.5 to 3 tons 15 yard 16 x 7.5 x 4.5 ft 5 to 6 2 to 3 tons 20 yard 22 x 7.5 x 4.5 ft 6 to 8 2 to 4 tons 30 yard 22 x 7.5 x 6 ft 9 to 12 3 to 5 tons 40 yard 22 x 7.5 x 8 ft 12 to 16 4 to 6 tons Dimensions and weight allowances vary by hauler and region. Treat these as planning ranges and confirm the exact numbers before you book. The 3-Check Method: Volume, Weight and Space Most sizing guides stop at volume. In practice, a dumpster has three limits, and whichever one you hit first decides your size. Run all three checks, then pick the smallest size that passes each one. If you keep asking what size dumpster do I need, this method gives you a repeatable answer instead of a guess. Check 1: Volume Measure each pile in feet, multiply length by width by height, then divide by 27. A pile that is 6 feet long, 4 feet wide, and 3 feet high is 72 cubic feet, or about 2.7 cubic yards. That is close to one pickup load. Furniture, cabinets and broken framing leave air gaps, so add 15 to 20 percent as a practical cushion. Check 2: Weight Convert heavy materials into tons and compare them with the allowance in your rental. Solid concrete weighs roughly 2 tons per cubic yard. A 10 by 10 foot patio that is 4 inches thick is about 1.2 cubic yards, so it weighs around 2.5 tons. That patio barely fills a 10-yard container, yet it can use up the whole weight allowance. Light items such as boxes and furniture hit the volume limit first, while concrete, soil, tile, and shingles hit the weight limit first. Check 3: Space Measure the drop spot before you book. A 20-yard container is about 22 feet long, and the truck needs a straight approach to set it down. The truck bed tilts during delivery, so low branches and power lines matter. Also look for steep slopes, soft ground, and tight gates. Plywood under the container helps protect a driveway, and the unit should stay clear of hydrants, mailboxes, and sidewalks. Between Two Sizes? Use These Tiebreaker Rules Sometimes the checks leave you between two sizes. These rules settle it. Your situation Lean toward Debris is heavy (concrete, soil, tile, shingles) The smaller size, and watch the tonnage Debris is bulky and light (furniture, boxes, carpet) The larger size The project may grow once walls or floors open up The larger size, only if the weight check passes Your driveway is tight The smaller size, with a plan for a swap Budget matters more than convenience The smaller size, loaded tightly Moving up one size often costs less than a second haul, but only when weight is not the limiting factor. Weight by Material: Why a Full Dumpster Isn’t Always Allowed Trucks and landfills work with weight limits, so heavy loads can be restricted even when there is visible room left. Light: household furniture, boxes, carpet, yard trimmings. These usually fill the container to the top. Medium: drywall, cabinets, fencing, mixed remodel debris. Expect to fill about half to two-thirds. Heavy: concrete, brick, soil, tile, roofing shingles. These may use up the allowance at about a third of the container. Here is a roofing example. A 2,000 square foot roof is about 20 roofing squares. Single-layer asphalt shingles often weigh roughly 200 to 350 pounds per square, which puts the shingles alone at about 2 to 3.5 tons. A 20-yard container may have the volume, but the allowance decides whether it works. Ask whether a heavy debris option with

What to Do If You Miss Trash Day: Complete Guide

You hear the truck rumble past, glance at the garage, and realize your full bins never made it to the curb. It feels awful, but it is rarely a disaster. Knowing what to do if you miss trash day turns a week of smelly bags into a one-hour problem. At Junk Masterz, we spend our days hauling away what regular collection leaves behind, so we know how quickly a missed trash day can grow into a much bigger pile. This guide covers what to do if you miss garbage day, from the first hour to the full week ahead. You will also find a quick-fix table, a day-by-day plan, and a few mistakes worth avoiding. Quick answer Call your waste provider and ask about a return or special pickup. If that is not an option, seal your bags, store them somewhere cool and covered, and move extra waste to a drop-off site or a haul-away service. Otherwise, your trash waits for the next scheduled collection. First, Was It Really a Missed Pickup? Not every full bin is your fault, and the right fix depends on which situation you are in. A late bin. Crews often start early, and many cities expect bins at the curb by about 6 or 7 a.m. Check your own rules. If you rolled the bin out after the truck passed, that is a missed trash day on your side, and your next regular collection is usually the only option unless your provider sells extra pickups. A skipped route. If the bin was out on time, the lid was closed, and nothing blocked the truck, but the bin is still full, the crew probably skipped you. Look for a tag or sticker on the bin. Crews sometimes leave one explaining why, such as an overfilled bin or a wrong item inside. A schedule shift. Holidays and bad weather often push collection back a day or more. Check your provider’s service alerts, then glance at your neighbors’ bins. If theirs are still full too, the delay is probably area-wide, and a missed garbage pickup on your street will likely be fixed without any effort from you. Missed Trash Day Quick-Fix Table: Match Your Situation to the Best Option What to do if you miss trash day depends on how much you have and how long until the next truck. Find your row. What you have Next pickup in 1 to 2 days Next pickup in 3 to 7 days 1 to 2 bags Seal, store in a cool spot, and wait Double bag, keep away from heat, or ask a neighbor with permission 3 or more bags Ask your provider about a return pickup Use a drop-off site or book a haul-away Bulky items (furniture, mattress) Keep indoors and check bulky pickup rules Schedule a bulky pickup or junk removal Food waste Double bag and keep out of the heat Freeze it, compost it, or drop it off Hazardous items (paint, batteries, chemicals) Keep sealed and away from kids and pets Use a household hazardous waste drop-off What to Do in the First Hour If you forgot to take out trash and the truck may still be working nearby, speed matters most. Check your provider’s app or website for delay notices. If you can see or hear the truck on your street or the next one, get the bins to the curb and call right away. A crew a block or two away can sometimes circle back, though no one can promise it. Ask your provider whether a return trip or special pickup is available, and what it costs. Contain what you have. Close lids, tie bags, and move anything animals can reach into the garage or a shed. Take a quick photo of your bin at the curb. It helps if you later need to prove the truck skipped you. How to Report a Missed Pickup Step by Step If your bin was out on time, report it the same day. Most providers take reports by phone, online form, or app, and some only accept them within a short window. Gather your address, the type of service (trash, recycling, or yard waste), and the date. Use the fastest channel your provider offers. State clearly that the bin was out by the required time, and mention your photo. Ask for a confirmation number and when the crew will return. Unless your city limits how long bins can stay out, leave the bin where crews can reach it. If nobody returns by the next day, follow up and quote your confirmation number. If you simply forgot, this process works differently. A report will not usually earn you a free return trip, so ask politely whether a paid special pickup exists. Missed Trash Day Timeline: Day 1 to Day 7 Most advice stops at “call your provider.” Real life means a week of bags in your house, so plan by stage. Missing trash day hurts less when you act early, and each stage below has one clear job. Day 1 and 2: Contain and Call Double bag everything and tie it tightly. Pull food scraps into a separate sealed bag and put it in the freezer. Store the rest off the ground in a garage or shed with the door closed. Then make the provider call, even if you expect a no. Knowing your options on day one saves guesswork later. Day 3 and 4: Reduce and Relocate Shrink the pile. Flatten boxes, rinse and recycle what your program accepts, and compost scraps if you can. Anything that leaks or smells should leave the house now, not on day seven. A trip to a drop-off site can be quicker than most people expect, and it clears the worst bags first. Day 5 to 7: Escalate Before the Next Pickup Do the math before collection morning. Many providers only take what fits in the bin with the lid closed, so extra bags may be left behind again. If your

How to Recycle a Blender: A Complete Guide

A dead blender tends to hang around. It sits in the cabinet with a cracked jar and the cord wrapped around the base while you decide if it is trash, recycling, or something in between. If you are wondering how to recycle a blender units the right way, the short version is this: skip the curbside bin, check whether yours has a battery, and send it to an e-waste or small-appliance drop-off.  At Junk Masterz, we help Fresno-area homeowners clear out leftover kitchen clutter like this, so the steps below cover each situation, including what to do with a broken blender. Can You Recycle a Blender? Short answer: Yes. Most blenders can be recycled, but they belong in an e-waste or small-appliance stream, not your home recycling cart. A blender looks simple, but it is a bundle of materials that nobody designed to be separated by hand. It has a motor with copper windings, steel blades and a shaft, a plastic or metal base, a glass or plastic jar, a rubber gasket, and a cord. Recyclers can recover most of that, but only after the unit is dismantled or shredded on proper equipment. So the practical answer to how to recycle blender parts is to send the whole unit to a facility that can split the materials for you. Many people ask, “Can I put a blender in the recycling bin?” In nearly every curbside program, the answer is no. Sorting lines are built for bottles, cans, and paper. A motor, a cord, and an exposed blade can jam machinery and injure the people working the line. Can You Throw a Blender in the Trash? Short answer: It depends on where you live, and in California it is safer to assume the answer is no. Rules vary by state, county, and hauler. In California, small appliances containing toxic materials such as mercury switches, heavy metals, or lead solder are banned from landfills. You cannot tell by looking at a blender whether any part falls into that group, so treat it as something a recycler should handle. Your county solid waste office can confirm the rule for your address.  Cordless models raise the stakes. A rechargeable blender with a lithium-ion battery should not go in ordinary trash or municipal recycling. A damaged battery can overheat when it gets compressed in a collection truck. If trash is truly your only option, treat it as the last step in how to dispose of a blender. Wrap the blade in thick cardboard, tape the cord to the base, and confirm with your hauler first. Which Type of Blender Do You Have? The right route depends on what is on your counter, so identify it before you load the car. Blender type Best route Main caution Corded countertop E-waste or small-appliance drop-off Wrap the blade Cordless or rechargeable Battery or household hazardous waste collection Never open the case Personal bottle blender E-waste drop-off Unscrew the blade and treat it as a sharp item Immersion (stick) blender E-waste drop-off The shaft blade is exposed Commercial or heavy-duty Appliance or scrap-metal recycler, or pickup Weight and lifting If your blender has a USB port or a charging dock, it contains a battery, no matter how small it looks. Soup blenders that heat are a separate case. They carry a heating element and extra wiring, which e-waste recyclers are equipped to handle, so do not send them to a glass or plastics bin. Fix, Sell, or Donate Before You Recycle Recycling is a good outcome, but reuse is better, and a few minutes of checking can save you the price of a new blender. The motor hums but the blades do not spin. The drive coupler, a small plastic or rubber piece linking the motor to the blade assembly, wears out with use. It is often cheap and replaceable. Look for the model number on the sticker under the base. The jar is cracked, but the base works. Jars are usually model-specific, so a buyer with a matching jar may want your base. The model number matters here too. It works fine. Clean it, pack the lid and jar together, and call a donation site first. Many decline incomplete appliances or ones with damaged cords. There is a burning smell, a melted cord, or sparking. Do not sell or donate it. Recycle it. A broken blender with a scorched motor is not a gift for anyone, so retire it. Where to Recycle a Blender Start with the options closest to home, then widen your search. Local and County Programs Counties often run household hazardous waste facilities or scheduled collection events that accept small appliances. In Fresno County, the regional household hazardous waste facility accepts all types of batteries, which makes it the place to ask about cordless blenders. Call before you drive, since hours, accepted items, and per-vehicle limits change. E-Waste Drop-Off Centers and Events Certified e-waste recyclers dismantle electronics and send the recovered metals and plastics onward. When you call, ask three things: whether they take small kitchen appliances, whether there is a fee, and whether the cord can stay attached. Some charge by weight, while others are free. Retailer and Manufacturer Take-Back Some stores and manufacturers take back old appliances, but the terms vary. Some require a new purchase and others do not. Check the policy by phone or on the website before you bring the blender in. How to Prepare a Blender for Recycling Once you know how to recycle blender components, the prep takes about ten minutes. Unplug it. For cordless models, power it off and take it off the charger. Pour out any liquid. Leftover smoothie leaks in a vehicle and attracts pests. Separate the jar from the base. Most jars twist off the blade assembly. Wrap the blade. Use gloves, then tape the blade assembly into thick cardboard or a folded towel. Handle broken glass carefully. Wrap shards in newspaper or cardboard and mark the package as sharp. Bundle the parts.

How to Dispose of Lawn Mower? The Right Way (Safe & Eco-Friendly)

Every garage has that one machine nobody wants to deal with: a mower that died mid-summer and now sits in the corner, dripping oil onto the floor. If you are wondering how to dispose of lawn mower equipment without breaking local rules or hurting your back, here is the short version.  It cannot go in your trash bin; the fluids must come out first, and the best route depends on whether the mower runs, how heavy it is, and what powers it. Junk Masterz is a local Fresno junk removal team, and this guide covers the decisions that usually trip people up. Quick Answer: Find Your Best Option in 30 Seconds Most old lawn mower disposal problems get easier once you sort the machine into one of five groups. Match yours below, then drain the fuel and oil, because nearly every facility refuses a mower that still holds fluids. Mower condition Best route Typical cost Effort Runs well Sell, give away, or donate Free, may earn money Low to medium Runs badly Sell for parts or take to a repair shop Free or a small payout Medium Won’t start or seized Scrap yard, bulk pickup, or junk removal Free, small payout, or a pickup fee Medium Riding or zero-turn Scrap yard with pickup, or junk removal Varies, call first High if done yourself Battery-powered Pack to battery recycling, body to scrap Usually free Low to medium How to Prepare a Lawn Mower for Disposal Preparation takes about thirty minutes and decides whether a yard, a driver, or a county site will accept your mower. Do these in order: Let the engine cool completely, then move the mower onto a flat, hard surface. Empty the fuel. Run the engine until it stops, or pump the fuel into an approved container. Never pour it on the ground or down a drain. Drain the oil into a sealed container. Tilt the mower with the air filter facing up so oil does not flood the filter. Pull the spark plug wire off so the engine cannot start by accident. Remove the battery from riding and electric models. Remove the blade, or wrap it in thick cardboard and tape it. A bare blade is the most common way handlers get cut. Brush off caked grass and dirt. Wet clippings add weight and make the mower unpleasant to handle. Take a few photos and note the model plate. You will want them for listings and phone calls. If you can, drain everything a day early and leave the mower tilted over a tray, since oil keeps dripping for hours. This step is the core of how to dispose of lawn mower equipment safely, and skipping it is the main reason people get turned away. Where Every Part of Your Mower Goes Most guides treat a mower as one lump. In practice, it is a pile of different materials, and each one has its own exit. Part Where it goes Engine Small-engine repair shop for parts, or scrap metal Deck and frame Scrap metal Wheels and axles Scrap metal, or keep as spares Blade Scrap metal, wrapped Used oil Used-oil collection point or hazardous waste site Fuel Reuse in another engine, or hazardous waste site Lead-acid battery Battery recycling Lithium battery Battery recycling or hazardous waste site, never the trash Plastic covers and bags Regular trash, unless local rules say otherwise Disposal Options for Mowers That Don’t Run Scrap Yards and Recycling Centers For a dead mower, a metal recycler is usually the first call. Steel decks and aluminum parts have value by weight, so you may leave with a few dollars instead of a bill. If you are asking where can I dispose of a lawn mower that is beyond repair, this is often the answer. It is also the most direct way of how to recycle old lawn mower parts, because the metal goes straight back into the supply chain. Remove plastic first, since yards typically pay only for metal. Bulk Pickup and Hazardous Waste Drop-Off Some cities include bulky metal items in scheduled pickups, but power equipment is sometimes treated differently, so ask before you set it at the curb. For the fluids, Fresno County has a permanent Household Hazardous Waste Facility and several network sites that take items such as batteries and automotive fluids. Check the county website for current hours and accepted items before you drive over. Junk Removal Pickup When the mower is heavy, your truck is full, or you simply do not have an afternoon to spare, a hauling crew does the lifting and transport. It is also the sensible route when the mower is one of several items, such as an old trimmer, a broken edger, and a pile of yard debris. Options for Mowers That Still Run If you are deciding how to get rid of a lawn mower that still works, selling or giving it away keeps it out of the waste stream entirely. List it with honest photos, the model number, and any quirks. A “free, you haul” listing usually moves a running mower within days. Donation works when you call first, because some organizations decline gas engines. Retailers occasionally run trade-in promotions when you buy a new mower, but do not count on one. A mower that runs poorly can still sell “for parts,” since carburetors, wheels, and engines have buyers. Riding, Zero-Turn, and Battery-Powered Mowers Heavy Riding and Zero-Turn Mowers A riding mower weighs several hundred pounds, so loading one is a real injury risk. Use a proper ramp and trailer, never improvise with plywood, and strap the machine down at several points. Check for transmission or hydraulic fluid in addition to fuel and oil. Many scrap yards will not drive out for a single machine, so ask early whether they offer pickup for heavy items. Electric and Robotic Mowers (Battery Safety) Lithium packs are the part that needs real care. Remove the pack, tape over the exposed terminals, and keep it somewhere

How to Dispose of Water Heater: The Complete 2026 Guide

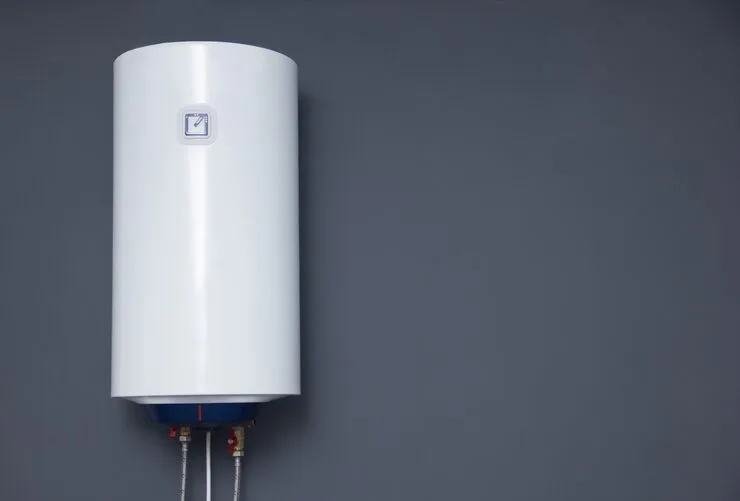
A dead water heater doesn’t just stop making hot water. It turns into a 100- to 150-pound problem sitting in your garage or basement, and most homeowners have no idea what to do with it next. If you’re searching for how to dispose of a water heater the right way, the good news is you have more options than “call a hauler and hope for the best.”  At Junk Masterz, we’ve pulled hundreds of old tanks out of Fresno homes, and the method that works best almost always depends on three things: whether the unit still runs, how much muscle you have access to, and how fast you need it gone. This guide walks through every real option, what it actually costs, how to prep the unit safely, and the mistakes that get people fined or hurt. Quick Answer: Which Disposal Method Fits You? Skip the guesswork. Match your situation to the method below: Buying a replacement tank: Ask the retailer or plumber for haul-away service first Unit still works: Sell it locally or donate it before scrapping it You want cash back: Take it to a scrap metal yard yourself No truck, no time, no patience: Book a junk removal pickup Not in a rush: Check your city’s bulk waste pickup schedule Upgrading to an efficient model: Ask your utility company about rebate and removal programs Is It Illegal to Throw a Water Heater in the Trash? In most cities, yes. Regular curbside trash pickup is built for bags and small bins, not a steel tank packed with insulation and metal fittings. Sanitation crews will typically skip it, and in many municipalities, setting one out without prior approval can result in a fine. The bigger issue is what’s inside the tank. Older units, especially those made before 2003, sometimes contain mercury switches in the gas control valve. Some pre-1980 tanks used asbestos-wrapped insulation. Neither belongs in a landfill, which is exactly why so many states restrict how to dispose of old water heater units through standard trash service. If you’re unsure what your unit contains, treat it as hazardous until a recycler or hauler confirms otherwise. How Much Does a Water Heater Weigh? (Why This Determines Your Options) Weight is the single biggest factor in choosing a disposal method, and it’s the part most guides skip. Standard 40- to 50-gallon tank: 100 to 150 pounds empty Tankless unit: 25 to 40 pounds Commercial tank (80+ gallons): 200 to 400 pounds A 40-gallon tank sounds manageable until you’re carrying it down a narrow basement staircase alone. That’s where most DIY attempts go wrong, not at the recycling center, but on the stairs. If your unit is in a basement, second floor, or tight utility closet, factor that into your decision before you commit to hauling it yourself. 8 Ways to Dispose of an Old Water Heater 1. Retailer Haul-Away (When You Buy a Replacement) Most big-box home improvement stores and local plumbing suppliers will remove your old tank when they deliver the new one. The install crew disconnects it, drains what’s left, and loads it onto their truck before they leave. You never have to touch it. The catch is you have to be buying a new unit through them, and not every retailer includes it automatically. Confirm haul-away at checkout, not after the crew shows up. 2. Scrap Metal Recycling Centers Water heaters are mostly steel, with copper wiring and brass fittings mixed in. Scrap yards pay for that. Depending on current metal prices and how much you strip out beforehand (plastic housing, foam insulation, wiring), you can typically walk away with $7 to $30. Call ahead. Some yards require the tank to be fully drained and the gas line capped before they’ll accept it. Others take it as-is but pay less per pound for the extra prep work they have to do. 3. Junk Removal Services This is the option most homeowners land on once they realize how heavy and awkward these tanks are to move. A junk removal crew disconnects the lines if needed, carries the unit out from wherever it’s sitting, whether that’s a basement, garage, or attic, and takes care of drop-off at the right facility. Junk Masterz handles this exact job across Fresno every week, and pricing generally runs $75 to $150 depending on access and location. If you’re also clearing out other items during a move or renovation, bundling the pickup with a broader Residential Junk Removal Fresno CA appointment usually saves money compared to booking a single-item pickup. 4. Municipal Bulk Waste Pickup Many cities schedule bulk-item pickups separately from regular trash routes. You place the water heater at the curb on your assigned day, sometimes for free, sometimes for a $25 to $50 fee. The tradeoff is timing. Bulk pickup days are often once a month or require advance scheduling, so the tank might sit in your driveway for a week or two. Most cities also require the unit to be drained and the gas line disconnected before it goes to the curb. 5. Utility Company Rebate or Trade-In Programs If you’re upgrading to a more efficient model, check your gas or electric provider’s rebate page first. Some programs bundle a cash rebate ($50 to $300) with free removal of the old unit as part of the installation. This is one of the most overlooked ways to handle water heater recycling because most homeowners never think to ask their utility company before calling a hauler. 6. Donate a Working Unit If the heater still functions and isn’t more than about eight to ten years old, donation is worth considering before you scrap it. Organizations that accept used building materials and appliances will often take a working unit, provided it passes a basic safety check. Call ahead. Most donation centers won’t send a truck for a single appliance, so you’ll need to handle transport yourself. 7. Sell It Online A functioning tank can bring $50 to $200 on local marketplace sites,

How to Dispose of Small Appliances (Without Harming the Planet)

Old toasters, blenders, coffee makers, and hair dryers are easy to ignore until they fill a cabinet. The right answer depends on the appliance’s condition, whether it contains a battery or electronics, and what your local disposal program accepts. Knowing how to dispose of small appliances starts with choosing the correct route before you put anything in a cart. For larger home cleanouts, Junk Masterz is also an option for handling the physical removal. A working item is usually better suited to reuse, donation, or resale. A broken item may belong at an appliance or e-waste facility, while battery-powered products need extra care. When several items are involved, pickup can be more practical than making repeated trips. Quick Answer: Which Disposal Option Fits Your Appliance? Condition Best move Why Works fine Donate or sell Someone else gets years of use Works badly Test, then repair Often a cord, switch, or fuse problem Dead, no battery E-waste drop-off or metal recycler Copper, steel, and aluminum get recovered Has a rechargeable battery Battery-safe drop-off Damaged lithium cells are a fire risk Smart or Wi-Fi enabled Factory reset first, then any option above Your data may still be stored inside Why Small Appliances Don’t Belong in the Regular Trash Small appliances look harmless, but circuit boards and batteries can contain lead, mercury, and cadmium. California’s Department of Toxic Substances Control says most e-waste exhibits toxic characteristics when it is thrown away. The metals inside are also worth recovering, which is why a recycler wants your toaster more than a landfill does. Rules matter here too. California classifies hazardous electronic devices and batteries as universal waste, and the state’s fact sheet says no person or business may put universal waste in the trash, households included. The size of the item is the trap: it is easy to carry, so it ends up in the bin. What Counts as a Small Appliance? If it plugs in or runs on a battery and one person can carry it, it usually counts. Category Examples Kitchen Toasters, toaster ovens, blenders, mixers, coffee makers, kettles, air fryers, slow cookers, rice cookers Personal care Hair dryers, straighteners, curling irons, electric toothbrushes, shavers, trimmers Around the house Vacuums, fans, space heaters, humidifiers, irons, steamers, desk lamps What does not count: refrigerators, freezers, window air conditioners, and dehumidifiers. These contain refrigerant and need certified handling. Our guide on how to get rid of old appliances covers the larger units. 5-Minute Prep Checklist Before You Get Rid of Anything Good prep makes disposing of small appliances faster and safer: Unplug it and let it cool. Irons, kettles, and heaters hold heat for a while. Test it on a different outlet. A bad outlet is more common than people think. Remove removable batteries. Tape the terminals of lithium cells before storing them. Empty and wipe it down. Crumbs, grease, and water attract pests and make recyclers less willing to take it. Leave the cord attached. The copper in the cord is part of what makes the unit worth recycling. How to Dispose of Small Appliances: 5 Eco-Friendly Ways 1. Repair or Upcycle It First Check the plug fuse, the cord near the plug, and any loose blades or knobs. A simple rule: if the repair costs more than half the price of a new unit, move on. If it is truly finished but the body is sound, a blender jar makes a decent utensil holder and a toaster shell works as a planter. 2. Donate or Sell Working Appliances Clean it, include every lid and attachment, and test it before you hand it over. Thrift stores, community kitchens, and local resale groups tend to move working small appliances quickly. Do not donate anything with a frayed cord, a broken tip-over switch, or an open recall. Those belong in recycling. 3. Use Recycling Centers and Community E-Waste Events This is the most reliable answer to where to recycle small kitchen appliances. Call before you drive and ask three questions: do you take appliances with cords, is there a fee, and how do you want batteries handled? If your city runs periodic collection events, saving items for one trip is often easier than making several. 4. Try Manufacturer and Retailer Take-Back Programs Some manufacturers and retailers accept old units by mail or in-store, sometimes when you buy a replacement. Programs differ on size limits and accepted categories, so confirm the details before you box anything up. 5. Book a Junk Removal Pickup for Bulk Loads Picture a kitchen remodel that leaves you with a microwave, toaster oven, stand mixer, and two coffee makers. Hauling that pile to three different drop-off sites eats a Saturday. Junk Masterz focuses on recycling and donating where possible, and our Residential Junk Removal Fresno, CA service fits cleanouts, estate sorting, and homes where lifting is a problem. Can You Put Small Appliances in the Trash? Do not assume an appliance belongs in household garbage simply because it fits inside the cart. Local rules can exclude electronics, batteries, or other materials from ordinary trash. In the City of Fresno, electronics and household batteries are listed as unacceptable in the gray garbage cart. The city directs residents to its recycling resources and Recycling Hotline for disposal guidance. So when deciding how to dispose of appliances, check your exact city or service area first. Appliance-by-Appliance Disposal Cheat Sheet Appliance Best route Watch out for Toaster E-waste or metal recycler Empty the crumb tray, keep the cord Blender Donate if it works; otherwise recycle Donate an intact jar separately Microwave E-waste drop-off or take-back Never open it; the capacitor can hold a charge Hair dryer E-waste recycler A damaged cord means no donation Air fryer Donate or recycle Flaking nonstick means recycle Electric toothbrush Battery-safe drop-off Built-in rechargeable cell Vacuum Donate or recycle Empty the bin, reset robot models Space heater Recycle Never donate with a damaged cord or switch Humidifier Recycle Drain and remove mineral buildup Iron Metal or e-waste recycler Cool fully

How Much Does Shed Removal Cost? Prices and Tips Explained

You have walked past that leaning shed for three summers. The door will not close, wasps have claimed one corner, and the floor gives a little more every year. Sooner or later the practical question arrives: how much does shed removal cost, and is it worth handing off to someone else? Small sheds with easy access are usually a modest expense. Large sheds, concrete bases, and tight backyards push the price up fast. Junk Masterz hauls away sheds, debris, and the clutter inside them across the Fresno area, and this guide explains what drives the final number so you can budget before anyone touches a panel. Quick Answer: Average Shed Removal Cost Shed removal cost comes down to three things: labor hours, the volume of debris, and what sits under the shed. National home-service pricing guides commonly list labor at about $50 to $100 per hour. For a small wooden shed on open ground, many homeowners should plan on a few hundred dollars. A large shed on a slab, or one that needs a crew to carry debris through a narrow side gate, can climb well past $1,000. Those figures are planning ranges, not quotes. If you are asking how much does it cost to tear down a shed in your own yard, photos and measurements will give you a far better answer than any national average. Shed Removal Cost by Size and Material Material changes the work more than most people expect. Here is how common shed types compare. Shed type What the crew deals with Cost direction Small wood (6×8 to 8×10) Light framing, usually one load of debris Lower Large wood (12×16 and up) Heavy floor joists, roofing, several loads Mid to high Metal Quick to unbolt, but sharp panels need careful handling Low to mid Resin or plastic Light panels that separate fast Low Brick, block, or concrete Real demolition, heavy debris, equipment High A wood shed with a plywood floor and pressure-treated skids is heavier than it looks, and weight matters once the debris reaches the disposal site. Shed Removal Cost Per Square Foot Most crews do not quote shed removal per square foot, and for good reason. Two 100-square-foot sheds can be completely different jobs: one is a resin unit on gravel, the other is a wood shed on concrete piers with a built-in workbench. Square footage is only a rough clue about debris volume. A 10 by 12 shed covers 120 square feet of floor, but its walls, roof, and floor frame add up to far more material than the footprint suggests. Shed Removal Cost by Method: Which Option Fits You? A professional shed removal service like Junk Masterz handles teardown and hauling in one visit, but it is not the only route. Each method trades money against time and effort. Full-Service Professional Removal A crew dismantles the shed, loads every piece, and sweeps the area. It costs the most on paper and saves the most effort. For a typical backyard shed, this fits under our Residential Junk Removal Fresno, CA service, and you can text photos for a quote before booking. DIY Demolition Plus Dumpster Rental You pay for tools, a rented bin, and your weekend. Fresno summer heat is a real constraint here, because swinging a pry bar at 3 p.m. in triple-digit weather is a fast way to get hurt. Start at sunrise and stop by late morning. Hybrid: DIY Teardown, Professional Haul-Away You take the shed apart and stack the pieces, then a hauler takes the pile. This often lands in the middle on price, because hauling is priced by the space your pile uses. Stack panels flat and tight to keep the load small. Selling, Donating, or Relocating Instead of Removing A sound shed may find a new owner willing to dismantle it for free. List it with a clear “buyer removes” note. Rotted or pest-damaged sheds rarely qualify. What Affects Shed Removal Cost? 1. Size of the Shed More panels, more roofing, and more framing mean more labor and more truck space. 2. Type of Materials Metal comes apart fast, wood needs cutting, and masonry needs breaking. Treated lumber and asphalt roofing can change how debris is sorted and disposed of. 3. Accessibility Carrying debris 15 feet to a driveway is quick. Carrying it through a tight gate and around a pool is not. Poor access can add more labor than the shed’s size itself. 4. Condition of the Shed Rotted wood crumbles into small pieces that take longer to gather. Old sheds also hide rodent nests, wasps, and spiders, which slow a crew down. A newer shed screwed together tightly can take longer to unscrew than a rotted one that falls apart. 5. Foundation Type Skids on gravel are easy. Concrete block piers and slabs add breaking, lifting, and heavier disposal. 6. Disposal Methods Some haulers bill by truck space, others by weight. Clean wood and metal can often be recycled, which keeps more material out of the landfill. Do the Math: A Simple Shed Removal Cost Formula Use this to sanity-check any quote: Labor (crew hours x hourly rate) + disposal + extras (slab, utilities, permits) = total Example only: if a crew bills $75 per hour and finishes a small wood shed in 4 hours, labor is $300. Add one load of disposal and any extras, and you have a number to compare against quotes. This is the most reliable way to answer how much does shed removal cost for your specific property. If a quote lands far above your math, ask what it includes. Hidden Costs People Don’t Expect Permit Fees Some cities require approval for removing larger accessory structures. Check with the City of Fresno or Fresno County building department before you start, since rules vary by size and location. Dump or Disposal Fees A low labor quote can hide a separate landfill charge. Ask whether disposal is included. Asbestos or Hazardous Materials Older sheds may have asbestos in siding or

How to Dispose of Glass Safely: Broken, Recyclable, and Hard-to-Recycle Glass (2026 Guide)

One slipped wine glass is all it takes. Suddenly, the whole kitchen floor is covered in tiny, nearly invisible blades. Or maybe you are staring at a garage shelf of old jars beside a cracked mirror, unsure which goes where. Either way, knowing how to dispose of glass properly protects your family, your pets, and the person who empties your bin.  This guide from Junk Masterz sorts glass neatly by type and condition so you can stop guessing. If you have ever asked How do you get rid of glass that is not a bottle, the answers are waiting below. Quick answer: Sort before you toss. Clean, whole bottles and jars go to recycling. Drinking glasses, mirrors, window panes, Pyrex, and ceramics go out with regular trash. Broken pieces belong in a firm box, taped shut and labeled so collectors know what is inside. Bulbs often need a special drop-off, so check your local program first. Where Does Your Glass Go? A 3-Question Disposal Path The best way to dispose of glass is the one that matches both its type and its condition. Ask these three questions in order. Is it a food or drink bottle or jar? Whole ones usually go to recycling. Glassware, mirrors, and bulbs follow other routes. Is it broken? Broken pieces, even from a recyclable bottle, need to be boxed, taped, and labeled. Loose shards are what slice through bags and hurt the people handling them. Is it too big or heavy for a normal bin? Window panes, shower doors, and tabletops usually need bulk pickup, a drop-off site, or a hauler. Once you can answer all three, how to dispose of glass turns into a routine instead of a debate at the trash can. Which Glass Can Be Recycled and Which Can’t Glass You Can Recycle Recycling programs are built around container glass: the bottles and jars that once held drinks, sauces, jam, and pickles. This glass shares a similar recipe, so it melts together cleanly and can become new containers. Glass That Never Belongs in the Recycling Bin Drinking glasses, ceramics, mirrors, window glass, picture-frame glass, and bulbs are made differently. Pyrex and other oven-safe glass need much more heat to melt, so one dish mixed into a batch of bottle glass can spoil the whole run. Mirrors carry reflective coatings, and some bulbs contain metal parts or mercury. That is why even a clean, intact drinking glass is a trash item in most areas. How to Prepare Bottles and Jars for Recycling Empty and rinse. A quick rinse is enough. Leftover food is the issue, not a spotless shine. Remove lids. Follow your local rules for where metal and plastic caps go. Leave the labels. Most programs do not ask you to peel them. Sort by color only if asked. Some programs want clear, green, and brown kept apart. Many do not. Keep it whole. Do not smash bottles to save space. Whole containers are safer to carry and easier to sort. How to Dispose of Broken Glass Safely When something shatters, how you pack the pieces matters as much as how you pick them up. Here is how to dispose of broken glass in a way that protects everyone downstream. What You Need Before You Start Thick gloves and closed shoes Safety glasses A small, firm cardboard box (small on purpose, because glass is heavy and a large box can split at the bottom) Packing tape and a marker Old newspaper or a towel you are ready to throw away Damp paper towels and a flashlight Then follow these steps: Clear the area. Move kids and pets out of the room. Collect. Lift big pieces with gloved hands into the box. Use a brush and dustpan for the rest. Cushion. Layer newspaper over the glass so the pieces do not rattle against the cardboard. Seal and label. Tape every seam, then write “Broken Glass” on the top and sides. Place in the trash. Set the box in your regular trash cart, never in recycling. That is how to dispose of broken glass safely without relying on luck. How to Clean Up Tiny Shards: The Flashlight Check and 24-Hour Recheck The pieces you can see are rarely the problem. The ones you cannot see are. Turn off the overhead light, hold a flashlight low and almost flat against the floor, and sweep the beam slowly. Tiny fragments glint like frost. Press a damp paper towel or a slice of bread onto each glint to lift it, or dab hard floors with wide tape. On carpet, use tape or a lint roller. Drop everything into the same box. Do not stop at the edge of the spill. Fragments bounce into hallways and slide under appliances. Then do the part most people skip: the next morning, walk the area in shoes and repeat the light check before bare feet or paws touch the floor. If you want to know how to get rid of broken glass completely, that second pass is the habit that finishes the job. Mistakes to Avoid When Throwing Away Broken Glass Part of learning how to dispose of broken glass safely is knowing which shortcuts backfire: Using bare hands or a sponge. Fragments embed in sponges and skin. Relying on a thin bag. Sharp edges cut through plastic. Vacuuming. Sharp bits can damage the hose and filter, fine dust can blow back into the room, and a broken fluorescent bulb should never be vacuumed. Reusing the cleanup cloth. Slivers hide in the fibers. Sending it down the sink or disposal. Glass does not belong in plumbing. Tossing it in recycling because glass is recyclable. Most curbside programs refuse broken glass. Item-by-Item Glass Disposal Chart Rules vary by city, so treat this as a starting point. Item Recyclable? Where it goes Prep tip Wine, beer, or soda bottle Yes Curbside or glass drop-off Rinse, remove cap Food jar Yes Curbside or glass drop-off Scrape out residue Drinking glass No Regular

How to Dispose of a Dishwasher: 7 Safe Ways, Costs & Local Rules (2026 Guide)

A dead dishwasher has a way of becoming everyone’s problem at once. It is heavy, still wired and plumbed into the cabinet, and far too big for your trash bin. If you need to know how to dispose of dishwasher units without a fine, a flooded floor, or a strained back, this guide from Junk Masterz covers the whole job, from disconnecting to drop-off. Quick answer: Cut the power, close the water valve, detach the supply and drain lines, then unscrew the unit from under the countertop. After that, match the exit to its condition. Let the store delivering your new one take it, schedule a bulky-item collection through your city or waste hauler, pay a crew to carry it out, sell or donate it if it still runs, or take a dead one to a scrap yard or appliance recycler. Which Disposal Method Fits Your Situation? Your situation Best route Why it works Works fine Sell or donate Someone gets use from it Dead, you have a truck Scrap yard or recycling drop-off Lowest cost, sometimes a small payout Buying a new one this week Retailer haul-away Old unit leaves on delivery day Stairs, no truck, bad back Removal crew They carry it out for you No rush, city offers it Bulky-item pickup Cheap, but tied to a set date Already disconnected, facility nearby Transfer station drop-off Quick if you can haul it Why Proper Dishwasher Disposal Matters A dishwasher is not bag-and-toss trash. Sharp edges, a pump that holds water, and wiring that may still be live make careless handling risky. Knowing how to dispose of dishwasher appliances properly also keeps steel and copper in use and helps you avoid illegal dumping fines. Facilities set their own appliance rules, so a quick call saves a wasted trip. Are Dishwashers Recyclable? Yes, most of the unit can be recycled: Tub and frame: stainless or coated steel in many models, plastic in cheaper ones Motor and pump: steel with copper windings Wiring: copper Racks and baskets: coated wire or plastic Control board: electronics some recyclers handle separately So, can you scrap a dishwasher? Yes, and it is easier than scrapping a fridge because dishwashers do not use refrigerant. Expect a small payout at best. A stainless tub is usually worth more than a plastic one, and prices follow the metal market, so treat any check as a bonus. How to Dispose of a Dishwasher the Right Way For how to dispose of old dishwasher units once they are disconnected, four routes cover most homes. Recycle or Scrap It Call first and ask whether the yard takes whole units or wants plastics and electronics removed. Bring it upright, strapped down, and wear gloves. Some places pay a few dollars, some take it free, and a few add a handling fee. Hire a Junk Removal Service A crew comes into the kitchen, carries the unit out, and delivers it to a recycler or reuse outlet. It suits built-in units in tight spaces, upstairs kitchens, and cleanouts with many items. Ask whether disconnection is included, since many crews only take units that are already free. Donate or Sell a Working Unit Run a full cycle first. If it fills, cleans, drains, and does not leak, post it on an online marketplace at a fair price and say pickup is required. Reuse stores and local charities may accept it too, but call before loading. Use Retailer or Manufacturer Haul-Away Ask for haul-away at checkout and get it written on the order. Fees run from free to modest. Delivery teams often refuse a unit that is still plumbed in, so disconnect it the day before. Can You Take a Dishwasher to the Dump? Sometimes. Some landfills and transfer stations take appliances for a fee, some direct you to a metal bin, and some send you elsewhere. If you are unsure where to dump old dishwasher units legally, call ahead about fees, hours, and whether you need proof of residency. Leaving one by a dumpster or roadside counts as illegal dumping. Where to Dispose of a Dishwasher Near You Check your county solid waste page first, then call around: County transfer station or appliance drop-off Scrap metal yard Appliance recycling center City or hauler bulky-item program Reuse store, if it still works A five-minute call is the fastest way to settle where to dump old dishwasher loads in your area. How to Remove a Dishwasher Step by Step Before lifting, most people wonder about the weight. The short answer to “how much do dishwashers weigh” is that many full-size built-in models run roughly 50 to 100 pounds, so check your model label and bring a second person. Turn off the breaker. Many units are hardwired through a box behind the lower panel, so confirm power is dead by trying to start a cycle. Close the supply valve under the sink. Remove the lower kick panel, set down a towel and shallow pan, then disconnect the water line and drain hose. If hardwired, separate the wires and cap each one. Remove the mounting screws holding the unit to the underside of the counter. Retract the leveling feet so the unit sits lower, then slide it out slowly over cardboard to protect the floor. Cap the supply valve and plug the drain connection if no new unit is going in right away. Open lines invite leaks and sewer smell. If any step feels beyond you, stop and call a plumber or removal crew. How to Prepare a Dishwasher for Disposal or Pickup Let leftover water drain into the pan before moving it, since the tub and pump hold more than you expect. Wipe out food residue so the truck does not smell. Strap or tape the door shut, or remove it if the unit will sit outdoors where a child could climb inside. Bundle the hoses and racks, photograph the model label, and clear the path to the exit. What to Do With an Old Dishwasher That

Color Palette