How

How Much Does Construction Debris Removal Cost in 2026?

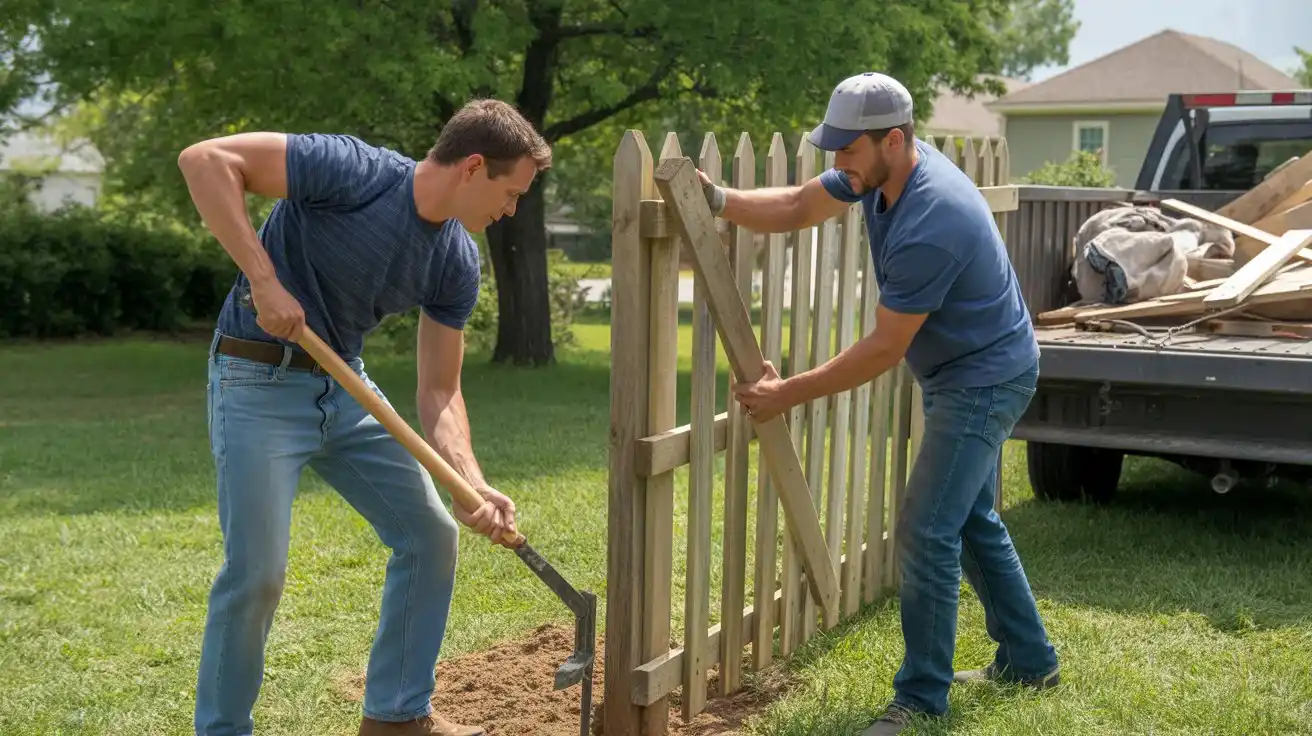
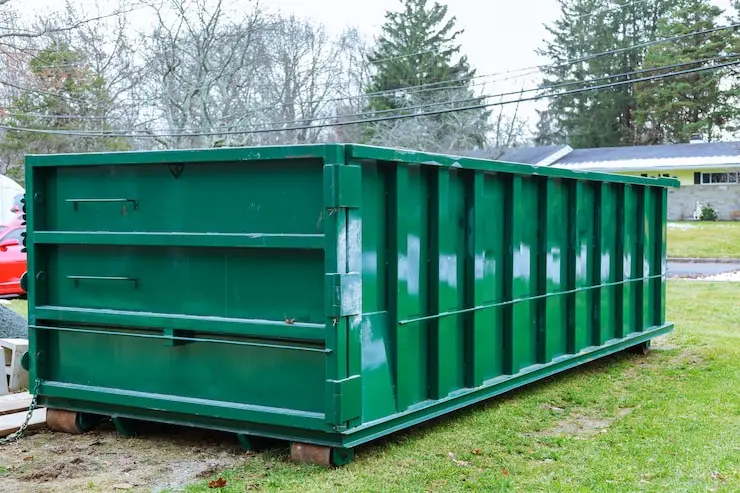
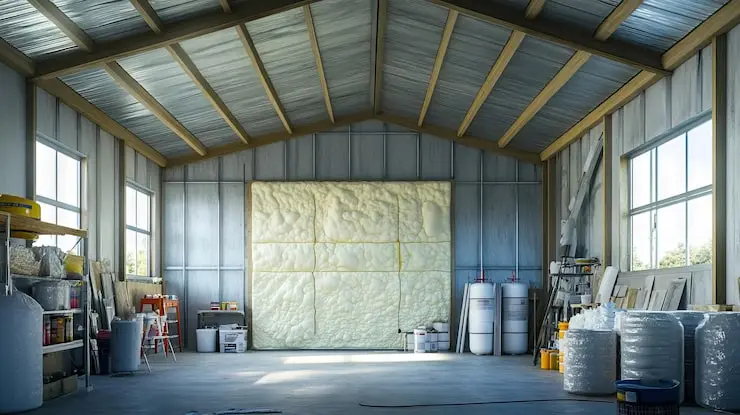
Understanding construction debris removal cost is one of the most overlooked parts of any renovation or construction project. Homeowners often focus on materials and labor, only to realize later that debris removal can take a noticeable bite out of the budget. Contractors see this issue daily when cleanup delays slow projects or cause extra fees. This guide follows a simple goal: explain costs clearly, honestly, and in a way anyone can understand. You will learn what affects pricing, how to estimate your own cost, and the cheapest way to get rid of construction debris without risking fines or injuries. Quick Answer: How Much Does Construction Debris Removal Cost? For most homeowners in 2026, the average cost of construction debris removal ranges between $300 and $800. A small project might cost as little as $100 for a single pickup, while large-scale demolitions can exceed $1,000. Most companies charge by cubic yard volume ($50–$80 per yard) or by truckload (roughly $450 for a standard half-load). What Is Construction Debris? Construction debris includes all waste materials created during building, remodeling, demolition, or repair work. This debris differs from everyday household trash and typically requires specialized handling. Home renovation debris often builds up faster than expected. A single room remodel can generate piles of drywall, wood, and flooring in just a few days. Larger projects add concrete, roofing, and fixtures to the mix. Common construction debris materials list Drywall, plaster, and sheetrock Wood framing, trim, and scrap lumber Flooring materials such as tile, carpet, laminate, and vinyl Cabinets, countertops, and vanities Roofing shingles and underlayment Concrete, brick, and masonry Metal pipes, wiring, and fixtures Insulation and packaging materials The type of debris matters because some materials are heavier, harder to recycle, and more expensive to dispose of. These details directly affect construction waste removal cost and overall pricing. Construction Debris Removal Cost Factors When you ask for construction debris removal pricing, companies don’t just pick a number out of a hat. They look at several things to decide the price. Understanding these factors is the best way to find the cheapest way to get rid of construction debris. 1. Volume Volume is usually measured in cubic yard volume. Think of a washing machine; that’s about one cubic yard. Most junk removal trucks hold about 14 to 16 cubic yards. Minimum loads: Usually cost $75–$150. Full truckloads: Can cost $500–$800. If your debris is “fluffy” (like insulation), it takes up more space but weighs less. 2. Weight Weight is the biggest price jumper. Landfills charge “tipping fees” based on weight. If you have a pile of concrete or bricks, it might not look big, but it could weigh three tons! Heavy surcharge: Most companies add an extra fee if the load is mostly concrete, dirt, or tile because it costs them more to dump it. 3. Removal Method How you choose to get rid of it changes the construction waste removal cost: Full-Service Junk Removal: Experts like Junk Masterz come into your house, pick up the heavy stuff, and haul it away. This is the easiest but costs a bit more for the labor. Dumpster Rental: You pay a flat fee (usually $300–$600) to have a bin sit in your driveway for a week. You do the heavy lifting. Bagster: A “dumpster in a bag” you buy at the store. It’s good for very small projects, but can get expensive if you need more than one. 4. Labor If your debris is on the third floor of an apartment with no elevator, expect to pay more. Local debris removal experts charge for the time it takes to carry items to the truck. If the pile is sitting right on your driveway, the labor cost is much lower. 5. Location Prices in big cities are higher than in small towns. This is because “tipping fees” (what the landfill charges the truck) vary wildly. In some places, it costs $40 to dump a ton; in others, it’s over $100. If you are looking for Construction Debris Removal in Fresno, local rates will depend on the current fees at the Cedar Avenue Recycling station. Cost Breakdown: What to Expect Load Size Typical Price Range Best For Minimum Load $75 – $150 A few bags of tile or a small vanity. 1/4 Truckload $150 – $250 Small bathroom refresh. 1/2 Truckload $300 – $450 Small kitchen gut or large closet demo. Full Truckload $500 – $800 Large room remodel or deck removal. Note: Prices can vary based on the average cost of construction debris removal in your specific city. How To Estimate Your Cost While the basic math for construction debris removal pricing is straightforward, the “real world” variables like material density and air space can quickly change your final bill. Follow this professional three-step process to get a highly accurate estimate. Step 1: Use the Advanced Volume Formula Most local debris removal experts charge by the cubic yard. To find yours, measure the length, width, and height of your debris pile in feet. The Professional Volume Formula: (Length*Width*Height) /27 = Total Cubic Yards Pro Tip: The “Air Space” Rule If you are estimating debris from a building that is still standing (like a shed or a room demo), experts multiply the total volume by 0.33. This accounts for the empty air space inside the structure so you don’t pay for “empty” cubic yards. Step 2: Convert Volume to Weight Since many professional debris removal experts pay tipping fees by the ton, heavy materials like concrete or brick are often charged differently than “fluffy” materials like wood or drywall. Use these common conversion factors to see if your load will hit a weight surcharge: Material Type Weight per Cubic Yard (lbs) Tons per Cubic Yard Mixed Construction Debris ~350 – 417 lbs ~0.20 Tons Concrete (Loose/Scrap) ~1,400 – 1,855 lbs ~0.70 – 0.93 Tons Drywall (Sheetrock) ~467 – 500 lbs ~0.23 Tons Asphalt Shingles ~700 – 731 lbs ~0.35 Tons Brick (Whole) ~3,024 lbs ~1.51 Tons Step 3:

How to Dispose of Old Office Furniture: The Complete Guide

Is your office storage room starting to look like a graveyard for broken chairs and scratched desks? Or maybe you are upgrading your workspace and don’t know what to do with the old gear. You are not alone. Every year, businesses face the huge challenge of clearing out old assets to make room for the new. Figuring out how to dispose of office furniture isn’t just about tossing things in a dumpster; it is about saving money, protecting the environment, and keeping your workspace efficient. Whether you are a facility manager for a large corporation or a small business owner moving to a new suite, the logistics can be a headache. You have to think about labor, transportation, and strict local dumping laws. Plus, nobody wants to send perfectly good items to a landfill if they don’t have to. In this guide, we will walk you through every option available, from selling and donating to recycling and professional removal. We will help you navigate the process smoothly so you can get back to business. Why You Shouldn’t Wait to Get Rid of Office Furniture Procrastination is easy, especially when it comes to heavy lifting. However, letting old desks, cubicles, and filing cabinets pile up is a mistake that can cost your business more than you realize. The Hidden Cost of Storage Space is money. In commercial real estate, every square foot comes with a price tag. If you are using valuable office space to store broken chairs or outdated conference tables, you are essentially paying rent for junk. Imagine if that storage room was converted into a productive huddle room or a break area for staff. By holding onto items you no longer need, you are wasting the potential of your lease. Depreciating Value Office furniture loses value very quickly. The longer you wait to sell or liquidate your assets, the less money you will get back. A chair that is currently “gently used” might become “outdated” or “dusty and worn” after sitting in a damp storage unit for a year. Styles change, and ergonomic standards evolve. If you want to recoup any of your initial investment through resale, speed is your best friend. Impact on Employee Morale and Safety Clutter kills productivity. Walking past stacks of unused equipment every day creates a visual burden for your team. It signals a lack of organization and care. Furthermore, old furniture piled in corners or hallways can become a fire hazard or a tripping risk. Keeping your office clean and streamlined isn’t just about aesthetics; it is about creating a safe, high-performance environment. Where to Sell Office Furniture If your furniture is in good condition, meaning no rips, deep scratches, or broken wheels, selling it is a fantastic option. It puts cash back into your budget and extends the life of the product. But where exactly should you list it? Online Marketplaces The internet has made it easier than ever to connect with buyers. Facebook Marketplace: This is often the fastest way to move items locally. It is free to list, and you can verify buyer profiles. Craigslist: Still a powerhouse for B2B sales. Many startups look here for cheap desks. eBay: Good for smaller, high-value items like ergonomic executive chairs, though shipping can be a pain. Office Liquidators If you have a large volume of matching furniture (like 50+ identical cubicles or chairs), office liquidators are your best bet. These companies buy in bulk. They won’t pay top dollar compared to selling individually, but they handle the labor of dismantling and moving everything at once. This saves you massive amounts of time. Local Used Furniture Dealers Search for “used office furniture buyers” in your city. Many dealers will come to your site, appraise the lot, and make you a cash offer. This is a great middle-ground between the hassle of selling one-by-one and the lower price of liquidation. Auction Sites For unique or high-end vintage pieces, online auctions can drive up the price. Platforms like GovDeals (if you are a public entity) or specialized furniture auction houses can expose your items to a wider audience. How to Sell Used Office Furniture: Tips for Success Selling used office furniture works best when you focus on condition, clarity, and timing. Start by selecting pieces that are sturdy and functional. Clean every item and repair small issues when possible, since buyers are more likely to pay for furniture that is ready to use. Photos play a big role in attracting interest. Take clear pictures in good lighting and show the furniture from multiple angles. Highlight important details and be honest about wear or damage. This builds trust and reduces unnecessary questions. Set prices based on your local market. Look at similar listings to understand what sells quickly and what does not. If your goal is fast office furniture removal, price competitively. If you have time, a fair price allows room for negotiation. Write clear and simple descriptions. Include size, condition, and pickup expectations. Grouping desks, chairs, or storage units can also help attract buyers who need multiple pieces at once and want a smooth buying experience. Alternatives to Selling: Donation, Recycling, and Disposal Sometimes, selling isn’t feasible. Maybe the furniture is too old, unmatched, or you are on a tight deadline. Here are the best alternatives for office furniture disposal. 1. Office Furniture Donation Donating is a win-win. You clear your space, and a non-profit gets much-needed equipment. Plus, there are office furniture donation tax deduction benefits to consider. Who accepts it? Organizations like Habitat for Humanity (ReStore), Goodwill, The Salvation Army, and local schools or shelters often accept furniture. The Catch: Most charities have strict standards. They will not take ripped, stained, or broken items because they don’t have the funds to repair them. Documentation: Always ask for a receipt. If the value of your donation exceeds $500, you will likely need to file specific forms (like IRS Form 8283) with your taxes. 2. Office Furniture Recycling If the items are at

How to Get Rid of an Old Swing Set the Smart and Safe Way

An old swing set can slowly turn from a childhood memory into a backyard problem. What was once a place for play often becomes a rusted, unstable structure that takes up valuable space and may even create safety risks. Many homeowners eventually reach a point where they search for practical solutions on how to get rid of an old swing set without damaging their yard or spending unnecessary money. Removing a swing set is not always as simple as pulling it apart. The process depends on the material, whether it is anchored in concrete, and whether you plan to do it yourself or hire professionals. It also involves understanding disposal rules, recycling options, and the overall swing set removal cost in your area. Should You Remove or Repurpose? Before you grab a hammer, take a close look at the structure. In the world of modern home care, we call this “Assessment.” Is the swing set truly at the end of its life, or does it just need a “glow-up”? Checking for Safety Safety is the most important factor. If you have a wooden set, check for “soft spots.” Use a screwdriver to poke the wood near the ground. If it sinks in easily, you have wood rot. For metal sets, look for deep, flaking rust at the joints. If the structural integrity is gone, you must remove it. A wobbly set is a hazard for any child who might wander into your yard. The Home Value Factor Believe it or not, an old, decaying swing set can actually lower your home’s value. Real estate experts in 2026 often suggest removing “dated” play structures before listing a home. A clear, well-maintained lawn is a “blank canvas” for buyers. On the other hand, if the frame is made of high-quality cedar and is still sturdy, you might consider repurposing swing set ideas. Making the Decision Ask yourself: Do kids still use it? If not, it’s taking up valuable real estate. Is it a safety risk? Rot and rust are non-negotiable “remove” signals. Is it an eyesore? If you cringe every time you look out the window, it’s time to act. DIY Disassembly Guide If you’ve decided on a DIY swing set teardown, preparation is key. This is a big job that requires the right tools and a bit of patience. Essential Tools List Don’t start without these: Safety Gear: Gloves, goggles, and sturdy boots. Wrenches & Sockets: Most sets are held together by 1/2-inch or 9/16-inch bolts. WD-40 or Rust Penetrant: Essential for bolts that haven’t moved in ten years. Reciprocating Saw (Sawzall): If the bolts are too rusted to turn, you’ll need to cut through them. Sledgehammer: Useful for breaking up concrete footers. A Helper: Never try to dismantle the main “A-frame” alone. Step-by-Step: How to Disassemble a Swing Set Remove Accessories First: Take off the swings, slides, and any plastic “fort” parts. These are usually held on by smaller screws. Clear the Area: Move any lawn furniture or toys away. You need a 10-foot “drop zone” around the set. Soak the Bolts: Spray all metal connectors with a rust penetrant and let it sit for at least 30 minutes. Top-Down Approach: Start with the roof and the highest crossbeams. This keeps the structure stable for as long as possible. The Main Frame: With your helper holding one side, unbolt the main crossbeam from the legs. Carefully lower the heavy beams to the ground. Concrete Footers: This is the hardest part. If the legs are buried in concrete, you may need to dig around them and use a pry bar or sledgehammer to break the concrete loose. Safety Tips for DIYers Keep a close eye on “stored energy.” A beam under tension can snap back when a bolt is removed. Always wear eye protection because old wood often splinters, and metal sets may drop flakes of rust into your eyes when you look up to unscrew a bolt. Cost Breakdown: DIY vs. Professional When figuring out how to get rid of old swing set debris, the price tag often dictates the path. Here is what you can expect to pay in 2026. The DIY Price Tag DIY isn’t “free.” You have to consider: Tool Rental: $50–$100 (if you don’t own a saw or heavy-duty wrenches). Dumpster Rental: A 10-yard dumpster typically costs $300–$500. Landfill Fees: Some local dumps charge by weight, usually $50–$100 per ton. Your Time: A full disassembly usually takes a weekend (10–16 hours). Professional Removal Costs Hiring a company like Junk Masterz provides a different value. Average Service Cost: Most junk removal services charge between $200 and $600 for a full “demo and haul.” Special Factors: If the set is anchored in deep concrete, expect an additional labor fee of $75–$150. The Benefit: They bring the tools, the muscle, and the truck. You just point, and it disappears. Expense Type DIY Cost Professional Cost Labor $0 (Your time) $150 – $300 Disposal/Dump Fees $100 – $400 Included Equipment/Tools $50 – $150 Included Total $150 – $550 $200 – $600 Donation & Selling Options If your swing set is still in good shape, why throw it away? There are plenty of swing set donation ideas and ways to make a few bucks. Selling for Cash In 2026, the secondhand market is thriving. Use apps like Facebook Marketplace or Nextdoor. The Golden Rule: List it as “Must Disassemble and Haul.” This saves you the work! Pricing: A used, high-end wooden set can sell for $100–$400. Metal sets usually go for $50 or even “free to a good home.” Where to Donate Donating is a great way to support the community. However, organizations like Goodwill or The Salvation Army rarely accept used outdoor play equipment due to liability. Better Options: Check with local preschools, churches, or “Buy Nothing” groups in your neighborhood. Liability Note: Always provide the original manual if you have it. This ensures the new owner can set it up safely. Recycling & Disposal: The Eco-Friendly Way If

How to Get Rid of Old Furniture: Easy, Fast & Eco-Friendly Solutions That Actually Work

Furniture plays a major role in every home, but there comes a time when old couches, broken tables, worn-out mattresses, and outdated cabinets need to go. Whether you are moving to a new house, renovating your space, downsizing, or simply replacing damaged items, figuring out how to get rid of old furniture can quickly become stressful. Large furniture pieces are heavy, difficult to transport, and often cannot be placed out with regular household trash. Many homeowners also struggle with deciding what to do with unwanted furniture responsibly. Some items may still be usable and worth donating, while others may need recycling or professional disposal. At the same time, more people are searching for eco-friendly solutions that reduce landfill waste and support sustainable living. This complete guide will walk you through the easiest, cheapest, and most environmentally responsible ways to dispose of old furniture. You will also learn how professional junk removal works, which furniture items can be donated or recycled, common mistakes to avoid, and how to choose the best option based on your situation. By the end of this article, you will know exactly how to clear out unwanted furniture quickly while saving time, avoiding stress, and keeping usable items out of the landfill. Why Proper Furniture Disposal Matters Many people leave furniture on curbs or dump it illegally because they assume disposal is simple. Unfortunately, improper furniture disposal creates several problems. Environmental Impact Furniture contains materials such as: Wood Metal Foam Fabric Plastic Glass When dumped in landfills, these materials can take years to break down. Some treated woods and synthetic materials may even release harmful chemicals into the environment. According to the Environmental Protection Agency (EPA), millions of tons of furniture waste end up in landfills every year, increasing environmental strain and waste management challenges. Community Appearance Abandoned furniture makes neighborhoods look neglected and can attract pests, rodents, and illegal dumping activities. Communities dealing with illegal dumping often spend thousands of dollars on cleanup and property maintenance. Organizations like Keep America Beautiful highlight how proper waste disposal helps maintain cleaner and safer neighborhoods. Safety Concerns Large furniture pieces can block sidewalks, roadways, or apartment hallways, creating safety hazards for pedestrians and emergency access. Heavy furniture can also become dangerous during storms or strong winds if left outdoors improperly. The National Safety Council recommends proper handling and disposal practices to reduce injury risks when moving bulky household items. Choosing responsible disposal methods helps reduce landfill waste while supporting recycling and donation programs in your local community. Assess the Condition of Your Furniture First Before deciding how to get rid of old furniture, inspect the item carefully. The condition of the furniture determines your best disposal option. Furniture in Good Condition If the furniture is still usable: Donate it Sell it online Give it away for free Schedule a charity pickup Examples include: Sofas with no major damage Functional dining tables Dressers with working drawers Clean mattresses accepted by local charities Furniture That Needs Minor Repairs Small cosmetic issues may still allow you to: Refinish the item Reupholster it Sell it at a discount Donate to organizations that repair furniture Furniture Beyond Repair If the furniture has: Severe structural damage Mold Pest infestations Broken frames Water damage Then recycling or junk removal may be the safest option. Best Way to Get Rid of Furniture There is no single answer that works for everyone. The best way to get rid of furniture depends on your timeline, budget, and the furniture’s condition. Here are the most effective options. Donate Old Furniture Donation is one of the easiest and most environmentally friendly solutions for getting rid of old furniture. Benefits of Donating Furniture Keeps usable items out of landfills Helps families in need May qualify for tax deductions Often includes free pickup services Commonly Accepted Furniture Donations Many organizations accept: Couches Tables Chairs Dressers Bed frames Office furniture However, heavily damaged or stained items are usually rejected. Tips Before Donating Clean the furniture thoroughly Check for missing parts Confirm donation guidelines in advance Measure doorways for pickup access Donation works best when furniture is still functional and presentable. Many charities and nonprofit organizations accept gently used furniture to help families in need while reducing landfill waste. Organizations such as Habitat for Humanity ReStore and The Salvation Army often provide donation drop-off locations or scheduled pickup services for larger furniture items. Sell Your Used Furniture Online If your furniture still has value, selling it can help offset replacement costs. Popular Places to Sell Furniture You can list furniture on: Local marketplace apps Community buy-and-sell groups Classified websites Consignment furniture stores Best Furniture Types for Resale Higher resale value usually applies to: Solid wood furniture Vintage furniture Modern sectional sofas Patio furniture Branded office furniture How to Sell Faster To improve your chances of selling quickly: Take clear photos Write accurate descriptions Include measurements Set realistic prices Mention pickup requirements Selling may take time, but it works well for furniture in good condition. Give Furniture Away for Free   Sometimes the fastest option is simply giving furniture away. Many people search online for free furniture, especially students, renters, and families moving into new homes. Advantages of Furniture Pickup Quick removal No disposal fees Less effort than selling Prevents landfill waste Important Safety Tips When arranging pickups: Meet during daylight hours Avoid sharing unnecessary personal information Place furniture outside if possible Use trusted local platforms Free giveaways are especially useful when you need immediate removal. Recycle Old Furniture Furniture recycling is becoming increasingly popular as cities focus on reducing landfill waste. Upcycling furniture is another creative and eco-friendly option that gives old items a new life instead of throwing them away. Old tables, chairs, and cabinets can be refurbished, redesigned, or repurposed into stylish and functional pieces, reducing waste while adding a unique touch to your home. What Furniture Materials Can Be Recycled? Many parts can be separated and recycled: Metal frames Wooden components Glass surfaces Fabric materials Foam cushions Items Commonly Accepted by Recycling

How Much Does Carpet Removal Cost? Average Rates Explained

Most people don’t think about their carpet—until it becomes a problem.It starts with a smell. Then stains. Maybe allergies get worse. Suddenly, you’re asking How much does carpet removal cost?  Old carpet can make your home feel dirty, smell bad, and even affect your health. Over time, it traps dust, pet hair, and stains that are hard to remove. When cleaning no longer works, many homeowners start asking one important question: how much does it cost to remove carpet? The answer is not always simple. Carpet removal prices depend on many factors such as room size, carpet type, labor, and disposal. Some people pay less than $150, while others spend over $2,000 for a full home. Before you start your project, it is important to understand what affects the cost and what to expect. This guide explains everything in a clear and practical way so you can plan your budget and avoid surprises. How Much Does Carpet Removal Cost In 2026, the average cost to remove carpet depends on the size and complexity of the job. Typical price ranges: $0.50 to $1.50 per square foot $150 to $400 per room $800 to $2,500 or more for a full house Small and simple jobs cost less, while larger homes with stairs or glued carpet cost more. For a detailed overview of average carpet removal costs in different areas, visit HomeAdvisor’s guide on carpet removal costs to compare pricing and options. Carpet Removal Cost Per Square Foot Most companies calculate pricing based on square footage. This helps estimate the cost more accurately. Here is a simple breakdown: 100 sq ft room: $50 to $150 250 sq ft room: $125 to $375 500 sq ft area: $250 to $750 1,500 sq ft home: $750 to $2,250 Key points to remember: Larger projects often have a lower cost per square foot Complex jobs increase the price even if the size is small Always confirm if disposal is included Cost to Remove Carpet by Room Each room has different challenges, which affects the price. Common room costs: Bedroom: $100 to $300 Living room: $150 to $500 Hallway: $80 to $250 Stairs: $50 to $150 per flight Basement: $200 to $600 Stairs and basements usually cost more because they require extra time and effort. What Affects Carpet Removal Prices   Carpet removal is not just about pulling up fabric. Several factors influence the final cost. 1. Installation Method The way carpet is installed makes a big difference. Tack strip carpet is easier to remove Glued carpet takes more time and effort The cost to remove glued carpet is higher because it sticks to the floor and may require scraping. 2. Carpet Thickness and Padding Thick carpet or old padding can slow down the process. Light carpet is easier and faster Thick padding may stick to the subfloor This increases labor time and cost. 3. Labor Cost Labor is the biggest part of carpet removal prices. Workers must: Cut the carpet into sections Pull it up Roll and carry heavy material Clean the area This is why professional residential removal cost is higher but more efficient. 4. Disposal Fees After removal, the carpet must be disposed of properly. Important points: Some companies include disposal Others charge extra Fees depend on weight and location This process is known as carpet removal and disposal, which also explains the different ways to dispose of carpet safely and properly. 5. Furniture and Obstacles If the room is not empty, it will cost more. Extra charges may include: Moving furniture Working around heavy items Limited space access 6. Location Prices vary based on where you live. Urban areas have higher labor costs Rural areas are usually cheaper Carpet Removal Cost by Type Different carpet types require different removal methods. Typical cost ranges: Standard carpet: $1 to $2 per sq ft Thick or shag carpet: $1.50 to $2.50 Glued carpet: $2 to $4 Carpet tiles: $0.75 to $1.50 Outdoor carpet: $1.50 to $2.50 Glued carpet is the most expensive because it requires extra work. Hidden Costs You Should Know Many homeowners forget about additional costs. These can increase your total budget. Common hidden costs include: Tack strip removal Adhesive scraping Subfloor repair Mold or water damage cleanup Extra labor for stairs or tight areas These costs can add 20% to 50% to the final price. Knowing how much does it cost to remove carpet in advance can help you stay within budget and make smarter decisions. DIY vs Professional Carpet Removal Choosing between DIY and professional service depends on your time, budget, and effort. DIY Carpet Removal Advantages: Lower cost Flexible timing Disadvantages: Physically demanding Time-consuming You handle disposal Estimated cost: $50 to $150 Professional Carpet Removal Advantages: Fast and efficient No heavy lifting Proper tools and cleanup Disadvantages: Higher upfront cost Estimated cost: $150 to $500 per room Hiring a professional service like Junk Masterz can save time and reduce stress. How Long Does Carpet Removal Take Time affects cost because labor is charged by effort. Estimated time: Small room: 1 to 2 hours Medium room: 2 to 4 hours Large room: 4 to 6 hours Full house: 1 to 2 days Professional teams work faster than DIY projects. Signs You Need to Remove Your Carpet Not sure if it is time to remove your carpet? Look for these signs: Strong odors that do not go away Stains that keep returning Mold or moisture damage Worn or torn areas Increased allergies If your carpet is over 10 years old, replacement is usually the best option. Repair vs Replace Sometimes cleaning is enough, but not always. Choose Cleaning If: The carpet is fairly new Stains are minor No bad odor Choose Removal If: The carpet smells bad Padding is flat or damaged The carpet is old Removal is a better long-term solution. Is Carpet Removal Worth It Carpet removal offers several benefits: Improves air quality Removes allergens and dust Enhances home appearance Prepares for new flooring Increases property value It is a

Fence Removal Cost Guide: How Much Does It Cost to Remove a Fence?

An old, damaged, or unwanted fence can create more problems than most homeowners realize. Broken panels, leaning posts, rusted metal, and rotting wood not only affect your property’s appearance but can also create safety concerns and lower curb appeal. Whether you are planning to install a new fence, sell your home, renovate your yard, or simply clear space, understanding fence removal cost is an important first step before starting the project. Many homeowners are surprised to learn that fence removal pricing can vary widely depending on the type of fence, the size of the property, labor requirements, and disposal fees. A simple wooden fence may cost only a few hundred dollars to remove, while large privacy fences with deep concrete posts can cost several thousand dollars. This is why so many people search online for terms like “how much does it cost to remove a fence,” “how much to remove fence,” and “how much does fence removal cost” before hiring a contractor. This complete guide explains everything homeowners need to know about fence removal pricing in 2026. You will learn average costs by fence type, labor charges, disposal fees, cost-saving tips, and whether DIY fence removal is worth the effort. By the end of this guide, you will have a clear understanding of what to expect and how to budget properly for your project. Factors That Affect Fence Removal Costs   When you ask a contractor, “How much does it cost to remove a fence?” they usually won’t give you a single number right away. That is because every yard is different. Several key factors change the final price on your bill. Fence Material Fence material has the biggest impact on fence removal cost. Each type requires different tools and labor. Wood fences are usually the least expensive to remove. Panels can often be dismantled piece by piece. Chain link fences take longer because of metal posts set in concrete. The chain link fence removal cost is higher due to cutting, pulling posts, and handling heavy steel. Vinyl fences are lightweight but fragile. Care is needed to avoid breaking panels during removal. Wrought iron or aluminum fences are heavy and often bolted or cemented deeply, raising labor time. Materials affect removal cost because they change how much effort is needed to extract posts and load debris. Fence Length and Height Fence removal cost per foot increases with fence length, but height also matters. A tall privacy fence weighs more and takes longer to dismantle than a short decorative fence. Most contractors calculate the cost to remove a fence using linear feet. Longer fences may lower the per-foot price slightly, but the total cost still increases with size. Post Installation Method This is often the “hidden” cost of fence demolition. Are your posts just buried in the dirt, or are they anchored in big chunks of concrete? Fence post removal cost goes up significantly if a pro has to use a jackhammer or a tractor to pull out heavy concrete footings. Extracting these “plugs” is back-breaking work that adds to the labor hours. Fence Condition Believe it or not, a fence that is falling over might actually cost more to remove. Why? Rotten wood can snap and splinter, making it harder to move safely. A rusted chain link can be sharp and dangerous. If the fence is in one piece, it’s often faster to dismantle. Accessibility and Terrain Can the crew get a truck right up to the fence? If they have to carry heavy panels through a small gate, up a hill, or across a muddy yard, the labor costs will rise. Flat, open ground is always the cheapest environment for fence removal. Local Labor Rates and Permits Where you live matters. Labor in big cities usually costs more than in rural areas. Also, some towns require a permit for fence demolition. While these aren’t always expensive, they are a necessary step to stay legal. Debris Removal and Disposal Once the fence is down, it has to go somewhere. Waste disposal options include renting a dumpster, taking it to a landfill, or hiring a junk removal service. Landfills charge “tipping fees” based on weight, so heavy materials like wet wood or concrete will cost more to dump.You can read more about safe disposal and recycling guidelines on the   EPA website. Average Fence Removal Cost in 2026 The average fence removal cost ranges from $3 to $12 per linear foot, depending on the material and complexity of the project. For most homeowners, total costs typically fall between: Fence Size Average Cost Small fence (50–100 ft) $300–$900 Medium fence (100–200 ft) $800–$2,000 Large fence (200+ ft) $2,000–$5,000+ If concrete footings, difficult terrain, or heavy materials are involved, costs can rise significantly. Fence Removal Cost Calculator A simple fence removal cost calculator can help estimate your project budget. Basic Formula Fence Length × Cost Per Linear Foot = Estimated Total Cost Example: 150 linear feet $7 per linear foot Estimated cost: $1,050 However, this estimate may not include: Dump fees Concrete post removal Permit costs Hauling charges Heavy equipment rental That is why homeowners often search for terms like “how much does fence removal cost” before hiring a contractor. How Much Does It Cost to Remove a Fence by Material? Different fencing materials require different removal methods. Some are lightweight and simple to dismantle, while others involve heavy labor and equipment. Wood Fence Removal Cost Wood fences are among the easiest to remove. Average Cost: $3–$8 per linear foot Why Costs Vary: Rotting wood may break apart easily Concrete posts increase labor costs Large privacy fences take longer Wood fencing is common in residential neighborhoods, making it one of the most frequently removed fence types. Chain Link Fence Removal Cost Chain link fences are lighter but often involve metal posts set in concrete. Average Cost: $4–$10 per linear foot Additional Considerations: Rusted hardware may slow removal Metal recycling can sometimes reduce disposal fees Commercial chain link fencing costs more Vinyl Fence Removal

What Size Dumpster Do I Need? Expert Guide to Dumpster Sizes

If you are planning a cleanup, remodel, or construction job, one question always comes up first: what size dumpster do I need? It sounds simple, but the answer depends on many things like debris type, weight, space, and how much trash you really have. People often guess and end up with a dumpster that is too small or way too big. Both mistakes cost money and time. This guide is written to help homeowners, renters, contractors, and event planners make the right call the first time. We will walk through dumpster sizing step by step, using plain language and real examples. By the end, you should feel confident choosing the right dumpster size for your project. What Does “Dumpster Size” Really Mean? When people talk about dumpster size, they are usually talking about cubic yard capacity. A cubic yard is a unit of volume. One cubic yard is about the size of a washing machine. Most roll off dumpster sizes range from 10 to 40 cubic yards. Dumpster size is not just about how much fits inside. It also includes: Dumpster dimensions (length, width, height) Weight limit set by the landfill The type of debris you plan to throw away Where the dumpster will be placed Standard dumpster dimensions matter because space can be tight. A driveway placement that works for one home may not work for another. This is why two dumpsters with the same cubic yard capacity may still feel different on-site. Dumpster Size Understanding what dumpster size really means helps answer the bigger question of what size dumpster do I need without guessing. Let’s break down the different dumpster sizes and what they’re actually good for. This chart gives you the real dimensions and helps you picture what fits inside. 10-Yard Dumpster Typical dimensions: 14 feet long × 7.5 feet wide × 3.5 feet tall Holds: About 10 cubic yards or roughly 4 pickup truck loads Weight limit: Usually 2-3 tons Best for: Small bathroom remodels, garage cleanouts, yard debris from trimming trees or removing a small deck Real-world example: Cleaning out a one-car garage or replacing 1,500 square feet of carpet 15-Yard Dumpster Typical 15 yard dumpster size: 16 feet long × 7.5 feet wide × 4.5 feet tall Holds: About 15 cubic yards or roughly 6 pickup truck loads Weight limit: Usually 2-3 tons Best for: Medium cleanup projects, removing old flooring from several rooms, small estate cleanouts Real-world example: Tearing out a kitchen (cabinets, counters, and flooring) or clearing out a basement with old furniture 20-Yard Dumpster Common 20 yard dumpster dimensions: 22 feet long × 7.5 feet wide × 4.5 feet tall Holds: About 20 cubic yards or roughly 8 pickup truck loads Weight limit: Usually 3-4 tons Best for: Large home renovations, roof replacements for small to medium homes, whole-house carpet removal Real-world example: Replacing a 3,000 square foot roof or gutting and remodeling two bathrooms 30-Yard Dumpster Typical dimensions: 22 feet long × 7.5 feet wide × 6 feet tall Holds: About 30 cubic yards or roughly 12 pickup truck loads Weight limit: Usually 4-5 tons Best for: Major home additions, large construction debris projects, whole-home cleanouts Real-world example: Building a large deck, removing siding from an entire house, or major estate cleanouts 40-Yard Dumpster Typical dimensions: 22 feet long × 7.5 feet wide × 8 feet tall Holds: About 40 cubic yards or roughly 16 pickup truck loads Weight limit: Usually 5-7 tons Best for: Commercial projects, complete home gut-jobs, new construction sites Real-world example: Tearing down a large shed or garage, commercial building cleanouts When looking at different size roll off dumpsters, remember that the “yard” number tells you volume, not actual size. A container’s shape might vary, but the capacity stays the same. Read More: How Much Does a Dumpster Rental Cost? How To Estimate Your Dumpster Needs If you are asking, how do I know what size dumpster I need, start with trash estimation. This means taking a close look at what you plan to throw away. Step 1: List Your Debris Write down everything going into the dumpster. Are you tossing old furniture, drywall, wood, or yard debris? Different materials take up space in different ways. Step 2: Think in Pickup Loads One pickup truck load equals about 2 to 3 cubic yards. 3 pickup loads = 10 yard dumpster 6 to 7 pickup loads = 20 yard dumpster This method helps visualize volume without measuring. Step 3: Plan for Extra Most cleanup projects grow as you work. Hidden junk, broken materials, and last-minute changes add up. Choosing a slightly larger dumpster size can save you from needing a second rental. Material-Based Weight Considerations   Here’s something that catches people off guard: you can’t always fill a dumpster to the top. The culprit? Weight limits. Every dumpster rental comes with a weight limit measured in tons. Go over that limit, and you’ll pay hefty overage fees sometimes $50-100 per extra ton. Understanding your materials disposal needs prevents these surprise charges. Lightweight materials (can fill the dumpster completely): Household junk and furniture Yard debris like branches, leaves, and grass Drywall and wood Carpet and padding Cardboard and paper waste Medium-weight materials (fill about halfway to two-thirds): Mixed home renovation waste Doors and windows Kitchen cabinets Vinyl siding Fencing Heavyweight materials (fill only one-third or less): Concrete and asphalt Brick and stone Dirt and soil Roofing shingles Tile and hardwood flooring (large amounts) Let’s look at a real example: You’re replacing your roof. A typical 2,000 square foot roof generates about 2-3 tons of shingles. A 20-yard dumpster has a 3-4 ton limit, which sounds perfect. But here’s the catch you can only fill that 20-yarder about one-third full with shingles before hitting the weight limit. Some companies offer special “heavy debris” dumpsters for roofing and concrete these are shorter but have higher weight limits. For construction site waste mixing light and heavy materials, load strategically. Put heavy stuff on the bottom and lighter materials on top.

How to Insulate a Garage: A Complete Homeowner’s Guide

Insulating a garage is one of those home projects that sounds simple until you actually look into it. Some people do it to stay warm in winter. Others want to protect stored items, reduce energy bills, or turn the garage into usable space. The problem is that most advice online skips over the real questions homeowners have, like whether insulation is even worth it for their garage, what type actually works, and how much it really costs. This guide walks through everything you need to know about insulating a garage, from deciding if it makes sense to choosing materials, understanding R-values, and avoiding common mistakes. Whether you plan to do the work yourself or hire a professional, you’ll leave with a clear plan instead of guesswork. Do You Really Need to Insulate Your Garage? Before getting into materials and steps, it’s worth asking a simple question: do you actually need to insulate your garage? The answer depends on how your garage is built and how you use it. Attached vs detached garages If your garage is attached to your house, insulating it usually makes sense. Heat moves easily through shared walls and ceilings. A cold garage can make nearby rooms harder to heat in winter and hotter in summer. Insulating garage walls and ceilings can reduce that energy loss and improve comfort inside the home. Detached garages are different. If you only use the space for parking and basic storage, insulation may not provide much benefit. But if you spend time out there or store temperature-sensitive items, insulation can help stabilize conditions. How you use the space Insulating a garage makes the most sense if you: Use it as a workshop or home gym Store tools, paint, or electronics Have plumbing that could freeze Plan to convert it into living space Want better temperature control year-round If the garage is rarely used and completely separate from the house, insulation may not be a priority. How Much Does It Cost to Insulate a Garage? Budgeting is where most homeowners get stuck. In 2026, material prices have stabilized, but labor remains at a premium. Here is a breakdown of what you can expect for a standard 2-car garage (~400 sq. ft.). 2026 Cost Comparison Table Material Type Material Cost (per sq. ft.) Total DIY Cost (Est.) Professional Cost (Installed) Fiberglass Batts $0.40 – $1.50 $800 – $1,200 $1,800 – $2,500 Mineral Wool $1.40 – $3.50 $1,300 – $1,900 $2,400 – $3,200 Rigid Foam Board $1.00 – $2.50 $900 – $1,500 $2,000 – $3,000 Spray Foam (Closed Cell) $1.50 – $4.50 N/A (Pro only) $3,500 – $6,000 PRO TIP: When calculating how much does it cost to insulate a garage, don’t forget to budget $200–$400 for a dedicated garage insulation kit for your door. It is the single most important part of the project. How Do I Prepare to Insulate My Garage? Preparation is the difference between a project that lasts 30 years and one that rots your studs in five. Declutter the Perimeter: You need full access to the wall studs. Remove all shelving, hooks, and wall-mounted racks. The “Leak Audit”: Insulation stops heat transfer, but it doesn’t stop air. Use a can of expanding foam to seal gaps where wires penetrate the top plate and around window frames. This is a critical step in how to insulate a garage effectively. Moisture Check: Look for “efflorescence” (white powdery salt) on concrete walls. If your garage has moisture issues, you must fix the exterior drainage or apply a waterproof masonry sealer before installing batts. What Type of Insulation Should I Choose?   Choosing the right garage insulation r value depends entirely on your climate. R-value measures a material’s resistance to heat. Fiberglass Batts: The go-to for insulating garage walls. It’s DIY-friendly but requires a vapor barrier in cold climates. Mineral Wool: Brands like Rockwool offer superior fire resistance and soundproofing. It doesn’t sag over time and repels water. Reflective Foil: In places like Florida or Arizona, the best way to insulate a garage door is using radiant barriers to reflect the sun’s heat back outward. Recommended R-Values for 2026 Walls: Aim for R-13 to R-15 in the South; R-19 to R-21 in the North. Ceilings: Aim for R-30 to R-40. What Are the 6 Steps to Insulate a Garage? Follow this checklist to ensure a professional-grade finish. Step 1: Seal the Gaps Before you touch the insulation, seal every crack. Use high-quality caulk for small gaps and expanding spray foam for larger holes around plumbing and electrical outlets. Step 2: Install Attic Baffles (Ceiling Only) If you are insulating the ceiling, you must maintain airflow to your roof. Staple foam baffles (rafter vents) to the roof sheathing to prevent your new insulation from blocking the soffit vents. Step 3: Fit the Insulation Snugly When how to insulate garage walls, “snug” is the keyword. Cut your batts about a half-inch wider than the stud cavity. Tuck them in so they are flush with the studs. Crucial: Do not compress the material. Squishing insulation kills its R-value by removing the air pockets that trap heat. Step 4: Add the Vapor Barrier In colder regions, stapling a 6-mil poly vapor barrier over the studs prevents your breath and car exhaust moisture from condensing inside the walls, which leads to mold. Step 5: Insulate the Garage Door The door is a giant thermal hole. Use a specialized garage insulation kit or cut rigid foam boards to fit the panels. This is often cited as the best way to insulate a garage door because it significantly reduces the vibration and noise of the door as well. Step 6: Cover with Fire-Rated Drywall In most jurisdictions, you cannot leave insulation exposed. It is a fire hazard. Install 5/8-inch Type X drywall. Not only is this safer, but it also gives your garage a finished, professional look. Common Garage Insulation Mistakes Even good materials won’t help if installation is done poorly. Skipping air sealing: Insulation without air sealing allows

How to Recycle a Blender: A Complete Guide

Old blenders often end up collecting dust in kitchen cabinets or getting tossed into the trash when they stop working. However, blenders contain metal, plastic, and electronic components that can often be recycled or reused. Knowing how to recycle a blender properly helps reduce landfill waste and supports environmental sustainability. In this guide, we’ll walk you through everything you need to know about recycling, disposing of, or repurposing your blender. We’ll answer common questions like How to Recycle a Blender?, how to get rid of an old blender, and share practical tips that make the process simple and safe. Why You Can’t Just Throw a Blender in the Trash Blenders may seem harmless, but most small appliances fall under the category of electronic waste (e-waste). Tossing them in landfills can have serious consequences: Toxic materials: Motors, wiring, and electronics can contain heavy metals or other toxins that leach into soil and water. Non-biodegradable components: Plastic and glass take decades or even centuries to decompose. Wasted resources: Metals and certain plastics can be recycled into new products, but throwing them away wastes these materials. Because of these reasons, understanding how to dispose of a blender properly is essential. Simply dropping it into a curbside recycling bin rarely works; most municipal programs do not accept small electronics. Understanding Blender Materials Before recycling, it helps to know what makes up your blender. Each part may require different handling: Glass jars: Most blender jars are made from tempered glass, which is recyclable. Some recycling programs accept glass directly, while others prefer it separated from electronics. Plastic parts: Lids, jar bases, and smaller accessories may be recyclable depending on local guidelines. Check the recycling symbol to confirm. Metal components: Motors, blades, and screws are valuable for metal recovery. Blades should be handled carefully due to sharp edges. Electronics: Motors, wiring, and switches fall under e-waste. These should never go into regular recycling bins and require specialized disposal. Tip: Disassembling your blender into these components before recycling makes the process smoother and safer. Options for Recycling or Disposing of a Blender There are several avenues to get rid of your old or broken blender responsibly. 1. Local Recycling Programs Many cities and municipalities have special programs for e-waste or small appliances. These programs often provide: Drop-off locations for small electronics. Scheduled curbside pick-up days for e-waste. Guidelines for separating materials (plastics, metals, electronics). How to check: Visit your city’s waste management website or call your local recycling office. They can tell you if your blender qualifies for their program. 2. Electronic Waste Centers E-waste centers specialize in recycling electronics safely and efficiently. They: Properly dismantle motors, wiring, and electronic circuits. Recycle metals and plastics to create new products. Often accept items free of charge or for a small fee. Some e-waste centers also provide tax credits or trade-in incentives, making it easier to get rid of appliances responsibly. 3. Retail Take-Back Programs Many retailers and appliance brands offer take-back programs for old electronics and appliances. Examples include: Best Buy: Offers in-store drop-offs for small appliances and electronics. Major blender brands: Some accept old appliances through mail-in or in-store recycling. Check your local store or the manufacturer’s website to confirm whether your blender is eligible. This method is convenient if your appliance is too heavy or bulky to transport to a recycling center. 4. Donation or Repurposing If your blender is still functional but old, donation can be a great option: Donation options: Schools, shelters, or community centers often accept small appliances. Repurposing: Even broken blenders can be repurposed. Glass jars can become storage containers, or motors can be used in DIY projects. This not only keeps appliances out of landfills but also benefits communities or hobbyists looking for inexpensive materials. Step-by-Step Guide to Prepare Your Blender for Recycling Before taking your blender to a recycling facility or drop-off location, follow these steps to ensure safe and effective disposal: Unplug and disassemble: Remove the jar, lid, blades, and base. Clean thoroughly: Any leftover food can contaminate the recycling process. Separate components: Divide plastics, metals, glass, and electronic parts. Package safely: Wrap sharp blades and motors to prevent injury during transport. Choose the right recycling method: Take each part to the appropriate facility or program. Environmental and Practical Benefits of Recycling Blenders Recycling blenders has both environmental and practical benefits: Reduces landfill waste: Electronics and plastics take decades to decompose. Proper disposal prevents this buildup. Recovers valuable materials: Metals, plastics, and glass can be recycled into new products, reducing the need for virgin resources. Supports sustainable living: By properly disposing of appliances, you contribute to a circular economy where materials are reused rather than wasted. Even a small appliance like a blender can make a noticeable difference when disposed of responsibly. Common Mistakes to Avoid When recycling a blender, people often make mistakes that reduce efficiency or cause safety issues: Throwing it in the curbside bin: Most curbside programs do not accept electronics. Not cleaning the blender: Food residue can contaminate recycling streams. Leaving blades exposed: Sharp components can injure workers at recycling facilities. Mixing electronics with general plastics or metals: This complicates recycling and may lead to contamination. Following proper steps ensures your blender is recycled safely and effectively. We Take All kind of Junk At Junk Masterz, we make it simple to get rid of unwanted items, no matter the size or type. Whether it’s a broken blender, old kitchen appliances, furniture, electronics, or general household junk, we handle it all safely and responsibly. Our team ensures that everything we collect is recycled or disposed of properly, helping you declutter while protecting the environment. Wondering exactly what we accept? Visit our What We Take page to see the full list of items we remove. From small appliances like blenders to large furniture, we take care of everything so you don’t have to lift a finger. Ready to get rid of your old blender or other junk? Contact us today and schedule a pickup. Let us help

How to Dispose of a Dehumidifier Safely and Responsibly

If you’ve recently upgraded your home or no longer need your dehumidifier, you may be wondering, “How do I get rid of it safely and responsibly?” Dehumidifiers are heavy, contain electrical components, and often house chemicals that shouldn’t end up in a landfill. Proper disposal is essential not just for safety but also for sustainability. In this guide, we’ll walk you through every step of safely disposing of a dehumidifier, explore recycling options, and answer common questions like whether you can use dehumidifier water for plants. Why Proper Dehumidifier Disposal Matters Before diving into the methods for disposal, it’s important to understand why throwing a dehumidifier in the trash isn’t a good idea. Improper disposal can cause environmental damage, pose safety risks, and even violate local regulations. Environmental Impact Dehumidifiers contain several materials that can be harmful to the environment if not handled properly. Plastic components can take hundreds of years to break down, and the refrigerants used in many units can contribute to greenhouse gas emissions if released. Even the water collected in the tank can contain dust and trace metals, which aren’t ideal to pour into the soil or down drains. By learning how to recycle dehumidifiers, you can ensure that as many components as possible are reused or safely processed, reducing your household’s ecological footprint. Safety Concerns Electrical appliances like dehumidifiers are heavy and can be dangerous if mishandled. Units often contain metal coils and fans that can cause cuts, and many models include refrigerants that need professional handling. Dropping a unit or attempting to dismantle it incorrectly can lead to injury or property damage. Following proper disposal steps ensures your safety and the safety of those handling the appliance after you. Ways to Dispose of a Dehumidifier Now that you understand why disposal matters, let’s explore your options. The right method depends on the condition of the unit and the resources available in your area. Donate or Sell If your dehumidifier still works, consider donating it or selling it. Local charities, thrift stores, or shelters often welcome functioning appliances. Online marketplaces like Craigslist, Facebook Marketplace, or local buy-and-sell groups can also be effective. Not only do you give your old dehumidifier a second life, but you also help someone in need while avoiding unnecessary waste. This approach is a practical answer for those searching for “how to get rid of a dehumidifier” quickly and responsibly. Recycling Options For units that are broken or too old to donate, recycling is the best option. Many regions have e-waste recycling facilities specifically designed to handle large appliances. These facilities safely extract metals, plastics, and refrigerants for reuse. Some manufacturers also offer take-back programs, accepting old appliances when you purchase a new unit. Step-by-step guide to recycling a dehumidifier: Check with your local municipality or waste management company for approved e-waste recycling centers. If available, contact the manufacturer for a take-back program. Prepare the dehumidifier by draining all water and removing filters. Transport the unit to the recycling center, ensuring any hazardous components are handled according to their instructions. Bulk Trash or Municipal Pickup Some cities allow large appliances to be picked up as part of scheduled bulk trash or curbside programs. The process usually involves scheduling a pickup and possibly paying a small fee. This option is convenient if you don’t want to transport the unit yourself, but it’s essential to verify your local rules. Some municipalities require certification that refrigerants have been safely removed, so check before placing your dehumidifier at the curb. Professional junk removal Junk removal services often recycle appliances correctly. This option works well for people handling multiple large items, though it usually costs more. Each option answers the question of how to dispose of dehumidifier units in a responsible way, without cutting corners. Utility company programs A few electric utility companies offer appliance recycling incentives. These programs focus on energy savings and may offer a small rebate for turning in old units. Can You Use Dehumidifier Water for Plants? Technically, dehumidifier water is distilled water, making it low in minerals. However, it may contain small amounts of dust, mold spores, or metals from the unit itself. If you decide to use this water for plants, it’s best for non-edible houseplants rather than vegetables or herbs. To be safe, consider filtering or boiling the water before use. Preparing Your Dehumidifier for Disposal This step-by-step guide breaks the process into simple actions. Follow these steps to avoid stress and mistakes. Step 1: Check if the dehumidifier still works Plug it in and test basic functions. If it removes moisture and runs without strange noises, donation or resale may work. Step 2: Clean the unit Empty the water tank and let it dry. Wipe dust from vents and coils. Clean units attract donors and recyclers alike. Step 3: Look up local rules Search your city or county waste authority page. Many areas list appliance disposal rules and approved recycling centers. This step matters since rules differ by location. Step 4: Choose a disposal method Pick recycling, donation, or professional removal based on your findings. Avoid curbside trash unless your local authority allows it, which remains rare for appliances with refrigerants. Step 5: Transport safely Keep the unit upright during transport. Tilting can cause oil or refrigerant movement inside the system. Step 6: Get proof if possible Some recycling centers provide a receipt or confirmation. This record helps if questions arise later. These steps answer how to dispose of a dehumidifier without confusion or risk. How to Recycle a Dehumidifier Properly Recycling answers both environmental and legal concerns. Knowing how to recycle dehumidifier units the right way makes the process smoother. Find certified recyclers Look for recycling centers certified to handle refrigerants. In the U.S., EPA-approved programs follow strict rules for refrigerant recovery. Ask about fees Some centers charge a small appliance recycling fee. This fee covers refrigerant removal and safe processing. Prepare the unit Remove loose parts like filters and water buckets if the recycler asks

Color Palette