How

How to Upcycle Old Furniture: Creative Ideas to Transform Your Home Sustainably

Old furniture often gets pushed into storage or thrown away when it starts to look worn out. Many people replace tables, chairs, or cabinets just because they no longer match their home style. Many people are now asking about how to upcycle old furniture and are looking for simple ways to reuse their old items instead of throwing them away. However, learning how to upcycle old furniture can help you turn these items into something useful and attractive again Upcycling old furniture is a practical solution for homeowners who want to save money and reduce waste. Instead of buying new items, you can improve what you already have. This guide explains how to upcycle furniture step by step, along with creative ideas and expert tips to help you get started.  What Is Upcycling Furniture? Before you begin, it is important to understand what upcycling means. Upcycling is the process of improving an old or unused item without breaking it down into raw materials. It is different from recycling. Recycling changes materials into something new, while upcycling keeps the original structure and enhances it. For example, you can: Turn an old dresser into a storage cabinet Repaint a table to give it a modern look Use wooden pallets to build a coffee table Upcycling old furniture allows you to reuse items in creative ways while reducing waste. Why More People Are Upcycling Old Furniture The demand for upcycling old furniture has increased in recent years. There are several reasons behind this shift. Saves Money New furniture can be expensive. Upcycling allows you to improve existing items at a much lower cost. A small investment in paint or tools can completely change the look of furniture. Reduces Waste Large furniture items take up a lot of space in landfills. When you upcycle instead of throwing items away, you help reduce household waste. Supports Sustainable Living Upcycling reduces the need for new materials like wood and metal. This helps conserve natural resources and lowers environmental impact. Encourages Creativity You can design furniture that matches your personal taste. Instead of buying mass-produced items, you create something unique. Provides a Better Alternative to Disposal Many people search for ways to dispose of old furniture. Upcycling gives you another option before sending items to landfills or recycling centers.  How to Upcycle Old Furniture (Step-by-Step Guide) If you are new to DIY projects, the process may seem difficult. However, learning how to upcycle your old furniture is easier when you follow simple steps. Step 1: Choose the Right Furniture Start with furniture that is still strong but looks outdated. Good options include wooden chairs, tables, cabinets, and dressers. Avoid items with major structural damage. Step 2: Clean the Furniture Remove dust, grease, and dirt using soap and water. Cleaning helps paint and finishes stick properly. Step 3: Repair Minor Issues Fix loose screws, cracks, or chipped areas. You can use wood filler and basic tools to make the furniture stable again. Step 4: Sand the Surface Sanding removes old paint and smooths the surface. This step prepares the furniture for a new finish. Step 5: Paint or Refinish Apply paint, polish, or stain depending on your design. Popular options include matte paint, natural wood finishes, or distressed styles. Step 6: Replace Hardware New handles, knobs, or legs can make a big difference. Small changes often improve the overall look of furniture. By following these steps, you can easily learn how to upcycle furniture at home. Creative Ideas for Upcycling Old Furniture If you are looking for inspiration, there are many simple ways to reuse old items. Turn Dressers into Storage Units An old dresser can be repainted and used as a storage cabinet for bedrooms or hallways. Convert Doors into Tables Old wooden doors can be transformed into dining tables or desks by adding legs. Use Bookshelves for Kitchen Storage Bookshelves can be reused to organize kitchen items or pantry supplies. Make Plant Stands from Chairs Broken chairs can hold plants and work as decorative pieces. Create Coffee Tables from Pallets Wooden pallets are commonly used in DIY projects. With sanding and finishing, they can become modern tables. These old furniture recycling ideas are simple and cost-effective.  Common Mistakes to Avoid When Upcycling Furniture Many beginners make small mistakes that affect the final result. Avoid these issues when learning how to upcycle old furniture. Skipping cleaning before painting Not sanding the surface properly Using low-quality paint Ignoring small repairs Choosing furniture with severe damage Taking the time to properly prepare the furniture leads to better results. When Furniture Cannot Be Upcycled Not every piece of furniture can be saved. Some items may be too damaged to repair. Examples include: Broken frames that cannot be fixed Mold-infested furniture Water-damaged materials In these cases, it is better to choose proper disposal methods. Recycling programs or professional removal services can handle large furniture safely. According to global waste statistics and furniture disposal impact, furniture contributes significantly to landfill waste each year.  Tips from Professional Furniture Upcyclers Experienced furniture upcyclers follow simple practices to achieve better results. Start with small projects if you are a beginner. Items like stools or side tables are easier to handle. Use good-quality tools because they improve your work. Choose durable paints that last longer and protect the surface. It is also helpful to study modern design trends. Styles like minimal, rustic, and industrial are popular and easy to recreate. If a piece cannot be restored, you can explore how to dispose of large furniture safely or consider professional junk removal services to handle unwanted items in an environmentally responsible way. Environmental Benefits of Upcycling Old Furniture Upcycling old furniture is not only useful for your home but also beneficial for the environment. Reduces Landfill Waste Furniture takes years to break down. Upcycling keeps items in use for a longer time. Conserves Natural Resources Reusing furniture reduces the need for new wood and raw materials. Saves Energy Manufacturing new furniture requires energy. Upcycling reduces production demand. Supports Circular

How to Recycle Fluorescent Tubes Safely?The Ultimate Guide for Homes and Businesses

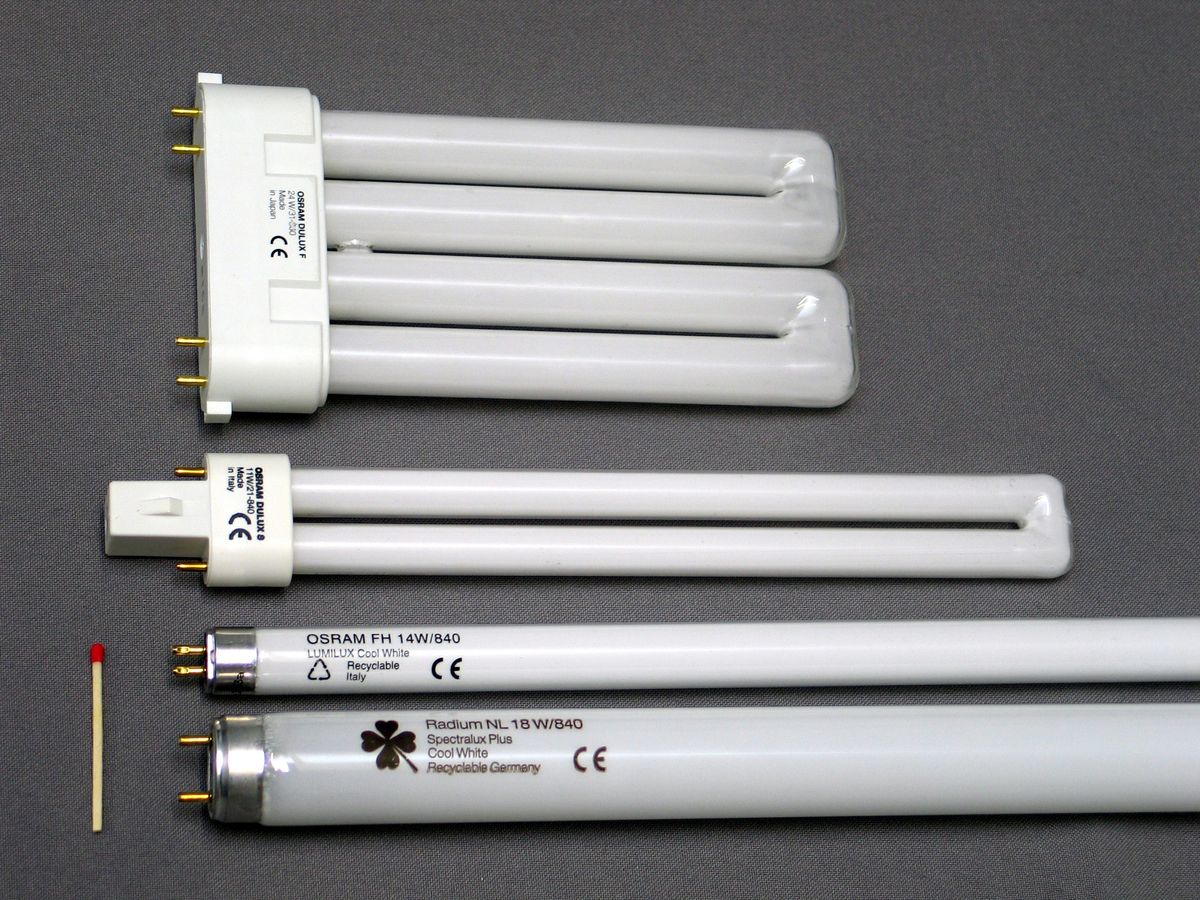
Fluorescent tubes are widely used in offices, warehouses, schools, and homes because they are energy-efficient and provide bright, long-lasting illumination. However, these tubes contain mercury, a toxic substance that poses serious health and environmental risks if broken or disposed of improperly. Understanding how to recycle fluorescent tubes and how to recycle fluorescent light tubes safely is critical, as even a small amount of mercury can contaminate soil, water, and the food chain, making responsible disposal essential. Recycling fluorescent tubes is not just an eco-friendly choice—it’s a legal requirement in many regions and an important step toward protecting public health. By recycling, valuable materials such as glass, metals, and phosphors can be recovered, reducing the need for raw materials and minimizing environmental impact. For homeowners and businesses alike, understanding how to recycle fluorescent tube lights safely, the cost involved, and the latest recycling methods is essential. This guide provides a comprehensive, step-by-step approach to fluorescent tube recycling while highlighting the environmental, economic, and regulatory benefits. Understanding Fluorescent Tubes What Are Fluorescent Tubes? Fluorescent tubes are long, tubular lights that produce illumination through electrical discharge in mercury vapor. They are popular due to energy efficiency but pose environmental risks because of the toxic mercury content.  Why Recycling is Crucial Environmental Safety: Mercury and phosphor coatings can harm soil, water, and wildlife. Legal Compliance: Improper disposal can lead to fines under environmental laws. Resource Recovery: Recycled tubes can reclaim glass, metals, and phosphor, reducing landfill waste. How to Recycle Fluorescent Tubes  Step-by-Step Recycling Process Collection: Store spent fluorescent tubes safely in a rigid container to prevent breakage. Drop-Off Locations: Find certified recycling centers or hazardous waste facilities. Some hardware stores also offer recycling programs. Transportation: Avoid breaking the tubes; mercury can evaporate, posing health hazards. Processing: Recycling facilities crush and separate the tubes’ glass, metal, and mercury. Mercury is safely captured for reuse.  Home vs. Business Recycling Homeowners: Usually small quantities. Local collection programs and municipal drop-offs are ideal. Businesses Often deal with large volumes. Contracting waste management companies specializing in fluorescent tube recycling is cost-effective and compliant with regulations. Common Mistakes to Avoid Throwing tubes in regular trash. Breaking tubes before disposal. Ignoring local regulations. Cost of Recycling Fluorescent Tubes One common question: “How much does it cost to recycle fluorescent tubes?” Costs vary depending on volume, location, and service provider.  Average Costs Home Users: $1–$3 per tube at local collection points. Businesses: $50–$200 for bulk pickups, depending on quantity. Specialty Services: Some offer free recycling for large orders to encourage sustainability. Factors Influencing Cost Tube length and type. Collection and transportation distance. Local environmental regulations. Tip: Combining collections and scheduling pickups with certified facilities can reduce overall costs. How to Recycle Fluorescent Tube Lights Efficiently Partner With Certified Recyclers Look for EPA-certified facilities or licensed hazardous waste management companies. Check their website for tube acceptance policies.  Use Take-Back Programs Some lighting manufacturers or retailers offer take-back programs where you can return old tubes for free or minimal fees. Explore Mail-Back Options For remote locations, specialized mail-back kits are available for safe disposal. Maximize Safety Wear gloves and goggles when handling tubes. Avoid dropping or crushing tubes. Label boxes “Hazardous Material – Fluorescent Tubes” for safety during transport. By following these steps, both homeowners and businesses can safely and responsibly manage their lighting waste. Partnering with certified recyclers  like Junk Master is  offering Junk Removal   services ensures the process is convenient, compliant, and eco-friendly. Proper Way to Dispose of Fluorescent Light Tubes Disposing of fluorescent tubes safely is critical due to the mercury content and potential environmental risks. Whether you have a few old tubes at home or large quantities in a business, following the right disposal steps ensures safety and legal compliance. Broken bulbs or tubes can easily cut hands, release hazardous substances, or cause fires if mishandled. Using proper containment, following local recycling regulations, and leveraging certified recycling facilities ensures that fluorescent tubes and light bulbs are disposed of safely, protecting both people and the planet. You May Also Read: How to properly dispose of light bulbs  DIY Alternatives for Small Quantities If you only have a few tubes, you can follow safe DIY approaches: Wrap each tube in cardboard or bubble wrap. Place in a sturdy box labeled “Fluorescent Tubes – Hazardous Material.” Drop off at a local recycling center or municipal hazardous waste day. Avoid DIY mercury recovery; it’s unsafe and illegal in most regions. Environmental Benefits of Fluorescent Tube Recycling Recycling fluorescent tubes reduces environmental impact in multiple ways: Mercury Containment: Prevents soil and water contamination. Resource Conservation: Reuses glass, metals, and phosphors. Energy Savings: Manufacturing new tubes consumes more energy than recycling old ones. Businesses showcasing sustainability in lighting disposal also benefit from positive public perception, enhancing brand trust. At Junk Masterz, we help companies implement safe and eco-friendly fluorescent tube and light bulb recycling practices, reinforcing their commitment to sustainability while maintaining compliance with environmental regulations. Conclusion Recycling fluorescent tubes is not only environmentally responsible but also legally required in many regions. These tubes contain mercury and other materials that, if improperly disposed of, can harm the environment and human health. By understanding how to recycle fluorescent tube lights safely, knowing how much it costs to recycle fluorescent tubes, and following proper disposal practices, you can protect your home, business, and community from potential hazards. Beyond safety, recycling fluorescent tubes offers significant economic and environmental benefits. Valuable materials such as glass, metals, and phosphors can be reclaimed, reducing the demand for raw materials and conserving energy. Businesses that implement proper recycling practices also gain a competitive edge, showcasing sustainability and compliance with environmental regulations—an increasingly important factor for customers, partners, and regulators. Modern recycling programs and take-back initiatives make the process easier than ever. Whether you are a homeowner with a few tubes or a business managing large quantities, leveraging certified recycling centers, retailer programs, and professional waste management services ensures your tubes are handled safely, efficiently, and legally. Finally, taking the step to recycle

How to Get Rid of Yard Waste? Smart Strategies for Clean and Healthy Yards

Keeping your yard clean and healthy requires regular maintenance. Activities like mowing the lawn, trimming trees, and removing dead plants often leave behind large piles of organic debris. Many homeowners quickly realize that yard waste can pile up faster than expected. Understanding how to get rid of yard waste properly helps protect the environment, keeps your property clean, and prevents potential fines in areas where improper disposal is restricted. Yard waste typically includes grass clippings, leaves, branches, weeds, shrubs, and other organic materials that come from landscaping or gardening. While small amounts may fit into regular waste bins, large cleanups after storms, seasonal yard work, or landscaping projects often create much bigger piles. This guide explains how to get rid of a lot of yard waste, the best eco-friendly disposal methods, and when professional help may be the most efficient solution. Whether you are dealing with seasonal leaf piles or major yard renovations, the strategies below will help you manage yard debris safely and responsibly. Understanding Yard Waste: What Counts and Why It Matters Before deciding how to dispose of yard debris, it’s important to understand what qualifies as yard waste. Common Types of Yard Waste Typical yard waste materials include: Grass clippings Leaves Tree branches and limbs Shrubs and bushes Garden plants Weeds and vines Wood chips and bark These materials are organic and biodegradable, but they should not always be thrown in regular trash. Many municipalities separate yard waste from household garbage because organic materials can be composted or recycled. Why Proper Yard Waste Disposal Is Important Improper disposal can lead to several issues: Overfilled landfills Environmental pollution Pest problems in neighborhoods Potential local fines or penalties Improper yard waste disposal can lead to several issues: overfilled landfills, environmental pollution, pest problems in neighborhoods, and potential local fines or penalties. Leaving yard debris in the wrong place or mixing it with regular trash can reduce recycling effectiveness, increase methane emissions from anaerobic decomposition, and harm local ecosystems when clippings and leaves wash into storm drains and waterways — all issues that sustainable waste experts and environmental research organizations highlight as key problems when organic waste is not managed properly  (see why yard waste management is important at The Institute for Environmental Research and Education)When yard cleanup creates large piles of leaves, branches, or landscaping debris, many homeowners find it difficult to handle everything alone. In these situations, professional help from Junk Masterz can make the process much easier by safely collecting, loading, and disposing of yard waste in an environmentally responsible way. Best Methods for Getting Rid of Yard Waste There are several practical ways homeowners can handle yard debris, depending on the amount and type of material. 1. Composting Yard Waste at Home Composting is one of the most environmentally friendly ways to deal with yard debris. Instead of throwing organic materials away, they can be converted into nutrient-rich compost for gardening. Materials That Compost Well Good compost materials include: Leaves Grass clippings Small branches Plant trimmings Avoid adding diseased plants or invasive weeds to compost piles because they may spread when reused in gardens. Benefits of Composting Reduces landfill waste Improves soil health Saves money on fertilizers Creates sustainable gardening practices For homeowners with moderate yard waste, composting is often the simplest long-term solution. 2. Municipal Yard Waste Collection Programs Many cities provide seasonal yard waste pickup services. These programs typically allow residents to place organic debris in designated bins or paper yard bags for weekly or monthly collection. How These Programs Work Most municipalities require: Bundled branches tied with twine Leaves placed in biodegradable bags Specific pickup days for yard debris Check your local guidelines before placing yard waste on the curb to avoid rejected pickups. Municipal collection works well for routine yard maintenance but may not handle extremely large amounts of debris. 3. Yard Waste Recycling Centers Recycling facilities and composting centers accept organic materials from homeowners and landscaping companies. These facilities usually process: Leaves and grass Tree limbs Brush and plant debris After processing, the materials are converted into compost, mulch, or biomass energy. Recycling centers are a good solution when you need to get rid of bulk yard waste after seasonal cleanup or landscaping projects. 4. Mulching Yard Debris Mulching is another effective method for reusing organic materials directly in your yard. Materials That Work Well for Mulching Leaves Grass clippings Small branches processed with a chipper Mulch helps retain soil moisture, regulate temperature, and suppress weeds in garden beds. By turning yard debris into mulch, homeowners reduce waste while improving their landscape. How to Get Rid of Large Amounts of Yard Waste Sometimes, yard debris becomes too large to handle with normal disposal methods. This often happens after storms, tree removal, or major landscaping work. If you are wondering how to get rid of large amounts of yard waste, consider the following solutions. Rent a Yard Waste Dumpster Dumpster rentals are commonly used for landscaping projects because they allow homeowners to dispose of large volumes of organic material quickly. Benefits include: Convenient onsite disposal No repeated trips to recycling centers Ability to handle heavy branches and debris However, dumpsters may not always be ideal for small properties or quick cleanups. Cost of Yard Waste Removal The cost of yard waste removal can vary depending on the amount of debris, location, and the type of service used. On average, homeowners may pay between $100 and $600 for yard waste removal services. Small loads of leaves or grass clippings may cost less, while large piles of branches or storm debris can increase the price. Factors that influence yard waste removal costs include: Volume and weight of the debris Type of materials (branches, leaves, brush) Labor required for loading and hauling Local disposal or recycling fees For large projects, hiring a professional yard waste removal service can still be cost-effective because it eliminates the need for multiple trips, equipment rentals, and time spent hauling debris yourself. You May Also Read: Average cost of yard

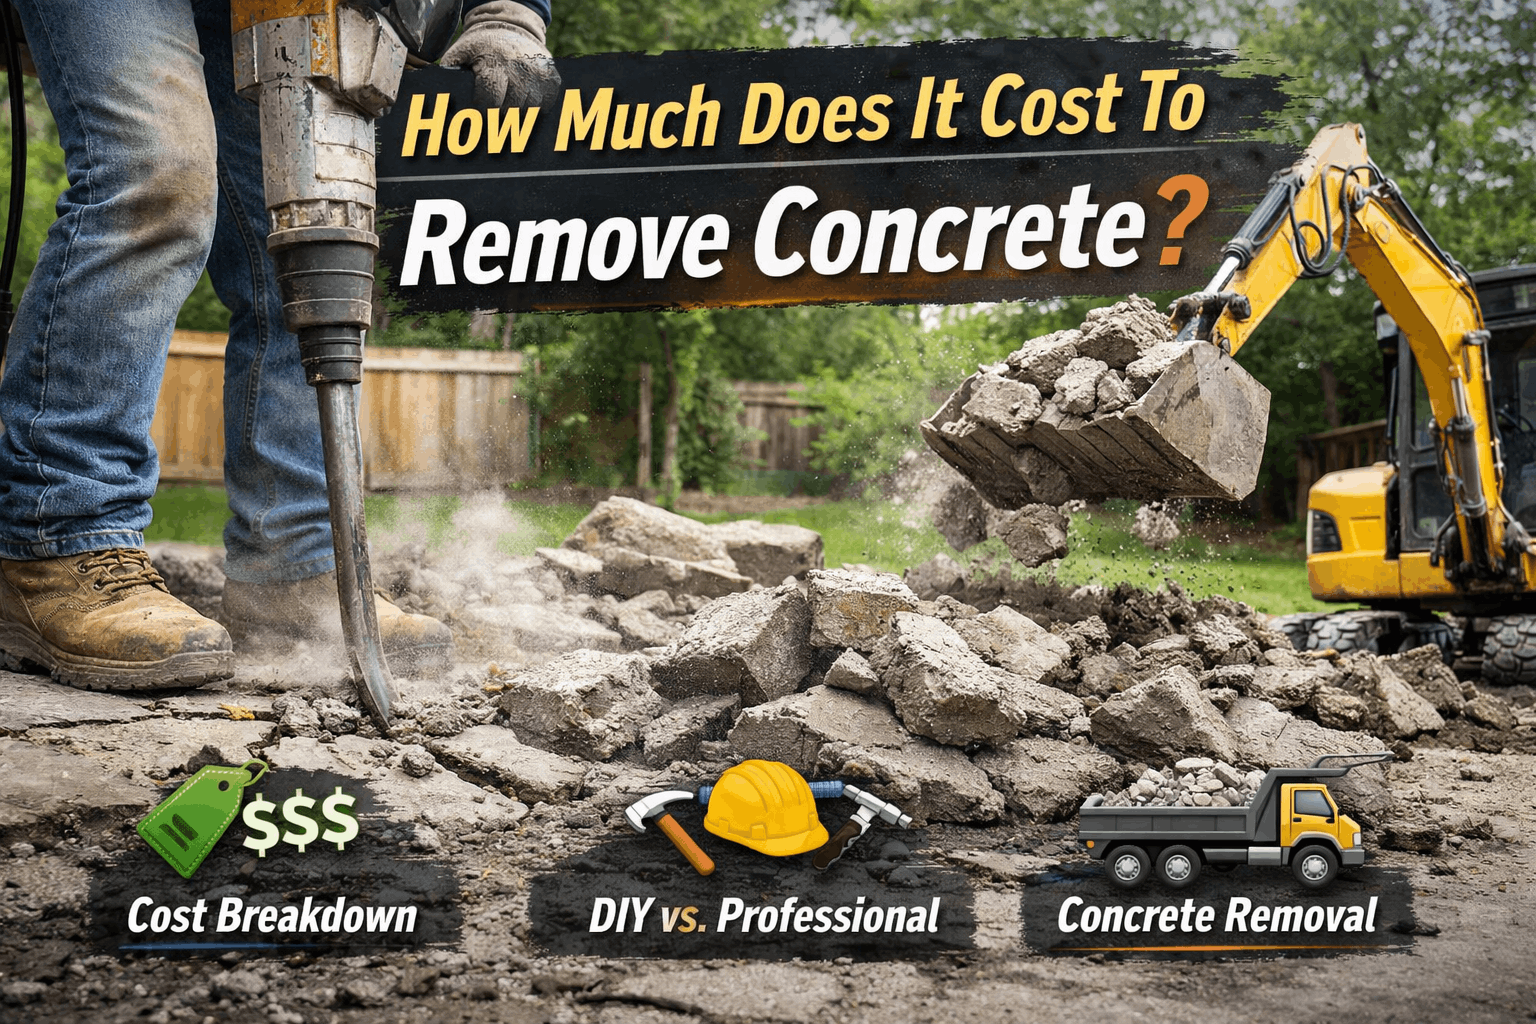
How Much Does It Cost to Remove Concrete?

Removing concrete can be a daunting task, whether it’s an old driveway, patio, sidewalk, or foundation. If you’re planning a home renovation or just want to refresh your outdoor space, knowing how much does it cost to remove concrete is crucial for budgeting and planning. In this guide, we’ll break down the average costs, factors that influence pricing, and tips for reducing expenses while ensuring safety and efficiency. Concrete removal might seem straightforward, but the process involves careful planning, the right equipment, and proper disposal. By understanding the variables that impact the cost of concrete removal, you can make informed decisions and avoid unexpected expenses. What Is Concrete Removal? Concrete removal involves breaking up, demolishing, and hauling away old or unwanted concrete structures. This process is essential in many home improvement projects, including replacing driveways, patios, sidewalks, and even foundations. There are two main approaches to concrete removal: DIY Removal – Using hand tools, sledgehammers, or rented equipment to break and remove concrete yourself. Professional Removal – Hiring licensed contractors who bring heavy machinery and handle disposal efficiently. Choosing the right method often depends on the size of the project, accessibility, and your budget. The concrete demolition and removal cost can vary widely depending on these factors. Why People Remove Concrete Homeowners remove concrete for various reasons: Renovation and Remodeling: Upgrading driveways, patios, or garden pathways. Safety Concerns: Cracked or uneven concrete can pose tripping hazards. Landscaping Improvements: Removing concrete allows more natural space for gardens, lawns, or outdoor living areas. Structural Repairs: Old foundations may need removal to support new construction. Understanding why you need removal helps determine the method and scope of the project, which directly influences the cost of removing concrete.A well-planned schedule prevents surprise costs from rushed labor or last-minute disposal fees, and using Junk Masterz ensures your concrete debris is removed safely and responsibly. Factors That Affect the Cost of Concrete Removal The price of removing concrete is not one-size-fits-all. Several variables can influence the final cost: 1. Size and Thickness of Concrete Larger slabs require more labor and equipment. Similarly, thicker concrete takes more time and effort to break, increasing both labor and disposal costs. 2. Type of Concrete Structure Different structures have varying levels of complexity: Driveways: Often 4–6 inches thick, accessible, and easier to remove. Patios: May include irregular shapes, landscaping integration, or decorative finishes. This can increase the cost to remove concrete patio. Sidewalks and Pathways: Narrow and sometimes reinforced, requiring careful handling. Foundations: Often the most labor-intensive and expensive due to depth and reinforcement. 3. Accessibility and Location If the concrete is in a tight space, near obstacles, or on multiple levels, the job becomes more labor-intensive. Urban locations can also increase pricing due to disposal regulations and limited equipment access. 4. Labor and Equipment Manual removal is cheaper but more physically demanding and time-consuming. Hiring professionals usually involves heavy machinery like jackhammers, skid steers, or excavators, which increases the overall cost. 5. Disposal and Environmental Considerations Hauling away concrete to a landfill or recycling center adds to the price. Some local regulations may require specific disposal methods, especially for large projects. Using recycled concrete can sometimes reduce costs. Average Costs of Concrete Removal While prices vary by region and project size, here are some general estimates: 1. National Average Small slabs (under 100 sq. ft.): $150–$500 Medium slabs (100–500 sq. ft.): $500–$1,200 Large slabs (over 500 sq. ft.): $1,200–$4,000 On average, homeowners can expect to pay $2–$6 per square foot for residential concrete removal. These numbers include demolition, labor, and disposal, but not any additional site preparation or landscaping work. 2. Cost Breakdown by Project Type Driveway Removal: $800–$3,000 depending on size and thickness. Patio Removal: $300–$1,500, factoring in shapes and decorative finishes. Sidewalk Removal: $200–$800. Foundation Removal: $2,000–$5,000 or more, depending on depth and reinforcement. 3. DIY vs. Professional Costs DIY removal can save money, with small projects potentially costing only $50–$200 for tool rentals and disposal fees. However, for larger slabs or reinforced concrete, professional services ensure safety, efficiency, and compliance with local regulations. You May Also Read:How much is post construction cleaning How to Reduce the Cost of Concrete Removal Even professional removal doesn’t have to break the bank. Here are some ways to lower costs: Recycle Concrete: Many facilities accept concrete for reuse, reducing landfill fees. Get Multiple Quotes: Compare at least 3–4 professional estimates to find competitive pricing. Break Projects Into Sections: Smaller demolition sections may be cheaper and easier to handle. DIY Preparations: Removing furniture, landscaping, or non-structural obstacles before professionals arrive can save labor costs. Being proactive and planning carefully can significantly reduce the concrete demolition and removal cost while ensuring safety. Planning Your Concrete Removal Project Proper planning is key to staying within budget and avoiding delays. 1. Preparing the Site Remove obstacles and secure surrounding areas. Check for permits if local regulations require them. Ensure safety measures such as protective gear and proper signage are in place. 2. Hiring Professionals When choosing contractors: Look for licensed, insured, and experienced companies. Ask for detailed estimates that include labor, equipment, and disposal costs. Check references and online reviews to confirm credibility. 3. Timeline and Expectations Small projects may take a few hours; larger projects could take several days. Allow time for disposal and cleanup. A well-planned schedule prevents surprise costs from rushed labor or last-minute disposal fees. Small projects may take a few hours; larger projects could take several days. Allow time for disposal and cleanup. Junk Masterz offers professional Debris Construction Removal services to handle hauling and disposal efficiently, saving you time and effort. Conclusion Removing concrete doesn’t have to be overwhelming if you understand the costs and plan properly. By considering factors such as slab size, type, accessibility, labor, and disposal, homeowners can budget effectively and make informed decisions. Whether you choose DIY removal or hire professionals, knowing how much does it cost to remove concrete ensures your project runs smoothly without unexpected expenses. Remember to request multiple quotes,

How Much Does House Cleaning Cost? A Complete Pricing Guide for Homeowners

House cleaning is one of the most requested home services today. Busy homeowners, families, and property managers often rely on professional cleaners to maintain a clean and healthy living space. However, one of the most common questions people ask before hiring a cleaner is how much does house cleaning cost. The cost of professional house cleaning can vary widely depending on several factors such as home size, location, level of cleaning required, and whether the service is recurring or a one-time deep clean. Some homeowners may only need a quick tidy-up, while others require extensive cleaning after renovations or move-outs. Understanding pricing helps you budget properly and avoid surprises when hiring a cleaning service. In this guide, we’ll break down the typical pricing structures used by cleaning companies, explain what influences the cost, and provide real examples to help you estimate what you might pay. By the end of this article, you will clearly understand how much does a house cleaner cost, what services are included, and how to choose the right cleaning service for your home. Average House Cleaning Costs in 2026 For most homeowners, professional cleaning services typically cost between $100 and $400 per visit depending on the home size and service type. Here is a quick breakdown of average cleaning costs: Home Size Average Cleaning Cost Small apartment (1 bed, 1 bath) $80 – $150 Medium home (2–3 bedrooms) $120 – $250 Large home (4+ bedrooms) $200 – $400 Many cleaning companies charge per visit, per hour, or per square foot, depending on the service type. If you’re wondering how much does it cost to get your house cleaned, the answer largely depends on the amount of work required. Routine cleaning tends to be more affordable, while deep cleaning services cost more due to the additional time and effort involved. How Much Does House Cleaning Cost Per Hour? Another common pricing model is hourly rates. On average, professional cleaners charge between $25 and $60 per hour per cleaner. Hourly pricing is often used for: One-time cleaning jobs Custom cleaning requests Homes with unpredictable cleaning needs For example: A small apartment may take 2–3 hours A standard home may take 3–5 hours Large homes may require 6+ hours If two cleaners are working together, the time is shorter but the hourly cost increases accordingly. So when people ask how much does house cleaning cost per hour, the final price depends on both the hourly rate and the time required to complete the job. Cost Per Square Foot for House Cleaning Some cleaning companies calculate pricing based on the size of the property. Typical rates range from: $0.10 to $0.30 per square foot Example estimates: Home Size Estimated Cost 1,000 sq ft $100 – $250 1,500 sq ft $150 – $350 2,500 sq ft $250 – $600 Larger homes usually cost more, but companies may offer discounts for recurring cleaning schedules.  How Much Does a One-Time House Cleaning Cost? One-time cleaning services are usually more expensive than recurring cleaning. The average cost for a one-time house cleaning ranges between: $150 and $450 This type of service is commonly used for: Move-in cleaning Move-out cleaning Seasonal deep cleaning Post-construction cleaning Because the cleaner may need to tackle built-up dirt, grease, and clutter, the job typically requires more time. If you’re asking how much does a one time house cleaning cost, expect to pay slightly more than regular maintenance cleaning. You May Also Read: Fastest way to clean the house How Much Does a Deep House Cleaning Cost? Deep cleaning goes far beyond standard cleaning by focusing on areas that are often overlooked during regular visits. It is more labor-intensive, thorough, and typically requires specialized cleaning products and tools. Scrubbing Baseboards: Over time, baseboards collect dust, dirt, and scuff marks. Deep cleaning involves carefully wiping, scrubbing, and sometimes using specialized cleaners to remove stubborn buildup. Cleaning Behind Appliances: Standard cleaning usually stops at the front of appliances, but deep cleaning includes moving or reaching behind ovens, refrigerators, and washers to remove hidden dust, crumbs, and grime. Washing Interior Cabinets: Kitchens and bathrooms often accumulate grease, spills, and dust inside cabinets. Deep cleaning ensures the interiors are wiped, sanitized, and free of residues. Detailed Bathroom Sanitation: Bathrooms harbor germs, soap scum, and mold. Deep cleaning involves scrubbing tiles, grout, sinks, tubs, toilets, and fixtures thoroughly to ensure a hygienic and sparkling result. Removing Built-Up Grime and Dust: Areas like ceiling fans, vents, light fixtures, and window sills collect long-term dust and dirt. Deep cleaning addresses these neglected spots for a fully refreshed home. Many homeowners schedule deep cleaning once or twice a year to “reset” the home’s cleanliness, making regular maintenance easier and reducing the need for costly future cleaning services. When people search how much does a deep house cleaning cost, the price reflects the additional labor and attention required. Factors That Affect House Cleaning Prices Several variables influence the final price of a cleaning service. Home Size Larger homes require more time and supplies, increasing the overall cost. Number of Bathrooms Bathrooms are the most labor-intensive areas to clean, so homes with more bathrooms usually cost more. Cleaning Condition Homes that haven’t been cleaned for a long time require more effort and time. Pets Pet hair, odors, and stains may increase cleaning time. Frequency of Cleaning Recurring services are usually cheaper than one-time visits. For example: Weekly cleaning → lowest cost per visit Bi-weekly cleaning → moderate price Monthly cleaning → higher price Standard Cleaning vs Deep Cleaning: What’s the Difference? Understanding service types helps explain pricing differences. Standard Cleaning Includes Dusting surfaces Vacuuming carpets Mopping floors Cleaning kitchen counters Bathroom sanitizing Trash removal Deep Cleaning Includes Cleaning baseboards Scrubbing grout Cleaning inside appliances Detailed kitchen and bathroom work Removing built-up dirt and grease Because deep cleaning requires significantly more time, it explains how much does it cost for a house cleaner when additional services are requested. How Often Should You Hire a House Cleaner? The frequency of hiring

How to Finish a Basement ?For Maximum Value and Comfort

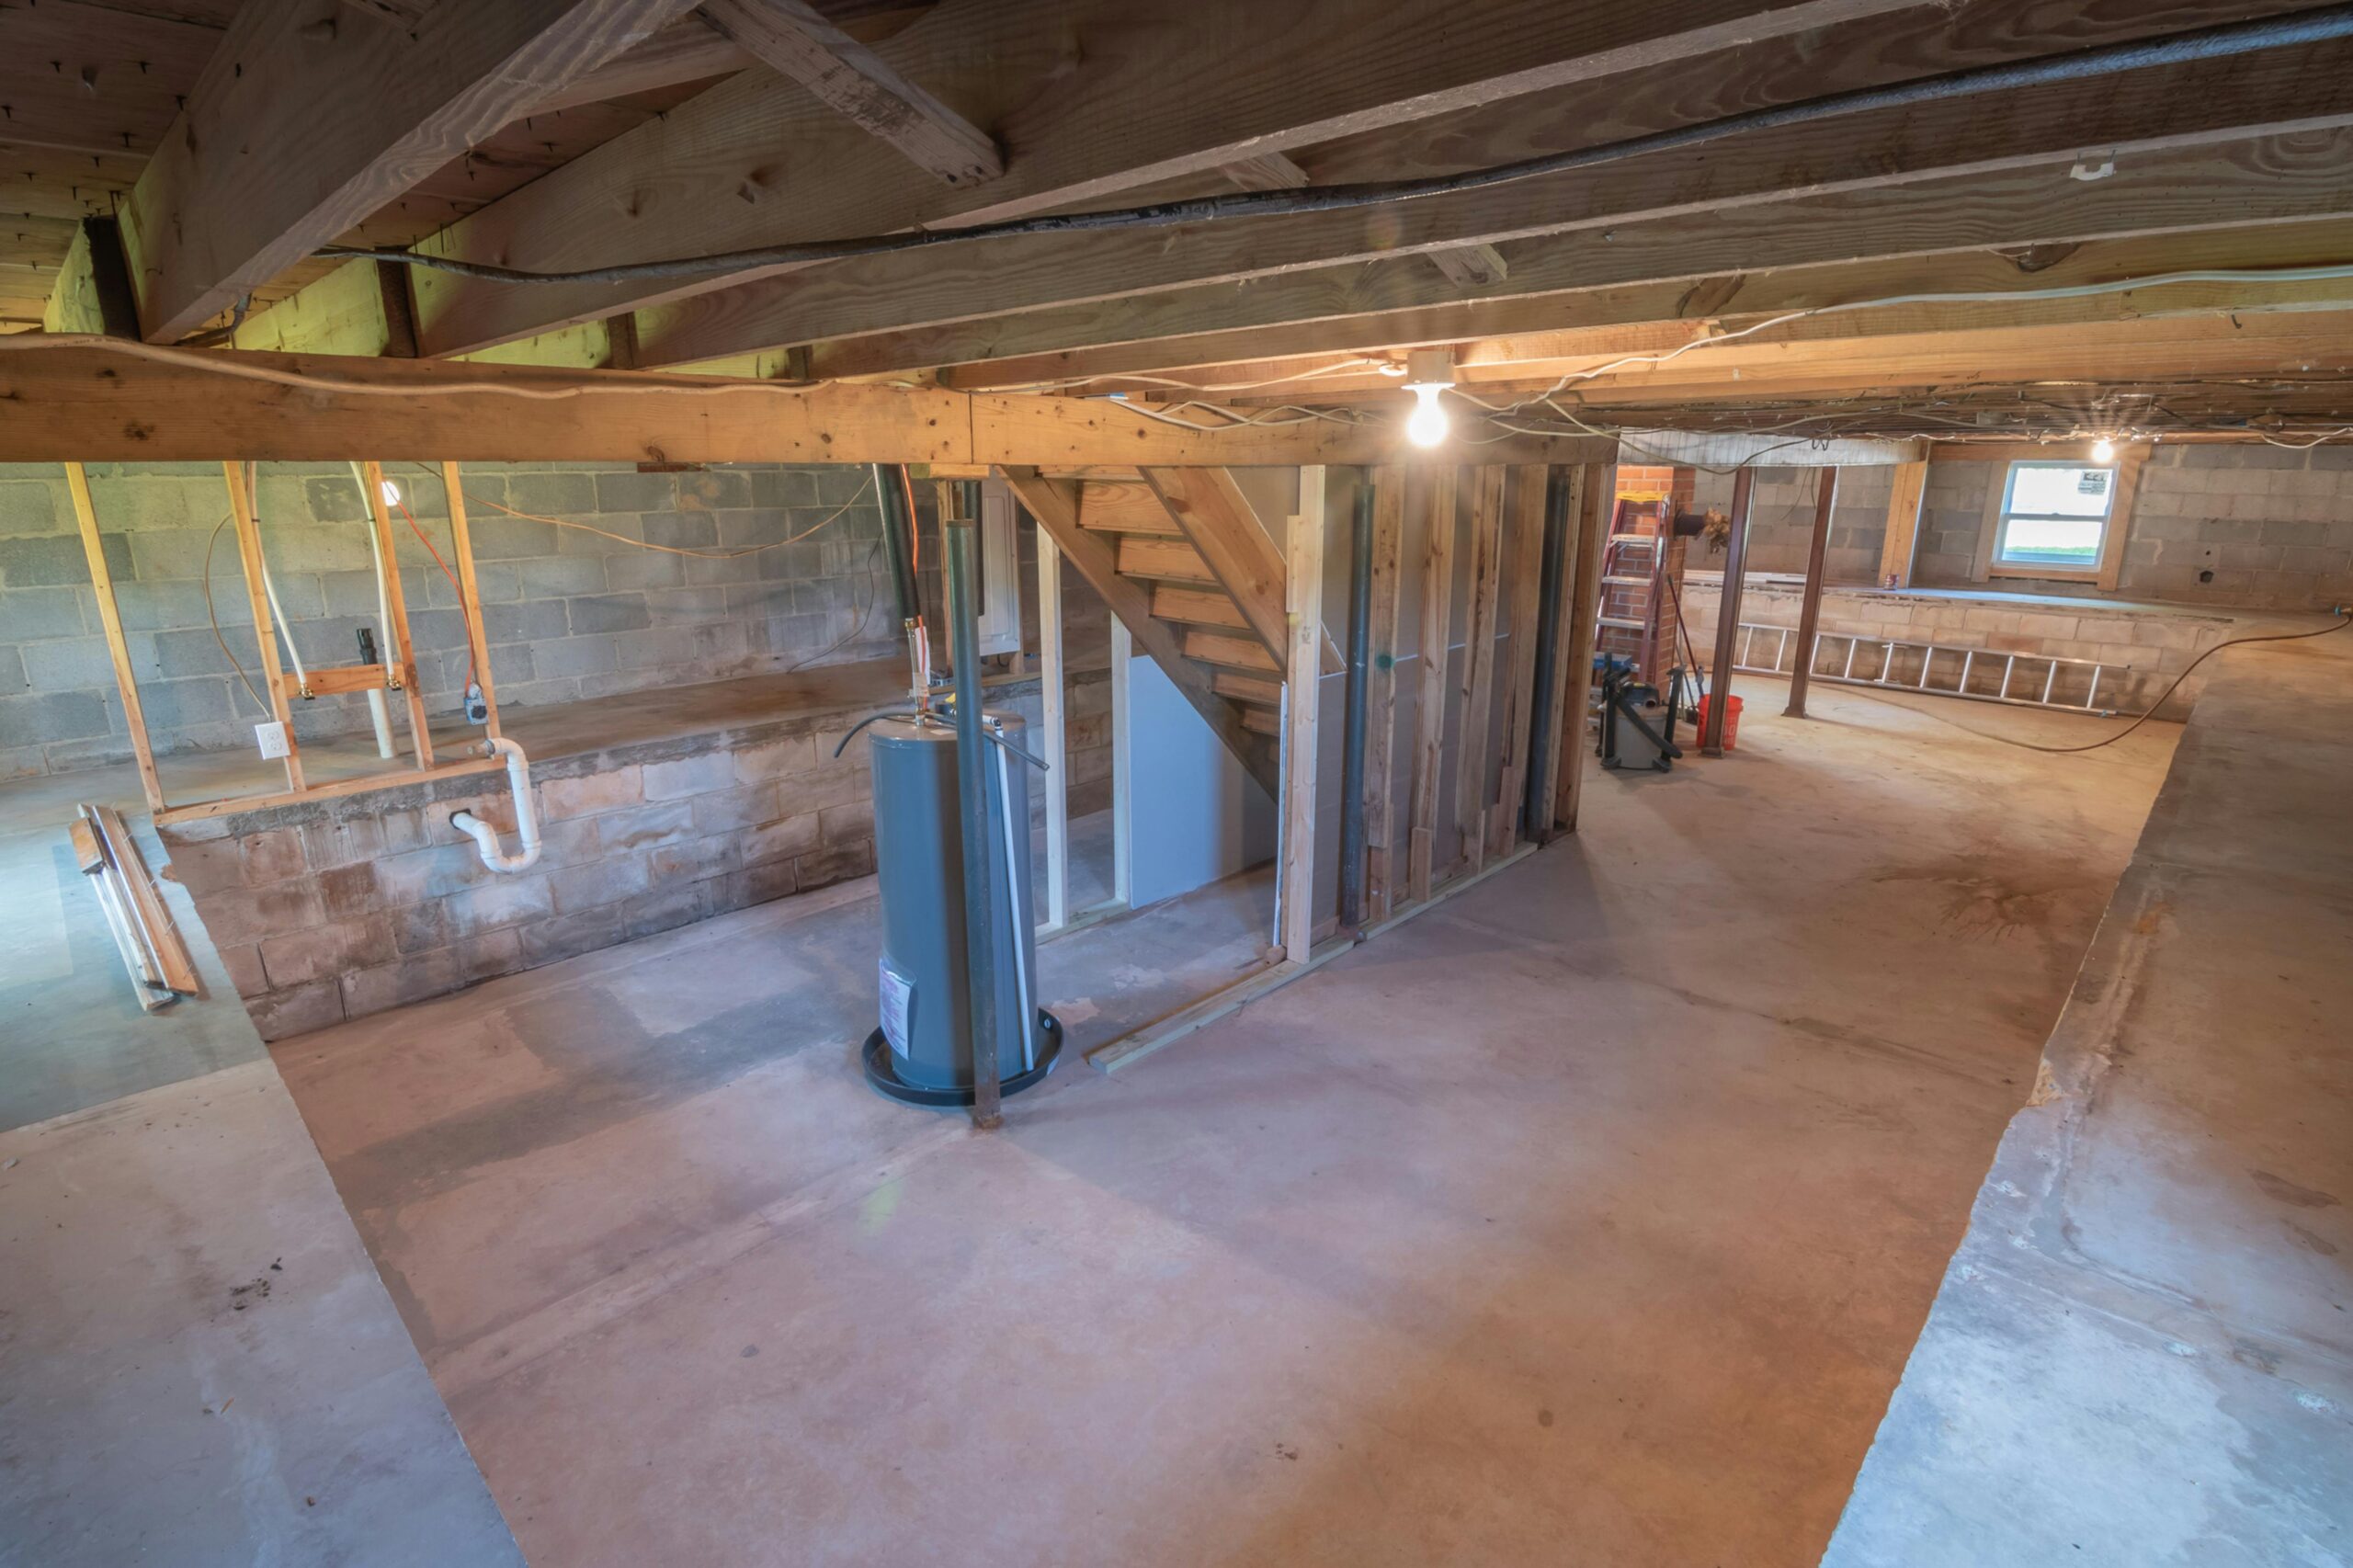
A basement is one of the most valuable yet underused spaces in many homes. Instead of leaving it unfinished or used only for storage, homeowners can transform it into a comfortable living area, home office, entertainment room, or even a rental suite. Knowing how to finish a basement  can significantly increase both the functionality and value of your property. However, finishing a basement is not just about adding drywall and flooring. It requires careful planning, moisture protection, insulation, electrical work, and compliance with local building codes. Without the right approach, homeowners can face issues like mold growth, poor ventilation, or structural damage. This guide explains the best way to finish a basement using practical, easy-to-follow steps. Whether you plan to complete the project yourself or hire professionals, understanding the how to finish basement steps will help you avoid costly mistakes and create a safe, comfortable space. By the end of this guide, you’ll have a clear roadmap, expert tips, and realistic expectations for completing a successful basement renovation. Why Finishing a Basement Is a Smart Home Investment? Finishing a basement offers multiple advantages for homeowners. Increased Living Space An unfinished basement can be converted into a guest bedroom, entertainment room, gym, office, or playroom. This additional square footage improves comfort and usability. Higher Property Value Real estate experts often note that finished basements can significantly increase resale value. Buyers appreciate extra living space that does not require further renovation. Improved Energy Efficiency Proper insulation and wall finishing help regulate temperature, reducing heating and cooling costs. Rental or Income Potential In some areas, homeowners convert finished basements into legal rental units, creating a new source of income. When considering the best way to finish a basement, think about long-term goals. Designing the space for flexibility ensures it can adapt to changing needs. Planning Your Basement Renovation Planning is the most important stage when learning how to finish a basement successfully. Assess the Basement Condition Before beginning construction, inspect for: Water leaks Foundation cracks Mold or mildew Poor drainage These issues must be fixed before any renovation begins. Check Local Building Codes and Permits Many municipalities require permits for electrical, plumbing, and structural work. Ignoring regulations can cause problems during resale or inspections. Decide the Purpose of the Basement The design will depend on how the space will be used. Common finished basement ideas include: Family entertainment room Home theater Office or workspace Guest bedroom Home gym Set a Realistic Budget Basement finishing costs vary depending on materials, labor, and square footage. Planning early helps prevent unexpected expenses. Following these steps ensures a smoother renovation process. Moisture Control and Waterproofing Moisture is one of the biggest challenges when finishing a basement. Without proper waterproofing, homeowners risk mold growth, damaged walls, and unpleasant odors. Common Sources of Basement Moisture Poor exterior drainage Cracked foundation walls High humidity levels Leaking pipes How to Prevent Moisture Problems Experts recommend these solutions: Install a vapor barrier Use waterproof sealants on foundation walls Improve exterior drainage and gutters Install a sump pump if necessary Use a dehumidifier to control humidity Moisture prevention is often considered the best way to finish a basement because it protects your investment and ensures long-term durability. Proper waterproofing, drainage improvements, and humidity control can help prevent common basement issues such as mold growth, wall damage, and unpleasant odors. Skipping this step can lead to costly repairs later and may even damage newly installed walls, flooring, and insulation. Many homeowners also rely on experienced service providers during renovation projects to manage debris and maintain a clean work environment. For example, Junk Masterz helps homeowners by handling construction debris and cleanup during basement finishing projects, allowing the renovation process to stay organized and efficient. Framing the Basement Walls After waterproofing is complete, framing is the next stage in the how to finish basement steps. Framing creates the structure for walls, doors, and room divisions. Basic Framing Process Measure and mark the layout. Install pressure-treated bottom plates. Build wall frames using wooden or metal studs. Secure frames to floor joists above. Leave space for electrical outlets and plumbing lines. Tips for Basement Framing Maintain a gap between concrete walls and framing to avoid moisture contact. Use pressure-treated wood for areas touching concrete. Plan wall locations carefully before construction begins. Good framing ensures a strong and durable structure for drywall and insulation. Electrical, Plumbing, and Insulation Before closing walls with drywall, electrical wiring, plumbing, and insulation must be installed. Electrical Installation Basements typically require: Lighting fixtures Wall outlets Dedicated circuits for appliances Smoke detectors Hiring a licensed electrician ensures compliance with safety codes. Plumbing Considerations If the basement includes a bathroom or kitchenette, plumbing lines must be installed during this stage. Insulation Options Proper insulation improves comfort and energy efficiency. Common basement insulation materials include: Rigid foam boards Spray foam insulation Fiberglass batts Insulation also helps control moisture and temperature fluctuations. When planning how to finish basement steps, installing insulation properly is essential for creating a comfortable living environment. Drywall, Flooring, and Ceiling Installation Once framing and utilities are complete, the finishing stage begins. Drywall Installation Drywall panels are attached to wall studs and then taped, mudded, and sanded to create smooth walls. Moisture-resistant drywall is often recommended for basements. Basement Flooring Options Not all flooring works well in basements due to humidity. Popular choices include: Vinyl plank flooring Engineered wood Tile flooring Carpet tiles with moisture barriers Ceiling Choices Basements often use drop ceilings or drywall ceilings. Drop ceilings provide easier access to electrical wiring and plumbing lines, while drywall ceilings create a more polished look. Choosing the right materials is key when determining the best way to finish a basement. You May Also Read: What is the best way to dispose of drywall? Lighting, Ventilation, and Safety Lighting and ventilation can dramatically improve basement comfort. Lighting Ideas Basements often lack natural light, so proper lighting is essential. Common solutions include: Recessed LED lighting Wall sconces Floor lamps Ventilation Proper airflow prevents humidity and

How to Get Rid of Old Washer and Dryer (Complete Homeowners Guide)

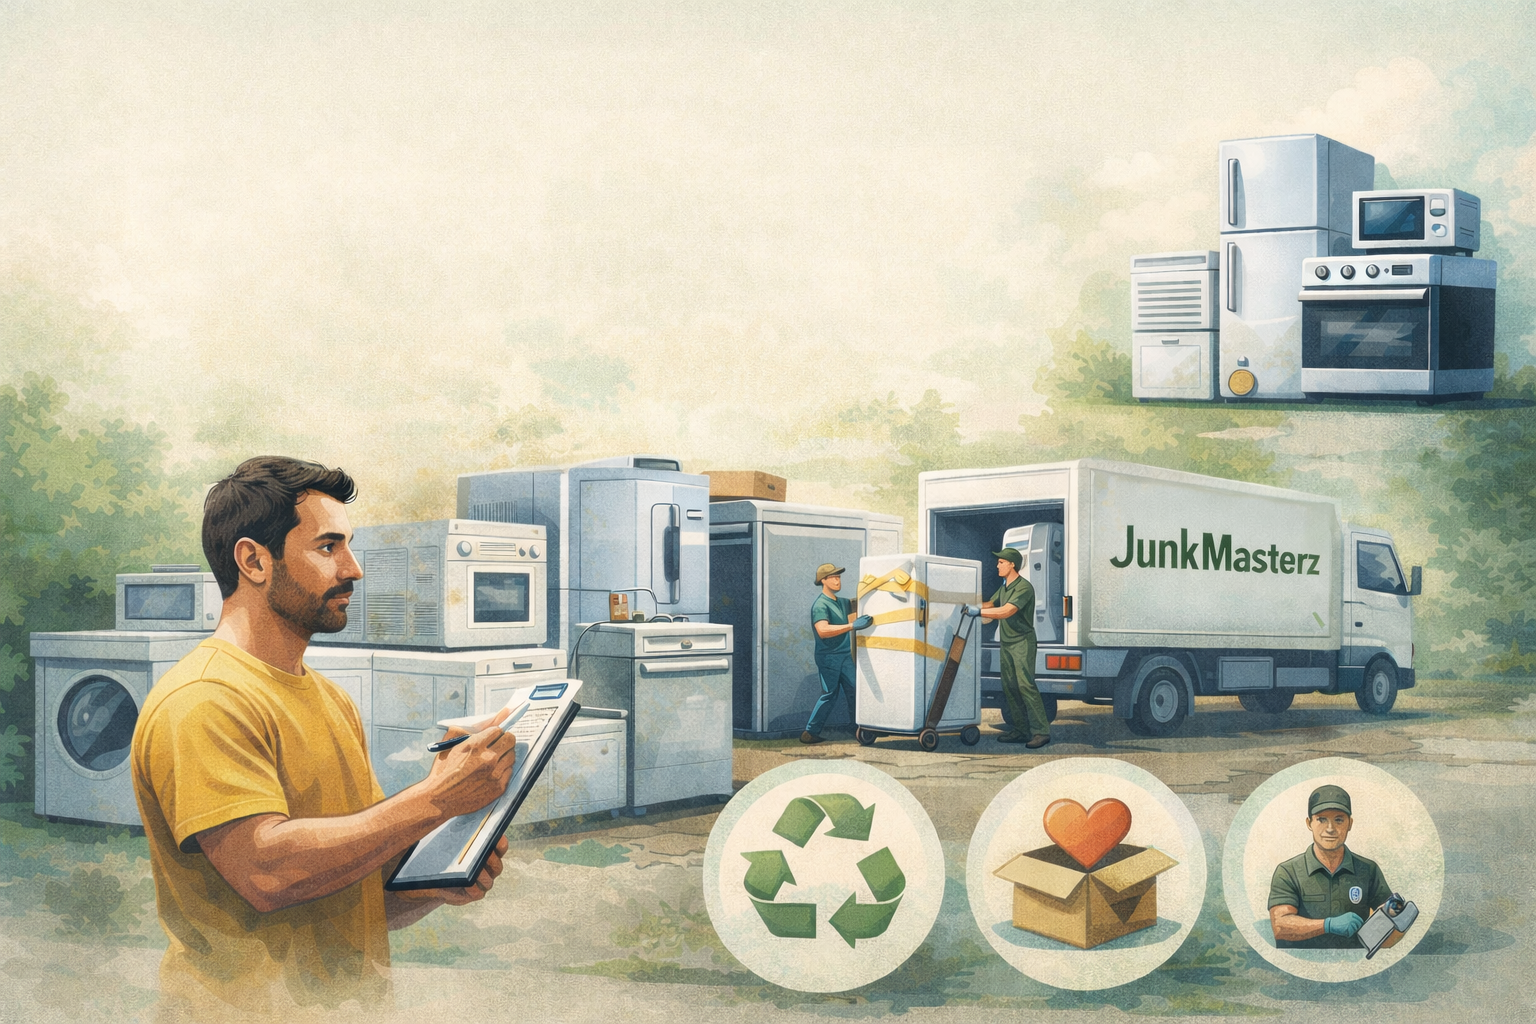
So the new washer and dryer just got delivered, and now you’re standing in the garage staring at the old ones, wondering how they got so heavy. Or maybe your washing machine finally gave out, and it’s just sitting there, dead weight, taking up space you need back. Here’s the good news: getting rid of an old washer and dryer is a lot easier than it looks, and in most cases, it doesn’t have to cost you anything. Depending on whether your units still work, how much time you have, and how much effort you’re willing to put in, you’ve got several solid options from free retailer pickup to donation, resale, scrap recycling, and junk removal services. This guide walks through all of them, how to Get Rid of old washer and dryer, what they cost, and how to prep your old appliances so the process goes smoothly. How Do You Get Rid of an Old Washer and Dryer? 7 Easy Ways The fastest ways to get rid of an old washer and dryer are: Have the retailer haul it away when they deliver your new one Donate it to a local charity if it still works Sell it or give it away for free online Recycle it for scrap metal Check for a manufacturer or retailer take-back program Schedule a municipal bulk trash pickup Hire a junk removal service to take it off your hands Which option makes sense for you really comes down to one question: does the appliance still work? If yes, you’ve got donation, resale, or trade-in paths available, and some of them can even put a little money back in your pocket. If it’s broken, scrap recycling, municipal pickup, or a junk hauler are your best bets. Let’s go through each one in detail. 1. Let the Retailer Haul It Away When You Buy New If you’re replacing your washer and dryer, this is usually the path of least resistance. Most major appliance retailers offer haul-away service when they deliver your new unit, meaning the delivery crew disconnects the old machine and takes it with them the same day. It’s not always free, though. Some retailers include haul-away at no charge, while others tack on a fee, usually somewhere between $20 and $50 per appliance. Some also only offer it if you’re buying a comparable replacement (a washer for a washer, not a washer for a dryer). What to Ask Before You Buy Before you finalize the purchase, ask the salesperson directly: Is haul-away included, or is it an add-on fee? Will they disconnect water and power lines, or is that on you? Do they take both the washer and dryer, or just one? Getting this in writing (or at least confirmed on your receipt) saves you from a surprise conversation on delivery day. 2. Donate Your Old Washer and Dryer If your appliances still run, donating is one of the best ways of getting rid of a washer without letting a perfectly good machine go to waste. Local charities, Habitat for Humanity ReStores, and community reuse organizations regularly accept working washers and dryers, and some will even come pick them up from your home. This is also one of the most overlooked answers to what to do with an old washer and dryer when you’re trying to downsize or clear out a rental property; it’s free, it’s fast, and someone else genuinely benefits. Donation Requirements to Know Most organizations have a few ground rules: The appliance generally needs to be in working condition; cracked drums, broken belts, or non-functional units usually won’t qualify Some charities offer pickup, but many require you to drop the unit off yourself Ask ahead of time, since availability and truck schedules vary by location and season If you itemize deductions, keep the donation receipt. The IRS allows deductions for donated household items at fair market value, not the original purchase price, so don’t expect to write off what you paid for it new. It’s worth checking current IRS guidelines on non-cash charitable donations before filing. 3. Sell It or Give It Away for Free If you’d rather not deal with a nonprofit’s schedule, selling or giving away your old washer and dryer online is one of the more practical answers to how to get rid of a washer and dryer without any drop-off runs. Platforms like Facebook Marketplace, Craigslist, and OfferUp are full of people specifically looking for used or even broken units; some buyers want a workhorse on a budget, others want a non-working machine just for spare parts. How to Price a Used Washer and Dryer Pricing depends heavily on age and condition: A working set under 5 years old can often sell for $150–$400 Older but functional units typically go for $50–$150 Non-working machines are usually listed as “free” or sold for a nominal $10–$20 to someone who wants parts Here’s a tip that surprises a lot of people: listing an old, broken washer as “free — you haul it” often moves faster than trying to sell it. People show up quickly for free appliances, and it saves you the hassle of arranging removal yourself. 4. Recycle It for Scrap Metal Washers and dryers are mostly steel, with some copper wiring inside the motor, both of which scrap yards are usually happy to pay for. This makes scrap metal recycling one of the more practical options for how to dispose of a washer and dryer that no longer works and isn’t worth donating. Most areas have at least one scrap metal recycler that accepts large appliances. A quick search for “scrap metal recycling near me” or a call to your local recycling center can help you find out what they accept and whether pickup or drop-off is available. Before disposing of any appliance, it’s important to understand your local disposal requirements and recycling options. For more helpful tips, check out our guide on how to dispose of large appliances, where we cover the safest, easiest,

How to Dispose of Paint Thinner Safely and Legally (Complete Homeowner Guide)

Paint thinner is a common tool in many households, used for thinning oil-based paints, cleaning brushes, and removing stubborn paint stains. This makes understanding how to dispose of paint thinner safely an essential part of any painting or renovation project.While it is incredibly useful, it also comes with serious risks if not handled or disposed of correctly. Many homeowners are unaware that improper disposal of paint thinner can lead to environmental contamination, health hazards, and even fire risks.  In this guide, we will walk you through safe and effective methods for disposing of used paint thinner, including how to reuse it, how to handle oil-based variants, and where to take larger quantities for legal disposal. By following these steps, you can protect your home, your community, and the environment while staying compliant with local regulations. What Is Paint Thinner and Why Is It Hazardous? Paint thinner is a petroleum-based solvent used to: Thin oil-based paints Clean brushes and rollers Remove paint spills Degrease surfaces Most paint thinners contain volatile organic compounds (VOCs). These chemicals evaporate quickly and can: Pollute air Contaminate soil and groundwater Cause health issues if inhaled Ignite easily (highly flammable) Because of these risks, paint thinner should never be poured down the drain, into the ground, or into regular trash unless fully dried and approved by local regulations. How to Dispose of Paint Thinner (Step-by-Step Guide) Here is the safest and most recommended process. Step 1: Determine If It Can Be Reused Before disposal, check if the paint thinner can be recycled at home. How to reuse paint thinner: Pour used thinner into a clear glass or metal container. Seal it tightly. Let it sit undisturbed for 24–48 hours. Paint residue will settle at the bottom. Carefully pour the clear liquid into a new container. The clear liquid can often be reused for cleaning tools again. This method is ideal when learning how to dispose of used paint thinner responsibly, since reuse reduces waste. Step 2: Dry Small Amounts Safely If you have a small leftover amount: Pour it into a metal tray lined with kitty litter or sawdust. Let it evaporate in a well-ventilated outdoor area away from flames. Once completely dry, the solid residue may be disposed of in regular trash (check local rules). Never dry paint thinner indoors. Step 3: Take It to a Household Hazardous Waste Facility For larger quantities, the safest answer to how to properly dispose of paint thinner is: Take it to your local Household Hazardous Waste (HHW) facility. Most cities operate drop-off centers several times a year. Some offer permanent facilities. These centers are equipped to: Neutralize chemicals Recycle solvents Dispose of hazardous materials safely How to Dispose of Oil Paint Thinner Oil paint thinner is more toxic than water-based alternatives. If you’re wondering how to dispose of oil paint thinner, follow these rules: Never mix it with other chemicals. Keep it in its original container if possible. Label it clearly if transferring to a new container. Store it away from heat sources. Oil-based thinners must be handled as hazardous waste in almost all regions. You May Also Read:How to Dispose of gasoline How to Dispose of Paint Thinner After Use If you need a fast summary: Let solids settle and reuse clear liquid. Dry small amounts outdoors with absorbent material. Never pour down sink, toilet, storm drain, or soil. Take larger quantities to hazardous waste collection. Store in sealed, fire-safe container until disposal. Mid-project cleanups can be overwhelming, and companies like Junk Masterz assist with sorting, transporting, and ensuring materials go to approved disposal facilities. Can You Pour Paint Thinner Down the Drain? No. Paint thinner damages: Plumbing systems Septic tanks Municipal wastewater systems It can also: Enter rivers and groundwater Kill aquatic life Release toxic fumes inside pipes Most municipalities fine residents for illegal disposal of hazardous solvents. Can Paint Thinner Go in Regular Trash? Only if: It has fully evaporated. It is completely dry. Local waste regulations allow it. Liquid paint thinner should never go in household garbage. Safe Storage Tips Before Disposal If you cannot dispose of it immediately: Store in original container. Keep tightly sealed. Place in cool, dry area. Keep away from children and pets. Avoid direct sunlight. Proper storage reduces fire risk and chemical leaks. Environmental Impact of Improper Disposal Improper disposal can: Pollute groundwater for decades Harm wildlife Increase indoor air pollution Create fire hazards in landfills Even small amounts can contaminate thousands of gallons of water. Responsible disposal protects both your household and the community. What happens if paint thinner goes down the drain? It can: Damage plumbing Contaminate groundwater Harm wastewater treatment systems Lead to fines It should never be poured into household drains. When to Call a Professional Removal Service If you have: Large quantities Garage cleanouts Commercial renovation waste Mixed hazardous materials It may be safer to contact professionals. Junk Masterz is offering affordable junk removal services that help homeowners safely remove unwanted materials, including paint-related waste. Frequently Asked Questions (FAQs) Is paint thinner considered hazardous waste? Yes. In most municipalities, paint thinner is classified as household hazardous waste due to its flammable and toxic chemical composition. How long does paint thinner take to evaporate? Small amounts may evaporate within 24–48 hours in a well-ventilated outdoor area. Larger quantities take longer and should not be left in enclosed spaces. Can you reuse paint thinner? Yes. After allowing solids to settle at the bottom of a container, the clear liquid on top can often be reused for cleaning brushes and tools. How do you neutralize paint thinner? Paint thinner cannot be chemically neutralized safely at home. The safest approach is evaporation of small quantities or disposal at a hazardous waste facility. Can I mix paint thinner with cat litter and throw it away? Yes, for small quantities. Once fully absorbed and completely dry, some municipalities allow disposal in regular trash. Always verify local regulations. How to dispose of used paint thinner from brushes? Let the thinner settle

How to Dispose of Old Appliances :Safe, Free, and Step-by-Step Guide

Replacing an old refrigerator, washer, or stove feels great — until you’re left staring at the bulky appliance sitting in your garage.How to Dispose of Old Appliances, you’re not alone. Many homeowners don’t realize that appliances can’t simply be tossed into regular trash. They often contain refrigerants, electrical components, heavy metals, and other materials that require careful handling. Taking the time to dispose of appliances correctly not only protects the environment but also supports recycling systems that recover valuable materials like steel, copper, and aluminum. Responsible disposal reduces landfill waste, conserves natural resources, and keeps hazardous materials out of soil and water. Making the right choice today contributes to a cleaner and safer community tomorrow. Why Proper Appliance Disposal Matters? Appliances are large, complex products made of various materials. Disposing of them incorrectly can cause long-term environmental harm. Cooling appliances contain refrigerants that contribute to climate change if released improperly. Many units contain metals like copper and aluminum that can and should be recycled. When these materials go to landfills, natural resources are wasted. There are also legal considerations. Federal environmental regulations require certified removal of refrigerants before scrapping refrigerators and air conditioners. EPA guidelines specify safe disposal procedures for household appliances that use refrigerants, and failure to comply with these federal requirements can lead to penalties. Many municipalities enforce strict rules for bulk waste disposal. Ignoring these rules can lead to penalties. In short, proper disposal protects the environment, conserves resources, and keeps you compliant with local laws. How to Dispose of Old Appliances?(Step-by-Step) Understanding how to dispose of old appliances properly begins with preparation. Step 1: Research Local Disposal Rules Every city has different guidelines. Some offer scheduled bulk pickup days. Others require drop-off at designated recycling facilities. Always confirm requirements before moving the appliance. Step 2: Disconnect Utilities Carefully Safety comes first. Unplug electrical appliances completely. Shut off and disconnect water lines for dishwashers and washing machines. Turn off gas lines before removing gas-powered appliances. This step prevents injury and property damage. Step 3: Handle Hazardous Materials Refrigerators and air conditioners contain refrigerants that must be removed by licensed professionals. Attempting to handle these chemicals yourself can be dangerous and illegal. Older appliances may also contain switches or components that require special disposal. Step 4: Prepare for Pickup or Drop-Off Clean out any food or debris. Secure loose wires and tape doors shut. In some cases, doors must be removed to eliminate safety risks during transport. By following these steps, you ensure the appliance is ready for responsible recycling or removal. How to Dispose of Old Appliances Safely? Safety should never be overlooked. Appliances are heavy and awkward to carry. Attempting to lift them alone can result in serious injury. Using a dolly or hiring help reduces risk. Sharp metal edges inside appliances can cause cuts. Wearing protective gloves is recommended. For cooling units, never puncture or dismantle the system yourself. Professional refrigerant removal is required to prevent environmental harm. Knowing how to dispose of old appliances safely protects both your health and the environment. If managing these options feels overwhelming, Certified Companies can help and coordinate responsible disposal for homeowners who prefer a hands-off solution. How to Dispose of Old Appliances for Free? Many homeowners don’t realize that free disposal options are available if you know where to look. Some appliance pickup services offer completely free appliance removal and responsible recycling, handling heavy lifting and disposal at no cost to you. For example, platforms like Take My Appliance can connect you with local partners who will pick up major household appliances — such as refrigerators, washers, and dryers — and recycle them responsibly with no fee. Utility companies and municipal programs often provide similar opportunities. Many communities and waste departments run free curbside or scheduled appliance pickup programs for bulky items, including old stoves and refrigerators, so you don’t have to pay to get them hauled away. Retailers frequently include free haul‑away services when you purchase a new appliance, and some private services advertise free pickup and recycling of appliances across large service areas. Donation is another free option if the appliance is still functional. Charities and resale outlets, including Habitat for Humanity ReStores and other nonprofit donation centers, often accept working refrigerators, washers, and stoves with no pickup fees, helping appliances find a new home instead of going to waste. Scrap metal recycling may even provide a small payout depending on weight and metal value. You May Also Read: How to get rid of small appliances How to Dispose of Old Household Appliances? (Room-by-Room Guide) Room / Area Appliance Disposal Method Safety / Tips Notes Kitchen Refrigerator / Freezer Certified recycling, municipal pickup Remove food, tape or remove doors, refrigerant must be handled by professionals Some utility companies offer free pickup or rebates Oven / Stove / Dishwasher Scrap metal recycling, bulk pickup Disconnect electrical, gas, and water lines Check local curbside rules Microwave E-waste recycling center Remove plug or batteries, clean interior Retailers sometimes accept for recycling Coffee Maker / Blender / Toaster E-waste recycling center Remove batteries, unplug Small appliances can also be donated if functional Laundry Washer / Dryer Scrap metal recycling or bulk pickup Disconnect water hoses and power cords, drain water Consider professional hauling if heavy Iron / Steamer E-waste recycling Remove electrical components Can be donated if functional Small Household Vacuum Cleaner E-waste recycling Empty dust bags, remove batteries Some resale stores accept working units Fan / Heater / Air Purifier E-waste recycling Disconnect power cord, clean filters Check local e-waste events Outdoor / Specialty Electric Lawn Mower E-waste or scrap metal recycling Remove batteries, drain fluids Gas-powered may require hazardous waste facility Gas Lawn Mower / Leaf Blower Hazardous waste drop-off Drain fuel, oil, and fluids Check local disposal rules Water Heater / AC Unit Certified recycling or junk removal Refrigerants or insulation are handled by professionals Professional junk removal is often recommended Pool Pump / Dehumidifier Scrap metal or e-waste recycling Drain water, unplug Small electronics

How Much Does Popcorn Ceiling Removal Cost? Complete Pricing Guide 2026

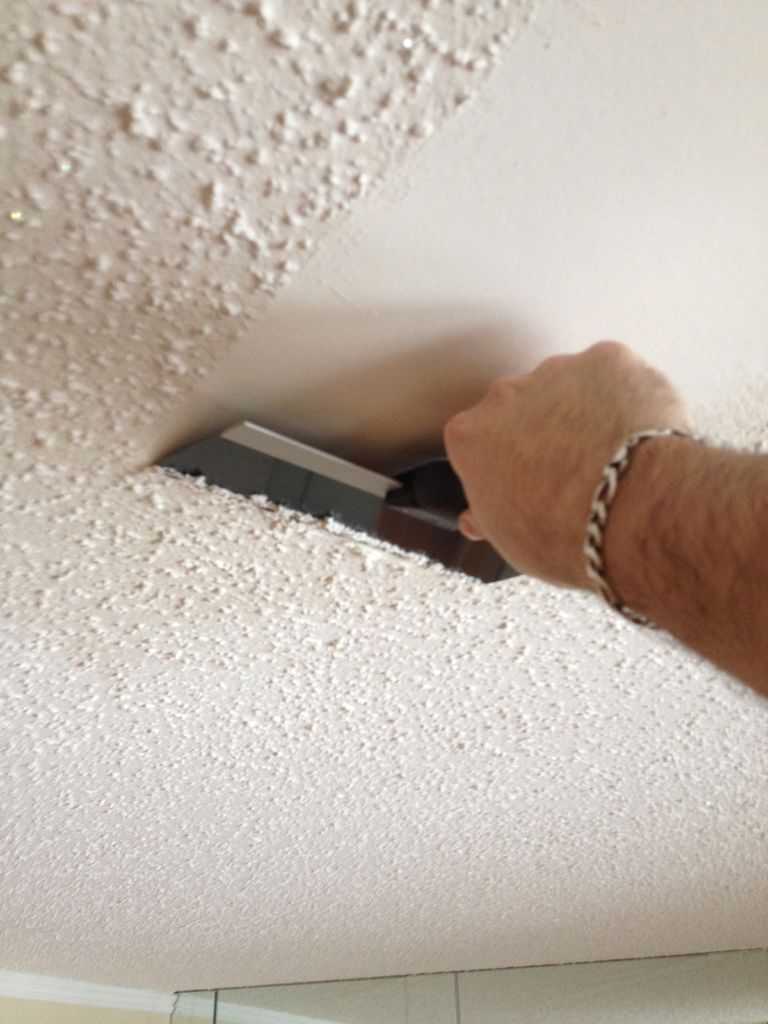
Popcorn ceilings were once a popular choice in homes because they were inexpensive to install and helped hide imperfections. Today, however, many homeowners choose to remove them to create a cleaner, more modern look. If you’re planning a renovation, one of the first questions you’ll likely ask is: How much does popcorn ceiling removal cost? On average, the popcorn ceiling removal cost in 2026 ranges from $1 to $7 per square foot, depending on the ceiling’s condition, labor costs, and whether repairs or painting are included. For an average-sized room, homeowners typically spend $300 to $1,200, while removing popcorn ceilings throughout an entire house can cost anywhere from $2,500 to $8,000 or more. In this guide, we’ll break down the cost to remove popcorn ceiling, explain what factors influence pricing, and help you decide whether hiring a professional is the right choice. Average Popcorn Ceiling Removal Cost in 2026 If you’re wondering how much does it cost to remove popcorn ceiling, the answer depends on several factors, including the size of the room, ceiling height, local labor rates, and whether the ceiling contains asbestos. Here’s a general idea of what homeowners can expect to pay in 2026. Project Size Average Cost Small Room (100–150 sq. ft.) $300–$800 Bedroom (150–250 sq. ft.) $500–$1,200 Living Room (250–400 sq. ft.) $900–$2,000 Entire House $2,500–$8,000+ These estimates usually include scraping the texture, basic cleanup, and labor. However, repairs, painting, or asbestos removal can increase the final price. Every home is different, so it’s always a good idea to request several estimates before choosing a contractor. Why Costs Vary From One Home to Another Many homeowners compare prices online and wonder why estimates can differ by thousands of dollars. The truth is that no two ceilings are exactly alike. A ceiling that’s in good condition can often be scraped and refinished relatively quickly. On the other hand, ceilings with water damage, cracks, or multiple layers of paint require more preparation and labor. Local labor rates also play a major role. Homeowners in large cities generally pay more than those in smaller towns because contractor wages and operating costs are higher. Another important factor is the finish you want after the popcorn texture is removed. Some homeowners choose a simple smooth finish, while others prefer decorative textures or fresh paint, all of which add to the total project cost. Understanding these variables helps explain why the cost to remove popcorn ceiling isn’t the same for every home. What Does the Removal Process Include? Professional popcorn ceiling removal involves much more than simply scraping off the texture. A typical project includes several steps to ensure a clean, high-quality finish. Most contractors will: Cover floors, walls, and furniture with protective plastic. Wet the ceiling texture to reduce dust. Carefully scrape away the popcorn material. Repair minor drywall damage. Sand the surface until it’s smooth. Apply primer if needed. Clean up debris after the job is complete. Some companies also include painting in their estimate, while others charge separately. Always ask what’s included in the quoted price so there are no surprises later. Hiring an experienced professional can also reduce the risk of damaging the drywall underneath, which may save money on repairs in the long run. Average Cost by Room Size Below is a detailed table to help you understand how much cost to remove popcorn ceiling based on room size. Room Type Room Size (Approx.) Estimated Cost Range Small Bedroom 10×10 (100 sq. ft.) $300 – $900 Medium Bedroom 12×12 (144 sq. ft.) $400 – $1,200 Living Room 15×20 (300 sq. ft.) $900 – $2,000 Kitchen 150–200 sq. ft. $450 – $1,200 Master Bedroom 200–250 sq. ft. $600 – $1,500 Basement Ceiling 400–800 sq. ft. $1,200 – $3,500 Whole House 1,000–1,500 sq. ft. $1,500 – $3,500+ If you’re still calculating how much does popcorn ceiling removal cost, remember that refinishing and painting can add 30–50% more to these numbers. Does Popcorn Ceiling Contain Asbestos? One of the most important questions homeowners should ask before starting a removal project is whether the ceiling contains asbestos. Popcorn ceilings installed before the early 1980s may include asbestos fibers, which were commonly used in construction materials because of their heat-resistant properties. When left undisturbed, asbestos generally poses little risk. However, scraping or sanding the ceiling can release harmful fibers into the air. For this reason, professionals recommend having older popcorn ceilings tested before removal. Typical asbestos-related costs include: Service Average Cost Asbestos Inspection $200–$800 Laboratory Testing $25–$100 per sample Professional Asbestos Removal $8–$15+ per sq. ft. If testing confirms asbestos is present, do not attempt to remove the ceiling yourself. Licensed asbestos abatement contractors have the training, equipment, and protective measures needed to remove and dispose of hazardous materials safely while complying with local regulations. Although asbestos removal costs more, it protects your family’s health and helps prevent expensive legal or environmental issues. So even though you’re focused on how much does popcorn ceiling removal cost, think about long-term benefits.If you are planning a renovation, remember that debris management is just as important as removal. Reliable companies like Junk Masterz can assist with heavy renovation waste, keeping your home safe and clean after the project. What Affects the Cost to Remove a Popcorn Ceiling? Understanding pricing helps you avoid surprises. Here are the biggest cost factors explained clearly. 1. Size of the Area The larger the room, the more labor and materials are required. Contractors usually charge per square foot. Even small increases in space can raise the final bill significantly. For example: 100 sq. ft. room = lower labor time 500 sq. ft. open area = longer scraping and refinishing time This directly impacts the overall cost of popcorn ceiling removal. 2. Asbestos Testing and Removal If your home was built before 1985, asbestos may be present. Testing costs: $200–$800 Professional asbestos removal: $5–$10 per sq. ft. If asbestos is found, the cost to remove a popcorn ceiling can double or triple. Certified specialists are required for safety and

Color Palette