Archive for David Harlan

How to Clean Out a House Full of Junk Step by Step

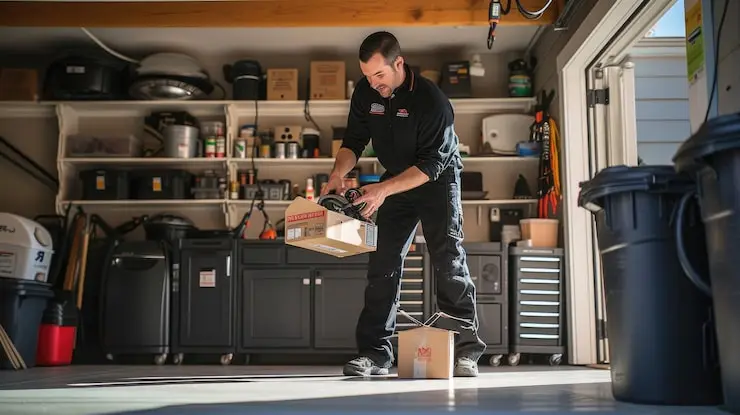
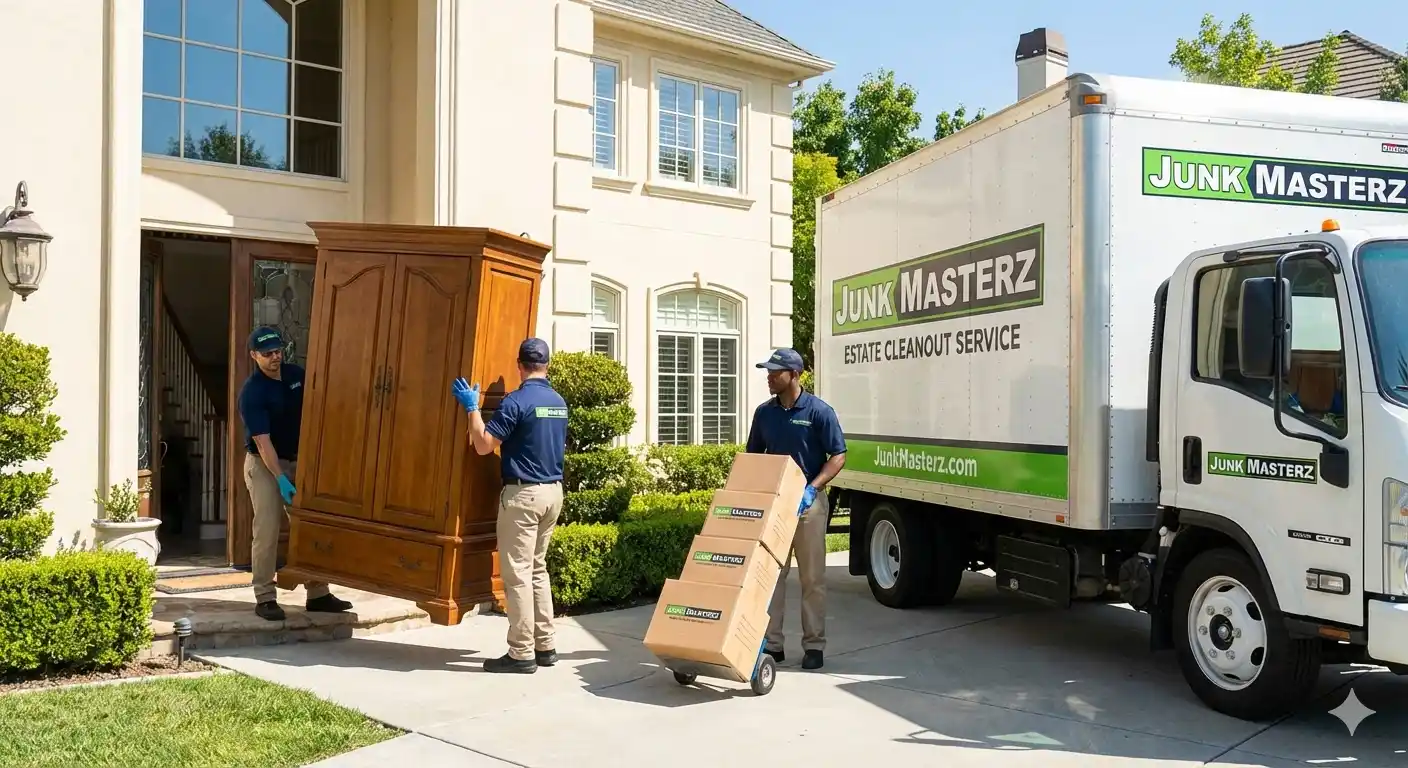
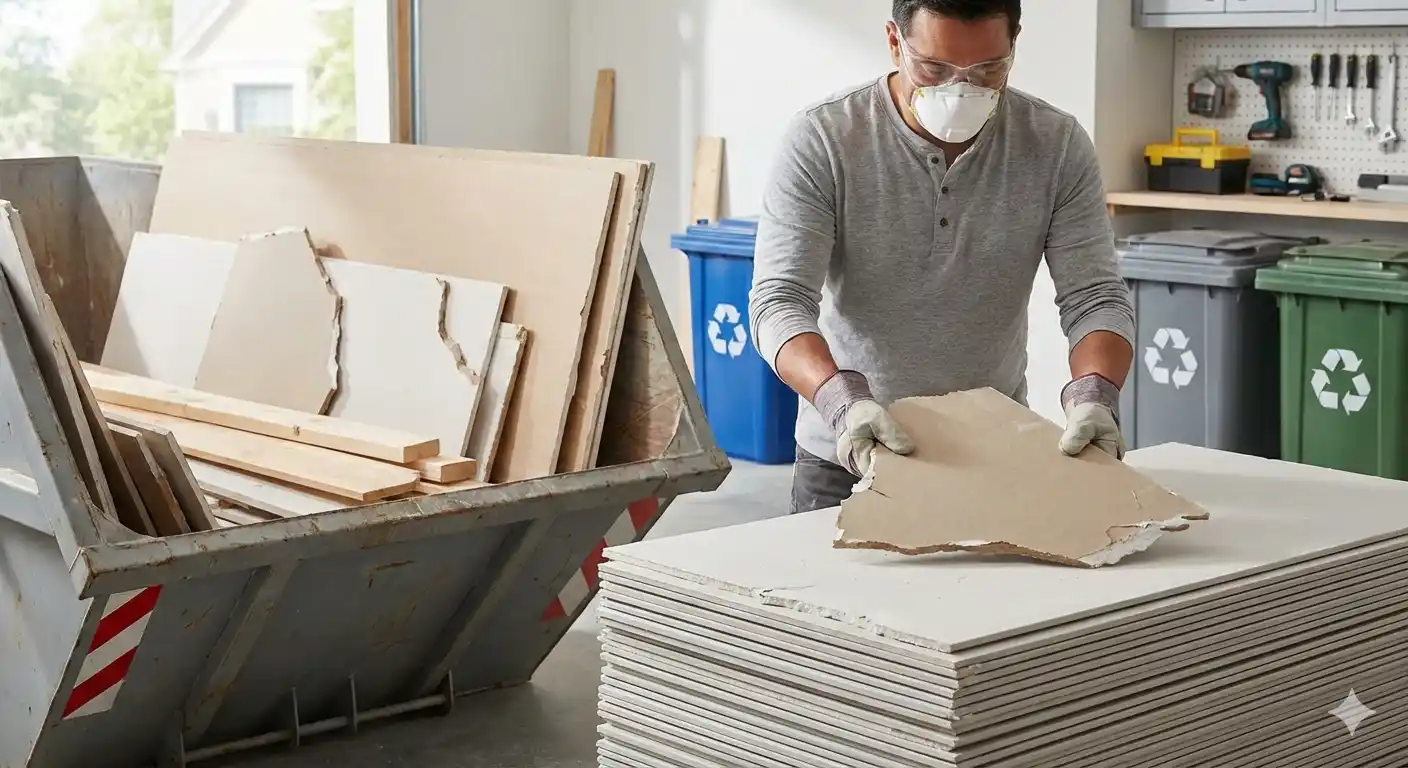
Cleaning out a house full of junk can feel heavy, stressful, and confusing, especially if clutter has built up for years. Many people face this task when moving, selling a home, handling an estate, or dealing with a major life change. Knowing where to start and how to move fast without making mistakes matters. This guide explains how to clean out a house full of junk in a clear and simple way. You will learn how to plan the work, remove trash, sort items, and handle bulky junk without wasting time or money. We also explain when help from companies that clean out houses makes sense. The goal is to help you finish the job with less stress and better results, while staying focused on what search engines and real people value today. What Does “Clean Out a House Full of Junk” Really Mean? When people talk about cleaning out a house full of junk, they are usually talking about a “whole-house” project. This is not just dusting shelves or sweeping the floor. It means going through every room, closet, and drawer to decide what stays and what goes. Sometimes, this happens because of a house cleanout sign from a landlord or a need to sell a property quickly. For some, it means clearing out a “hoarder” house where items have piled up to the ceiling. For others, it might be an estate cleanout after a loved one passes away. The goal is the same: to get the house back to a “blank slate” where you can see the floors and walls again. It involves physical work, like removing bulky household junk like old sofas or broken fridges. It also involves mental work, like deciding which old photos to keep and which broken toys to toss. How to Start: Planning Your Cleanout Before you pick up a single trash bag, you need a plan. If you just start grabbing things, you will get tired fast. To reach that top level of cleaning efficiency in your home, you must be organized. You cannot just run into a room and start throwing things. You will run out of energy before the first room is even half-done. 1. Set a Deadline If you don’t have a date in mind, the job might take months. Give yourself a weekend or a full week depending on the size of the house. If the house is very big, maybe take one room per day. A deadline keeps you moving when you want to stop. 2. Gather Supplies You will need heavy-duty trash bags. Do not buy the cheap ones, as they will rip and make a bigger mess. You also need sturdy boxes, thick markers, and strong tape. Gloves are a must-have to protect your hands from sharp edges or dirt. You might even want a few plastic bins for things you want to keep forever. 3. Find Help Don’t do this alone. It is too much for one person. Ask friends or look for companies that clean out houses. Professional teams like Junk Masterz have the tools to do the heavy lifting for you. Having a team makes the time go by faster and keeps you from getting hurt. 4. Think About Safety If a house has been full of junk for a long time, there might be dust or mold. Wear a mask so you don’t breathe in bad air. Wear boots to protect your feet. If you find old paint cans or chemicals, set them aside. You cannot just throw those in the regular trash. Step 1: Initial Trash Removal The fastest way to clean the house is to get rid of the obvious garbage first. This is what we call the “trash sweep.” Do not look at old mail, books, or photos yet. If you start reading old papers, you will stop working. Just look for things that are 100% garbage. This includes: Kitchen Waste: Old food boxes, expired cans, and empty jars. Paper Scraps: Junk mail, old flyers, and shredded paper. Damaged Items: Anything that is broken beyond repair, like a chair with three legs or a shattered vase. Actual Trash: Tissues, old wrappers, and bits of plastic. Walk through every room with a giant black trash bag. If it is dirty or broken, bag it. This “first pass” makes a huge difference. When the floor is clear of actual trash, you can see the items that actually need your attention. It creates a path for you to move around. You will feel better when you see five or ten bags of trash sitting on the curb. It shows that you are making progress. During this stage, don’t overthink. If you have to ask “Is this trash?” for more than three seconds, put it in a “maybe” pile and move on. The goal here is speed. This phase is about high-volume removal. If you have a huge amount of debris, look for removing bulky household junk services early so you don’t have piles of bags blocking your hallways. Sometimes people see a house cleanout sign and panic, but this first step of bagging the trash helps calm the mind. Step 2: Sorting Items (Keep, Donate, Sell, Recycle) Now that the trash is gone, you are left with things that might still have value. This is where most people get stuck. You need a system for sorting items: keep, donate, recycle. The best way to do this is to set up four stations in a large room, the garage, or even the driveway if the weather is nice. The “Keep” Station These are things you use every day or things that are very special to you. Be careful here. If you keep everything, the house will stay full of junk. Ask yourself: “Have I used this in the last year?” If the answer is no, you probably don’t need it. Put the “Keep” items in clear bins and move them to a safe spot. The “Donate” Station Many things are still

How to Clean Out a Storage Unit: Step-by-Step Guide

Cleaning out a storage unit can feel stressful, especially if it has been packed for months or years. Boxes pile up, items lose value, and costs keep adding up. Knowing how to clean out a storage unit the right way saves time, money, and effort. A good plan helps you stay safe, make smart choices, and avoid feeling stuck halfway through the job. This guide explains the full storage unit clean out process in simple steps. You will learn how to prepare, sort items, clean safely, and handle junk the right way. Whether you are decluttering for good or just organizing, this approach works for small units and large ones. The goal is to leave the unit clean, empty, and stress-free while making smart decisions about what stays and what goes. What You Need Before You Start Success starts with a solid plan and schedule. You cannot simply show up at the facility and hope for the best. Most people underestimate how much stuff they have. A small 5×5 unit can take three hours, while a large 10×20 unit might take two full days. Mark a weekend on your calendar. Check the weather to make sure it is not too hot or rainy, as you will be moving items outside to sort them. Your Safety First A storage facility can be a dirty place. Dust, bugs, and even mold can hide in old boxes. You need protective gear (gloves, mask). Thick work gloves protect your hands from sharp edges or rusty metal. A high-quality mask keeps you from breathing in old dust. This is the only way to ensure a safe clean self storage experience. The Tool Kit You need a specific cleaning supplies checklist to get your deposit back. Most rental contracts say you must leave the unit broom clean. A sturdy broom and dustpan: To get every bit of dirt off the concrete. Heavy-duty trash bags: Standard kitchen bags will rip. Buy the thick black contractor bags. Cleaning spray and rags: To wipe down the walls or any shelving you own. Packing supplies: Bring extra tape and markers. You might find boxes that are falling apart and need to be fixed before you transport belongings. Flashlight or headlamp: Many units have one dim bulb or no light at all. You need to see into the dark corners to make sure you didn’t leave anything behind. Moving and Hauling Think about how you will move the items. Do you have a van or a moving truck? If you are taking items to recycling centers or the dump, a small car will not be enough. You might also want to look into storage unit cleanout services if you have items that are too heavy for one person to lift. Companies like Junk Masterz specialize in this type of work. They know how to handle junk removal from storage unit spaces, so you don’t have to deal with the physical pain. Step-by-Step Process Following a set order helps you stay focused. If you just grab random boxes, you will get tired fast. Use these steps to keep moving forward without getting overwhelmed. Step 1: Take Inventory (Why it helps plan time) First, go to the unit and do an inventory of storage contents. Do not move anything yet. Just open the door and look at what you have. This is a very important part of the storage unit cleanout process. Write down a list of big items like furniture, appliances, or large plastic bins. This inventory helps you plan your time because you will see exactly how much work is waiting for you. If you see ten big boxes, you know you need at least two hours. If the unit is packed to the ceiling, you know you need a team. Taking photos of the unit is also a good idea. You can look at the photos later when you are at home to decide what might fit in your garage or spare room. Knowing what you have stops you from feeling surprised halfway through the day. Step 2: Set a Schedule Once you know what is inside, set a timeline. A small 5×5 unit can usually be done in three hours if you move fast. A 10×20 unit might take two full days of work. Pick a weekend with good weather. You want to avoid rain because you will likely be putting items on the ground outside the unit while you sort through them. Break your day into chunks. Work for two hours, then take a fifteen-minute break. This keeps your energy up. Tell the storage office when you plan to be done. This keeps you moving. If you tell them you will be out by Sunday, you are more likely to finish the job. If you find the job is too big as you get started, you can always look into storage unit cleanout services to help you finish on time. Step 3: Sort Items This is where the real work happens. You need to sort items into groups. The best way to do this is the Four-Box Method. This method keeps you from getting confused about where things go. The Four-Box Method Explained: Keep: These are the items you truly love and will use at home. Sell/Donate: These are good items that are still in working order but you no longer want. Recycle: This is for old papers, magazines, plastics, and metals that can be processed at recycling centers. Toss: This is for true junk. If it is broken, stained, moldy, or missing pieces, put it in the heavy-duty trash bags. The Sorting Setup: Imagine your unit door is the start line. Clear a space on the ground outside. Label four areas with your tape and markers. As you pull a box out, put it in one of those four areas right away. Do not let “maybe” piles happen. A “maybe” pile just means you have to do the work twice. Be firm with yourself. Step 4:

Box Truck Weight Capacity: How Much Can You Legally Haul?

Box truck weight limits are one of the most misunderstood parts of commercial driving. Many drivers focus on space, but weight matters just as much. Going over the legal limit can lead to fines, safety risks, and serious damage to the truck. Understanding box truck weight limits helps you protect your cargo, your license, and your business. This guide explains weight limits in plain language. You will learn how weight is measured, how different box truck sizes compare, and what the law requires. If you want clear facts without confusion, this guide is for you. Box Truck Weight Limits and GVWR GVWR stands for Gross Vehicle Weight Rating, and it’s the most important number you need to know about your box truck. This rating tells you the maximum total weight your truck can safely handle when it’s fully loaded. The GVWR includes everything: the truck itself, the driver, passengers, fuel, and all the cargo you’re hauling. Every box truck has a GVWR assigned by the manufacturer based on the vehicle’s design, frame strength, suspension system, and braking capacity. You’ll find this number on a sticker inside the driver’s side door frame or in your owner’s manual. This isn’t a suggestion—it’s a hard limit set for safety. Here’s how GVWR works in practice. If your box truck has a GVWR of 14,000 pounds and the empty truck weighs 8,000 pounds, you can only load 6,000 pounds of cargo. That 6,000 pounds includes everything you put in the truck bed, plus the weight of fuel, the driver, and any passengers. Go over that limit, and you’re breaking the law and risking serious safety issues. Understanding your GVWR helps you plan jobs better. When you know exactly how much weight your truck can handle, you can avoid overloading and make smarter decisions about what equipment or materials to bring on each trip. The curb weight (empty weight) of your truck is subtracted from the GVWR to give you your actual payload capacity. The difference between GVWR and actual payload capacity confuses many people. Your payload is what you can actually haul after accounting for the truck’s own weight. A 26,000-pound GVWR doesn’t mean you can load 26,000 pounds of junk or furniture. If the truck weighs 14,000 pounds empty, you only have 12,000 pounds available for cargo. Why GVWR Matters for Your Safety Exceeding your GVWR creates multiple dangers. Your brakes take much longer to stop the vehicle. The tires can overheat and blow out, especially on highways or in summer heat. Your suspension system gets damaged faster, leading to expensive repairs. Steering becomes harder, and the truck doesn’t handle turns or lane changes well. Insurance companies won’t cover accidents that happen when you’re overweight. If you crash while hauling more than your GVWR allows, you’re personally responsible for all damages. Police can impound your truck at the scene, and you’ll face fines that start at several hundred dollars and go up from there. Box Truck Weight Classifications Box trucks fall into different weight classes based on their GVWR. The U.S. Department of Transportation uses these classifications to set regulations and requirements. Knowing which class your truck falls into helps you understand what rules apply to you. Light-Duty Box Trucks (Class 1-3) These are the smaller trucks you see for local deliveries. They drive a lot like a big SUV or a pickup truck. Class 1: These are very small, usually under 6,000 pounds. Most box trucks start higher than this. Class 2: These weigh between 6,001 and 10,000 pounds. Many “step vans” or small delivery trucks are in this group. Class 3: This is a very common group. These weigh between 10,001 and 14,000 pounds. These are often called light-duty box trucks. They are great for small jobs because they can fit into tight driveways. Medium-Duty Box Trucks (Class 4-6) This is where most box trucks live. If you rent a truck to move your house, it will likely be in this group. Class 4: 14,001 to 16,000 pounds. These are getting bigger and often have dual rear wheels to help hold the weight. Class 5: 16,001 to 19,500 pounds. Class 6: 19,501 to 26,000 pounds. This is a huge category. Most 26-foot trucks are built to be right at 26,000 pounds. This is because of a special rule about licenses that we will talk about later. Heavy-Duty Box Trucks (Class 7-8) These are the giants of the box truck world. Class 7: 26,001 to 33,000 pounds. These trucks are very big and very strong. Class 8: Anything over 33,001 pounds. While most Class 8 trucks are semis, some very large straight trucks (trucks where the box and engine are on one frame) fall here. When you look for the weight limit for box truck use, you must know your class. It tells you if you have to stop at scales or if you need special insurance. It also changes how much you pay for tags and plates. Different Types of Box Trucks, Weight Limits, and Sizes The size of the box on the back usually tells you how much it can carry, but not always. You have to look at the box truck sizes and the frame separately. A long truck doesn’t always carry more weight than a short one; it might just have more room for light things like pillows. 10 Foot Box Truck This is the smallest size. It is great for a studio apartment or a small office move. It is often built on a van frame. Average GVWR: Around 8,600 to 10,000 lbs. Cargo capacity: About 2,000 to 3,000 lbs. Cargo volume: You have about 400 cubic feet of space. Best use: Picking up a new couch or moving a dorm room. 12 Foot Box Truck A step up from the 10-footer. It is a bit wider and taller. Average GVWR: 10,000 to 12,000 lbs. Payload capacity: roughly 3,000 to 4,000 lbs. Loading space: Good for a 1-bedroom apartment. Fact: These are very popular for “last-mile”

How Much Estate Cleanout Services Cost in 2026

Dealing with an estate cleanout after losing a loved one or helping family move to assisted living is never easy. The emotional weight is heavy enough without worrying about costs. But here’s the reality: understanding estate cleanout services cost helps you plan better and avoid surprise bills during an already difficult time. Whether you’re clearing out a small apartment or a large family home, knowing what to expect financially gives you control. In this guide, we’ll break down everything about estate cleanout pricing, from average costs to hidden fees, helping you make smart decisions that honor your budget while respecting your loved one’s belongings. 2026 Estate Cleanout Cost Overview The national average estate cleanout cost in 2026 sits around $1,250, but that number tells only part of the story. Most families spend between $500 and $3,000, depending on key factors. Small apartments run $300 to $800, while three-bedroom houses cost $1,000 to $2,500. Large estates with five or more bedrooms? You’re looking at $2,500 to $6,000 or more. What drives these numbers? The more stuff to sort, haul, and dispose of, the higher the price. Labor makes up the biggest chunk of estate cleanout pricing, with companies charging $25 to $50 per hour per worker. Small cleanouts need two workers for six hours ($300 to $600), while bigger jobs require four or five crew members working several days. Location matters significantly. New York City or San Francisco costs run 40-60% more than national averages due to higher labor costs and disposal fees. Rural areas have lower hourly rates but add travel fees. Item types impact cost too. Regular household items get standard pricing. But pianos need special handling ($400 removal), hazardous materials require proper disposal ($100 to $500), and hoarding situations come with premium charges. One family paid $600 for a tidy one-bedroom condo, while another spent $4,200 clearing a cluttered four-bedroom home. Estate cleanout cost per square foot isn’t how professionals calculate anymore. They focus on volume instead. A 2,000 square foot minimally furnished home costs less than a 1,200 square foot home packed floor to ceiling. The whole house cleanout average depends on fullness, not size. Foreclosure clean out pricing typically runs $500 to $2,000 for average properties. Abandoned homes with damage or illegal dumping reach $5,000. Banks usually cover these costs, but buyers should factor this into budgets. What Is Estate Cleanout? Estate cleanout is the complete clearing of a home after someone passes away, moves to assisted living, or during major life transitions like divorce or downsizing. It involves sorting through belongings, identifying valuables, coordinating donations, and disposing of unwanted items leaving the property empty and ready for sale or new occupants. What’s Included in Estate Cleanout Services Professional estate cleanout services go beyond basic junk removal. They include sorting personal belongings into organized categories (keep, donate, sell, discard), identifying valuable items such as antiques, collectibles, or jewelry, hauling and disposal of unwanted materials using proper methods, donation coordination with local charities like Goodwill or Habitat for Humanity, estate liquidation assistance if you’re selling items for profit, basic cleaning after all items are removed, document shredding and disposal for sensitive paperwork and records, organizing and packing items you decide to keep, and deep cleaning services to prepare the home for sale or new tenants. The key difference from regular house cleanout is the emotional component. Estate cleanout after death demands sensitivity and care. Professional workers understand that every item has meaning to someone. They carefully separate family photos from trash, search drawers and hidden spaces for valuables, and handle sentimental belongings with respect. Timeline varies, small spaces take one day, while large family homes need a week or more. Complete Cost Breakdown To understand your estate cleanout cost breakdown, you have to look at the four “pillars” of pricing: Labor, Volume, Disposal, and Specialty Fees. By understanding these, you can see why a 2,000-square-foot home might cost $2,000 to clear in one scenario and $7,000 in another. 1. Labor Hours and Manpower Labor is almost always the most expensive part of the bill. In 2026, the standard estate cleanout hourly rate ranges from $35 to $75 per worker. A typical 3-bedroom house usually requires a crew of three people working for two full days. The Sorting Factor: If the home is disorganized, the team has to spend more time on item categorization. This is the process of separating keep items from toss items. Expertise Premium: If you require estate paperwork sorting and disposal, you are paying for a higher level of trust and attention to detail. This ensures that tax documents, stock certificates, and deeds are not accidentally thrown away. 2. Volume of Items Most companies calculate their primary fee based on how much space the items take up in their trucks. In 2026, a standard professional hauling truck holds about 14 cubic yards of debris. Quarter Truck ($150–$250): Good for a single room or a very sparse apartment. Half Truck ($350–$500): Enough for a small living room and a bedroom. Full Truck ($650–$850): A typical full-service truckload. The Multi-Truck Estate: A standard family home that hasn’t been decluttered in 20 years usually generates 4 to 6 full truckloads. This alone can put the base cost between $2,600 and $5,100. 3. Disposal and Recycling Fees Once the truck is loaded, it has to go somewhere. Landfills and recycling centers charge tipping fees based on weight. Weight-Based Charges: Heavy items like construction debris or stacks of old books are charged per pound. In 2026, expect to pay $0.10 to $0.25 per pound for heavy loads. Environmental Surcharges: Many cities now charge a Carbon Tax for items going to a landfill. This is why donation coordination is so important. Donated items don’t incur these fees, which helps lower your total estate cleanout price. Hazardous Material Estate Cleanout Cost: Items like old cans of paint, motor oil, cleaning chemicals, and old tube televisions cannot be put in a regular dumpster. Professional disposal for these items usually costs an

How to Dispose of Drywall

Cleaning up after a home project is often harder than the work itself. You look at the pile of white boards in your garage and wonder what to do next. You cannot just throw it in the regular trash. Most cities have strict rules about construction waste. If you are trying to figure out how to dispose of drywall, you are in the right spot. This guide explains the best ways to get rid of your mess. We will look at recycling, safety, and local laws. Whether you have a few small scraps or a whole room of old walls, you need a plan. Doing it the right way keeps you safe and avoids big fines. Let’s look at the steps to clear your space and finish your job. Is Your Drywall Safe to Remove? Before you begin removing drywall, it’s essential to ensure it’s safe. Not all drywall is created equal, and some older boards may contain hazardous materials. Here’s what to check before you start: Check for Hazardous Materials Some drywall in homes built before the 1980s may contain asbestos. Disturbing asbestos can release dangerous fibers into the air, posing serious health risks. If you suspect your drywall may contain asbestos, it’s best to hire a professional to handle removal. Beware of Dust and Gas Drywall dust is not just messy; it can irritate your eyes, skin, and lungs. In rare cases, old or wet drywall can release hydrogen sulfide gas. This makes wearing a dust mask and eye protection essential. Long sleeves and gloves are also recommended. Turn Off Utilities Before removing drywall, turn off electricity in the area. Cutting into drywall without checking for hidden wires can be dangerous. Similarly, be aware of plumbing behind walls to prevent accidental damage. Decide DIY vs. Professional Help Small projects may be handled safely at home, but larger demolition or renovation projects benefit from professional services. Junk Masterz specializes in safe drywall removal, helping you avoid injuries and ensuring your drywall is disposed of correctly. Taking these precautions first can prevent accidents and make your drywall disposal process smoother. How to prepare drywall for disposal Getting your waste ready is the most important step. If you just throw everything in a pile, it will be much harder to move later. Proper drywall prep for disposal also helps you save money at the dump. Removing Metal and Hardware Drywall is usually held up by nails or screws. Before you take it to a recycling center, you should pull all of those out. Use a hammer or a pry bar. Also, look for metal corner beads. These are the long metal strips on the corners of walls. Recycling centers want clean gypsum. If there is too much metal, they might treat it like regular trash, which costs more. Sorting by Type and Condition Not all drywall is the same. You should make three different piles: Clean Scraps: These are brand-new pieces that have never been painted. These are the best for recycling. Painted Pieces: These are old pieces from your walls. They are harder to recycle but still okay for some landfills. Wet or Moldy Pieces: These must be kept separate. They are heavy and can contaminate other materials. Cutting and Bagging If you are taking the waste to the dump yourself, you need to make it easy to carry. Large sheets of drywall are hard to handle. Use a utility knife to cut them into squares that fit into contractor bags. Do not use thin kitchen bags. They will rip and leave a mess on your floor. For drywall mud disposal, make sure the mud is totally dry. If you have half-full buckets of wet mud, leave the lids off for a few days until they turn into solid blocks. Step‑by‑Step Disposal Methods There are many drywall disposal methods to choose from. Your choice depends on your budget and how much time you have. Using a Roll-Off Dumpster This is the most common way for big jobs. A company drops a big metal box in your driveway. You fill it up over a week or two. This is perfect for construction waste disposal. Just be careful not to overfill it. Drywall is very heavy, and dumpsters have weight limits. If the box is too heavy, the truck might not be able to pick it up. Read More: How Much to Rent a Dumpster? Hire Professional Junk Removal If you don’t want to spend your weekend carrying heavy bags, a pro service is best. The junk removal guy will come into your home or garage. They pick up the heavy pieces and load them into their own truck. This is a fast way to get your space back. You don’t have to worry about driving to the dump or getting your own truck dirty. You can Contact Us to find out how much it would cost for your specific pile of debris. Local Curbside Pickup Some towns have a “bulk waste” day once a month. You can put large items on the curb. However, you must check your local disposal regulations first. Many cities will take a sofa but will not take bags of sheetrock. If you put it out without checking, it might sit there and get wet, making it even harder to move later. Donation If you bought too much and have full sheets left over, do not throw them away. You can donate drywall to groups that build low-cost housing. As long as the sheets are clean and not broken, they are very useful. This is the best way to help someone else while cleaning up your own home. Landfill Disposal As a last resort, drywall can be taken to a landfill. Keep in mind that many areas have drywall landfill restrictions to prevent environmental hazards like hydrogen sulfide gas. Contact your local landfill to understand any limits or special procedures. By evaluating these options, you can choose the method that balances cost, convenience, and environmental impact. Can

How to Dispose of Box Spring Quickly and Legally

If you have an old box spring taking up space, you might be wondering what to do with it. A box spring is heavy, awkward, and not easy to move. And you can’t just toss it in the trash like normal garbage. Many cities treat box springs as bulky items, and they must be handled in a special way. This guide will show you how to dispose of a box spring safely, including the best disposal methods, how to dismantle it, and where to recycle or donate it. You’ll also learn how to avoid fines, save money, and keep the environment cleaner. Box Spring Disposal Rules: Why You Can’t Just Toss It in the Trash You might be tempted to treat your old bed base like a regular piece of trash, but most cities have strict municipal regulations regarding bulky items. Unlike a bag of kitchen scraps, a box spring is made of mixed materials steel, wood, and fabric that don’t break down easily in a landfill. Understanding Local Ordinances Before you set your box spring out, you must check your city waste department website. Many areas now have curbside pickup rules that require you to “schedule” a bulk collection rather than just leaving it out on a random Tuesday. If you ignore these local ordinances, you could face a hefty fine. Some cities even have a “Mattress Recycling Council” (MRC) mandate where specific laws dictate how these items enter the waste stream diversion process. The Problem with Landfill Fees If you decide to drive it to the dump yourself, be prepared for landfill fees. Because box springs take up so much “airspace” (they don’t squash down easily), many dumps charge a premium for them. This is part of a larger effort to reduce the environmental impact of large furniture. Health and Safety: Bed Bug Prevention One of the biggest reasons for strict rules is bed bug prevention. In many urban areas, you are legally required to wrap your box spring in a specialized plastic bag before it ever touches the sidewalk. This prevents pests from spreading to the neighborhood or the sanitation workers. Always check if your box spring trash pickup requires a sealed plastic cover. Disposal Method of Box Spring: Your Top 5 Options When you decide to eliminate box spring clutter, you have several paths to choose from. Each method has different costs and levels of effort. Here is a breakdown of the most common ways to get it done in 2026. 1. The Curbside Route Most people prefer box spring trash pickup. You should call your local waste provider to see if they offer a “Free Bulk Day.” Many towns allow one free pickup per quarter. If they don’t, you might have to pay a small fee ($10–$30) to have them come out specifically for your mattress box spring disposal. Read More: How Much Does Mattress Removal Cost in 2026 2. Retailer Haul-Away  If you are buying a new bed, check with the store. Many retailers, such as Mattress Firm or IKEA, will dispose of mattress and box spring units for a fee when they deliver the new one. In states with MRC laws, they are often required to offer this service. It is often the most convenient Experience-led solution for busy homeowners. 3. Hire Professional Junk Removal If you don’t have a truck and don’t want to break your back, a junk removal service is your best bet. A junk removal employee can come into your home, carry the heavy item out, and ensure it goes to a mattress recycling center instead of just a dump. This saves you from the heavy lifting and the planning. Read More: What do Junk removal companies do with Junk 4. Self-Hauling to the Landfill or Transfer Station You can take it to the dump yourself if you have a large vehicle. Be prepared to pay landfill fees. These fees vary based on your location. Always check the hours of operation first, as many dumps have specific “bulky item” hours. 5. Scrap Metal Salvage Because a box spring is mostly metal springs, it is valuable to scrap hunters. You can often list your item for “Free” on Facebook Marketplace with the title Box spring for free – for scrap. Local scrappers will often come pick it up just to get the steel. Step-by-Step: How to Dismantle a Box Spring If you want to eliminate box spring bulk and save money, taking it apart yourself is the best Experience-led solution. This is the perfect path if you are wondering how to take apart a box spring for recycling or if you need it to fit into a standard household trash can to avoid extra fees. 1. The Preparation Phase (Tools and Space) You don’t need fancy tools for it, just simple basic tools and the right gear required for it.  Space: You need a flat area, like a garage or a driveway. Do not do this on a carpeted floor, as old staples and wood splinters will get lost in the rug. Safety Gear: Wear gloves and eye protection. Old steel coils can be under tension and might snap back. Tools: A sharp utility knife, a pair of heavy-duty pliers, a hammer, and a hand saw (or a power saw if you are comfortable with one). 2. Stripping the Dust Cover and Fabric Flip the box spring so the bottom is facing up. Use your utility knife to cut away the thin dust cover. This is usually a thin black or gray piece of fabric. Underneath, you will see the upholstery and padding. Cut along the edges of the box spring to remove the side fabric. This fabric is often heavily stapled. You don’t need to remove every staple yet; just cut the cloth away. This fabric usually goes into the regular trash, though some areas are starting to experiment with textile recycling for these materials. 3. Detaching the Wood Slats from the Frame Once the fabric is gone, the skeleton

How to Dispose of a Gas Grill Safely (Step-by-Step Guide)

Getting rid of an old barbecue grill seems simple until you actually try to do it. A gas grill is not just a big piece of metal. It contains fuel connections, electronic parts, grease buildup, and materials that can be dangerous if handled the wrong way. Many people are surprised to learn that tossing a grill into the trash can lead to fines, safety risks, or environmental harm. That is why learning how to dispose of a gas grill properly matters. Whether you are replacing an old Weber grill, cleaning up before a move, or dealing with a grill that no longer works, there are safe and responsible ways to handle gas grill disposal. From recycling metal parts to managing propane tank safety, each step plays a role in protecting people and the environment. This guide breaks everything down in plain language so you know exactly what to do. You will also learn how gas grill disposal compares to charcoal grill disposal, what parts can be recycled, when donating or selling an old grill makes sense, and when professional help is the smarter choice. Step by Step Disposal Guide The biggest mistake people make is treating a gas grill as one item. In reality, it is a collection of different materials, and each one must be handled correctly. Following these steps will make grill disposal easier and safer. Step 1: Clean the Grill Before Disposal Before doing anything else, clean the grill. Scrape off food residue, grease, and carbon buildup. Empty the grease trap and wipe down surfaces. Many recycling centers and scrap yards will reject dirty items due to contamination concerns. Cleaning the grill also protects you while handling it. Old grease can hide sharp rusted edges and makes the grill harder to disassemble. Step 2: Turn Off and Disconnect the Gas Supply Make sure the propane valve is fully closed. Disconnect the hose from the propane tank. Never try to move or dispose of a gas grill while the tank is attached. Propane tanks are pressurized and considered hazardous waste. They must always be handled separately. Step 3: Remove the Propane Tank Once disconnected, set the tank aside in a shaded, well-ventilated area. Do not store it indoors or near heat sources. Even empty tanks can contain residual gas. We will cover safe propane tank disposal in detail in the next section. Step 4: Separate Non-Metal Parts Remove plastic parts such as: Control knobs Side shelves Wheels Plastic handles These parts are usually not recyclable and should be disposed of according to local trash rules. Step 5: Remove Electronics and Batteries Many gas grills include electronic igniters, wires, or battery packs. These are classified as electronics or e-waste and should not be mixed with metal recycling. Place these items aside for proper electronic disposal. Step 6: Break Down Metal Components The grill body, lid, burners, and frame are usually made from steel or aluminum. These metal parts are valuable to recycling centers and scrap yards. Disassembling the grill makes transport easier and increases the chance that all recyclable materials are accepted. How to Dispose of Old Gas Grill Tanks? The most dangerous part of the process is the propane tank. This is where propane tank safety becomes the number one priority. You should never, under any circumstances, put a propane tank in your regular trash or recycling bin. Why Propane Tanks are “Hazardous Waste” Even when a tank feels light, it likely contains a small amount of residual pressurized gas. If a garbage truck’s compactor crushes that tank, it can cause an explosion. This is why they are strictly labeled as hazardous waste by most municipal governments. Safe Disposal Methods for Tanks The Exchange Program: This is often the easiest way for free grill disposal. Most hardware stores and gas stations have tank exchange kiosks. Even if you aren’t buying a new one, many will accept an old, expired tank for a small recycling fee. Specialty Recyclers: Some recycling center locations are specifically equipped to handle pressurized cylinders. They will safely “de-valve” the tank so the steel can be repurposed. Hazardous Waste Events: Check your local city calendar for “Hazardous Waste Drop-off” days. These events are designed to collect items like paint, chemicals, and gas tanks that shouldn’t be in the general waste stream. 5 Ways to Dispose of Your Old Grill If you are staring at that old barbecue grill and feeling overwhelmed, here are five proven ways to get it off your property while staying eco-friendly. 1. Donate or Sell Old Grill If the burners still light and the frame isn’t rusted through, your grill has a second life. An old Weber grill often holds its value because parts are easy to replace. Donate: Contact local charities or community centers. Some vocational schools even take them for students to practice repair. Sell: List it on local marketplaces and Facebook Marketplace as “buyer must haul.” 2. Scrap Metal Recycling A gas grill is essentially a collection of high-quality metal parts. Most are made of aluminum, stainless steel, or cast iron. If you have a vehicle capable of hauling it, taking it to a local scrap yard is a great way to ensure the metal is reused. 3. Municipal Bulk Pickup Many cities provide a service for large item disposal. You usually have to call ahead to schedule a “bulk pick up.” Be sure to ask about their specific rules; most will require you to remove the plastic parts and the tank before they will load it onto the truck. 4. Professional Junk Removal If you don’t have the tools to dismantle the grill or a truck to haul it, hiring a professional service like Junk Masterz is the most efficient choice. We understand the local laws regarding bbq grill disposal and ensure that every part from the electronics to the metal parts, is handled responsibly. If you want it gone today, you can simply Contact Us. 5. Repurposing and Upcycling For the creative homeowner, an old

How to Dispose of Fire Extinguisher: Complete 2026 Guide

About 75 percent of homes have a fire extinguisher, but many people do not know what to do with it when it expires. A fire extinguisher that is old, damaged, or empty can be dangerous if it is thrown away the wrong way. That is why knowing how to dispose of fire extinguisher properly matters. If a fire extinguisher is not handled correctly, it can leak chemicals, cause a pressure explosion, or harm the environment. Many places also have rules about disposal, and breaking them can lead to fines. This guide will help you understand what to do with your old extinguisher in a safe and legal way. Understanding Fire Extinguisher Lifespan & When to Dispose Fire extinguishers don’t last forever, despite what many people believe. The typical lifespan of most fire extinguishers ranges from 10-12 years, though some rechargeable models can last up to 15 years with proper maintenance. Knowing when your extinguisher needs replacement versus simple servicing can save you money and ensure your home stays protected. Visual Inspection Checklist Before deciding to dispose of your fire extinguisher, conduct a thorough visual inspection. Start by checking the pressure gauge. This small dial on the unit’s face tells you everything about its current condition. The gauge typically has three zones: green (properly charged), yellow (needs inspection), and red (needs immediate recharge or replacement). Look for these warning signs that indicate it’s time for old fire extinguisher disposal: Physical damage: Cracks, dents, or rust on the cylinder, nozzle, or hose Loose or missing components: The handle, locking pin, or valve shouldn’t wiggle or be absent Faded or missing inspection tag: This sticker shows when the unit was last serviced Pressure loss: The gauge needle sits in the red or yellow zone Discharge history: The extinguisher has been used, even partially Age concerns: The manufacture date shows it’s over 10 years old The pressure gauge serves as your first indicator of problems. When the needle points to the green zone, your extinguisher maintains proper pressure and should function correctly in emergencies. A reading in the red zone (whether too high or too low) means the unit has lost its effectiveness and requires attention. Rechargeable vs. Disposable Fire Extinguishers Understanding the difference between rechargeable and non-rechargeable fire extinguishers affects your disposal decision significantly. Rechargeable fire extinguishers feature metal valve assemblies and can be refilled by certified fire extinguisher technicians multiple times throughout their lifespan. These units typically cost more upfront but offer better long-term value. Non-rechargeable or disposable fire extinguisher models have plastic valve assemblies and are designed for single use. Once discharged or expired, these units must be properly disposed of they cannot be refilled. You can usually identify a disposable unit by its lower price point and plastic valve components. When to Recharge, Replace, or Dispose The decision between fire extinguisher recharge, replacement, or disposal depends on several factors: Consider recharging if: The unit is less than 10 years old It has a metal valve assembly (rechargeable type) Only minor pressure loss has occurred The cylinder shows no physical damage Regular maintenance costs less than a new unit Opt for replacement when: The extinguisher is more than 12 years old Physical damage is present (rust, dents, cracks) It’s a non-rechargeable disposable model The fire extinguisher refill cost exceeds 50% of a new unit’s price Multiple components need repair Choose disposal for: Severely damaged units Expired fire extinguisher disposal situations where the unit cannot be recharged Used fire extinguisher disposal after single-use models have been discharged Units with unknown service history or age Many fire equipment dealers offer inspection services for a small fee, helping you make an informed decision. This professional assessment can reveal whether your extinguisher qualifies for recharging or needs immediate disposal. Types of Fire Extinguishers & Type-Specific Disposal Different fire extinguisher types contain various extinguishing agents and require specific disposal approaches. Understanding your extinguisher type ensures safe handling and proper environmental disposal practices. ABC Dry Chemical Extinguishers ABC dry chemical extinguishers combat Class A (combustibles), Class B (flammable liquids), and Class C (electrical) fires using monoammonium phosphate. While not highly toxic, the pressurized cylinder requires careful handling. Never open pressurized ABC extinguishers powder irritates eyes and lungs. These should go to household hazardous waste facilities unless completely depressurized. Steel cylinders offer excellent scrap metal recycling value once properly emptied. CO2 Extinguishers Carbon dioxide extinguishers operate at extremely high pressures often exceeding 800 PSI. This makes DIY depressurization dangerous. Always contact certified fire extinguisher technicians or fire extinguisher service companies for CO2 disposal. Professionals safely release gas and handle cylinders. After professional emptying, heavy-duty aluminum or steel cylinders can be recycled. Wet Chemical (Class K) Wet chemical extinguishers designed for kitchen fires use potassium-based solutions. The alkaline chemical classifies these as hazardous waste. These units must always go to household hazardous waste facilities never attempt curbside disposal. Commercial kitchens follow stricter disposal regulations through licensed hazardous waste collection services. Water & Foam Based Water and foam extinguishers are simplest to dispose of safely. Once depressurized, water or foam can be drained safely and cylinders recycled as scrap metal. Foam units may contain surfactants that shouldn’t enter storm drains consult local waste management guidelines. Extinguisher Type Disposal Difficulty HHW Required? Can Be Recycled? DIY Depressurization? ABC Dry Chemical Moderate Preferred Yes (metal only) Yes (with caution) CO2 High Recommended Yes No – Professional only Wet Chemical (Class K) High Required Limited No Class D Very High Required Limited No – Professional only Water/Foam Low Optional Yes Yes Understanding these differences helps you choose the appropriate disposal method and ensures you follow OSHA requirements and local fire codes. When in doubt, contacting a fire extinguisher service company provides expert guidance for your specific situation. Step-by-Step Disposal Methods Knowing how to dispose of fire extinguisher units properly involves choosing the right method for your situation. Here are five disposal approaches, ranging from the safest (and most recommended) to those suitable only for specific circumstances. Method 1: Household Hazardous Waste (HHW)

How to Dispose of Styrofoam the Right Way

Styrofoam is everywhere. It shows up in food containers, packing materials, electronics boxes, and shipping supplies. Yet many people are still confused about how to dispose of styrofoam the right way. Is it trash? Is it recyclable? Can it harm the environment or your health if handled wrong? This guide explains how to dispose of styrofoam safely, covers recycling challenges, and gives practical steps you can actually follow at home or work. Is Styrofoam Recyclable or Trash One of the first questions people ask when learning how to dispose of styrofoam is whether it belongs in the recycling bin or the trash. The answer is not simple, and misunderstanding it causes many recycling problems. Styrofoam is made from expanded polystyrene (EPS). EPS is lightweight, cheap to produce, and widely used for insulation and packaging. However, it is also a non-biodegradable material, meaning it does not break down naturally in the environment. This makes disposal a serious concern. Some types of styrofoam recycling do exist, but most cities do not accept EPS in regular curbside programs. These curbside recycling limitations exist because styrofoam is bulky, hard to compact, and expensive to process. When EPS breaks apart, it creates small fragments that can contaminate other recyclable materials. Food containers made of styrofoam usually cannot be recycled at all, especially if they are greasy or dirty. Even a small amount of food residue can ruin recycling batches due to contamination issues. On the other hand, clean packaging foam, such as blocks used in shipping or packing peanuts, may be recyclable at specialized locations. The key difference is cleanliness and type. If the styrofoam is clean, dry, and free from labels or tape, it may qualify for recycling through drop-off centers or mail-back recycling programs. When in doubt, styrofoam should not go in the recycling bin. Improper recycling causes more harm than placing it in landfill disposal. How to Get Rid of Styrofoam Knowing how to dispose of styrofoam properly starts with preparation and research. Throwing it away without checking local rules can cause problems for waste systems and the environment. The first step is to check local recycling guidelines. Cities and counties set their own rules, and these rules change often. Some areas offer EPS recycling through special events or facilities, while others do not allow it at all. Never assume styrofoam is accepted just because other plastics are. Next, inspect the styrofoam item. Ask yourself these questions: Is it clean or contaminated with food? Is it packaging foam or a food container? Does it break easily into small pieces? If recycling is an option, you must clean styrofoam properly. Remove all food residue, tape, labels, and stickers. Even small amounts of contamination can cause rejection at recycling facilities. Sorting is also important. Packing peanuts should be separated from rigid foam blocks. Some facilities accept one type but not the other. If recycling options are not available, landfill disposal may be the safest choice. While landfills are not ideal, they prevent styrofoam from entering waterways or breaking down into microplastics. Top 6 Ways to Dispose of Styrofoam Responsibly When it comes to responsible styrofoam disposal methods, some options are better than others. Below are six proven ways to handle styrofoam safely and legally. 1. Styrofoam Recycling Drop-Off Centers Styrofoam recycling drop-off centers are one of the safest and most responsible disposal options available. These facilities are designed to handle expanded polystyrene without causing contamination to other recyclable materials. Since styrofoam is bulky and lightweight, curbside programs usually reject it, but drop-off centers use specialized recycling equipment to manage it properly. How to dispose of styrofoam through drop-off locations helps reduce landfill waste and lowers environmental impact. This method works best for clean packing materials like foam blocks and protective inserts. Availability may vary by area, but when accessible, it is one of the most eco-friendly solutions. Best Way to Recycle Styrofoam Locally Collect clean and dry styrofoam only Remove tape, labels, and food residue Locate an approved EPS recycling drop-off Material is compacted and recycled safely 2. Mail-Back Recycling Programs Mail-back recycling programs are ideal for people who do not have local styrofoam recycling options. These programs allow you to ship clean styrofoam to certified recycling facilities that specialize in EPS processing. This method is commonly used for packaging waste from online shopping or businesses. While mail-back programs may involve a cost, they ensure styrofoam does not end up in landfill disposal. Understanding how to dispose of styrofoam through mail-back services is especially helpful in rural or restricted areas. It is a reliable and environmentally responsible alternative when drop-off centers are unavailable. How Mail-Back Recycling Programs Work Gather clean styrofoam packaging Pack it in approved shipping boxes Ship to the recycling provider Foam is compressed and reused 3. Reuse Styrofoam Reusing styrofoam is one of the simplest and most effective disposal methods. Many packing materials stay in good condition after first use. Foam inserts, sheets, and packing peanuts can be reused for shipping or storage. Reuse reduces waste and lowers demand for new packing materials. Learning how to dispose of styrofoam through reuse ideas saves money and protects the environment. While reuse does not eliminate waste forever, it delays disposal and reduces environmental impact. Easy Ways to Reuse Styrofoam Protect fragile items during storage Reuse for shipping packages Share with friends or small sellers Keep foam out of landfills 4. Donate Packing Materials Donating packing materials is a smart option when styrofoam is clean and usable. Many shipping stores, schools, and small businesses accept foam materials to reduce costs. This method supports reuse and reduces waste volume. If you want to know how to dispose of styrofoam responsibly, donation is a strong choice. It also helps local businesses and community groups. Always check donation rules before dropping items off. Where You Can Donate Styrofoam Shipping and mailing stores Schools and art programs Online sellers and small businesses Local reuse centers 5. Break Down Styrofoam for Storage and Transport Breaking down styrofoam helps

How to Dispose of Old Mattress in 2026

Every year, Americans throw away more than 20 million mattresses. That’s a lot of old beds taking up space in landfills! But here’s the thing – most people don’t know the right way to get rid of their old mattress. When you dump a mattress illegally, you could face fines up to $1,000 in many cities. Plus, mattresses take up valuable landfill space and can release harmful chemicals into the soil. The good news? There are smart, legal, and even free ways to dispose of your old mattress. Whether you’re upgrading to a better bed, moving to a new home, or dealing with damage from bed bugs or water, this guide will show you exactly how to handle mattress disposal the right way. We’ll cover everything from free donation options to professional mattress removal cost so you can make the best choice for your situation and budget. Ready to say goodbye to that old mattress responsibly? Let’s dive in. When Should You Replace Your Mattress? Before we talk about disposal, let’s make sure you actually need a new mattress. The average mattress lifespan is 7-8 years, but this varies by type. Different mattress types last different amounts of time: Innerspring mattresses: 7-10 years Memory foam mattresses: 6-8 years Latex mattresses: 10-15 years Hybrid mattresses: 7-10 years Here are clear signs it’s time to replace your mattress: Your mattress sags in the middle or has visible indentations where you sleep. This means the internal support has broken down. You’ll notice your body sinking deeper than it used to. You wake up with back pain, neck pain, or stiff joints that weren’t there before. An old mattress stops supporting your spine properly. You hear squeaking or creaking sounds when you move. This happens when the springs or foam/springs break down inside. You see tears, rips, or exposed materials. These damage points can’t be fixed and compromise the mattress structure. You notice stains that won’t come out, or there’s a musty smell. These indicate moisture damage or mold growth inside the mattress. You have allergy symptoms like sneezing or itchy eyes, mainly at night. Old mattresses collect dust mites, dead skin cells, and allergens over years of use. Special situations requiring immediate replacement: Bed bugs or infestation: Never try to salvage an infested mattress. The bugs live deep in the materials and are nearly impossible to fully eliminate. Water damage from flooding:  Even if it dries out, moisture creates mold and bacteria growth inside the mattress. Fire damage: Smoke and heat ruin the mattress materials and fire safety properties. If your mattress shows any of these problems, it’s time to start planning for disposal and replacement. The good news is you have options for getting rid of it responsibly. 6 Ways to Dispose of a Mattress Let’s explore proven mattress disposal options, from completely free methods to convenient full-service solutions. Each method works better for specific situations and budgets. Method 1: Donate to Charity If your bed is still in great shape, giving it a second life is the most helpful option. It keeps usable items out of the trash and helps a family in need. National organizations that accept mattress donations: Groups like the Salvation Army, Habitat for Humanity, and Goodwill often accept beds. Local homeless shelters or women’s refuges are frequently in need of beds in good condition. Check with a non-profit organization in your area to see if they offer a mattress pickup for donations. What makes a mattress donation-ready: The mattress must be completely hygienic and sanitary. It must be free from any stains, odors, or structural damage. The fire safety label must be firmly attached. There must be absolutely no history of bed bugs to ensure mattress reuse is safe. Method 2: Retailer Take-Back Programs When you buy a brand-new mattress, the easiest way to get rid of the old one is to let the store handle it. This saves you from having to find a separate mattress disposal service. How Retailer Programs Work: Many companies offer a mattress retailer take-back when you purchase a new bed. They often include the mattress removal cost in your delivery fee. The delivery team performs the heavy lifting and takes the old bed away when they drop off the new one. This is part of a mattress stewardship program designed for responsible disposal. Method 3: Municipal Curbside Pickup Most local governments have a system for picking up heavy items that don’t fit in your regular trash can. This is often the most affordable way to handle bulky waste. How To Use Local Rules: Contact your local waste management office to see if they allow curbside mattress pickup. You usually have to book a scheduled pickup in advance. The city will provide a specific pickup window or collection window for your bulky item. Preparation Requirements: Most cities require the mattress to be placed in a plastic mattress bag. This keeps the item hygienic for the waste collector. Failure to follow mattress disposal rules and regulations can result in the city leaving the item behind. Method 4: Mattress Recycling Centers Recycling is the best choice for the environment because it recovers valuable materials like steel and foam. It is a key part of maintaining a circular economy. Finding Recycling Centers: Look for a household waste recycling centre (HWRC) or a civic amenity centre in your area. Use the Bye Bye Mattress program or the Mattress Recycling Council website to find a drop-off facility. Check if there is a recycling facility that specializes in mattress recycling near you. What happens during mattress recycling: The bed is cut open to separate the mattress materials. Metal springs are sent for scrap metal recycling. Foam is cleaned and turned into carpet underlay or pillows. Fabric and wood are recycled into fuel or mulch. Method 5: Junk Removal Services If you are short on time or cannot move the bed yourself, hiring professionals is the way to go. A service like Junk Masterz takes all the stress

Color Palette