Archive for Lunch7

Where to Donate Exercise Equipment: A Complete Guide for Your Old Fitness Gear

Clearing out your home gym can feel overwhelming, especially when you’ve accumulated treadmills, dumbbells, or a stationary bike over the years. Instead of tossing your equipment into the trash, it’s worth exploring where to donate exercise equipment. Donating not only helps you reclaim space, but it also benefits others and the environment. Many people wonder where to donate old exercise equipment so it can actually be put to good use. Schools, community centers, local charities, and shelters often welcome these items to provide fitness opportunities to those who might not otherwise have access. Even smaller items like yoga mats or resistance bands can make a meaningful impact. Donating your unused fitness gear can make a real difference. Schools, community centers, shelters, and local charities often lack the resources to buy new equipment, and your old treadmill or weight set could provide them with valuable tools to promote health and wellness. Not only are you helping others stay active, but you’re also reducing waste and keeping bulky items out of landfills. In this guide, we’ll cover everything you need to know about where to donate used exercise equipment, including preparation tips, local donation options, and even tax considerations. Why Donating Exercise Equipment Matters Donating exercise equipment has benefits that go beyond clearing space. Environmental Benefits Unused gym equipment often ends up in landfills, contributing to unnecessary waste. By donating, you reduce your environmental footprint and extend the life of your equipment. Many items, like treadmills and dumbbells, can remain functional for years with proper care. Social Impact Your donations can make a real difference. Local schools, youth programs, shelters, and community gyms often struggle to afford fitness equipment. Your old treadmill or set of weights can provide much-needed resources to those who otherwise wouldn’t have access to fitness facilities. Financial Sense Some donations may be eligible for tax deductions, helping you save money while making a positive impact. Always check the IRS guidelines to understand what qualifies as a charitable contribution. Types of Exercise Equipment You Can Donate Not all gym equipment is suitable for donation, so it’s important to know what to keep and what to discard. Cardio Machines: Treadmills, stationary bikes, elliptical trainers, and rowing machines. Strength Equipment: Dumbbells, kettlebells, resistance bands, weight benches. Accessories: Yoga mats, stability balls, jump ropes, and foam rollers. Tips for Preparing Equipment Before Donation Inspect and Test Equipment Before donating, make sure your machines are in good working order. Test all parts, tighten screws, and ensure cables, belts, and electronics function correctly. Functional equipment is more likely to be accepted by charities. Clean Thoroughly Wipe down machines, clean handles and seats, and remove dust or sweat residue. Clean, presentable equipment is more appealing to donation centers and recipients. Pack and Label Items Disassemble large machines if possible. Keep manuals, cords, and small parts together in a labeled bag. This makes it easier for recipients to set up and use your equipment safely. Also Read: Best way to dispose of exercise equipment Where to Donate Exercise Equipment? Finding the right place to donate can depend on the type of equipment you have and the local community’s needs. Local Charities and Nonprofits Many charities accept gym equipment donations. Organizations such as YMCA, Goodwill, and Salvation Army often take donations and sometimes even offer pickup services. Check with local chapters to confirm the types of equipment they accept and their condition requirements. Schools, Community Centers, and Shelters Educational institutions and community centers frequently need exercise equipment for physical education programs or recreational activities. Shelters can also benefit, providing residents with access to wellness resources that may otherwise be unavailable. Fitness Equipment Resale and Exchange Programs Some organizations specialize in reselling or refurbishing used fitness equipment, including stores like Play It Again Sports. While this isn’t strictly donating, selling equipment to such stores ensures it’s reused responsibly. Local Facebook groups or online resale platforms also allow community members to give away equipment directly. Donation Pickup Services Transporting bulky items can be challenging. Services like affordable junk removal services with Junk Masterz provide convenient pickup options, making it easy to donate large machines safely. They handle logistics, ensuring your equipment reaches a donation center without hassle. How to Find Local Donation Options Searching for nearby donation opportunities can save time and help you connect with the right recipients. Google and Online Directories Use Google queries such as where to donate used exercise equipment near me or exercise equipment donation pickup. Google Maps is particularly useful for verifying locations and reading reviews to ensure legitimacy. Online Donation Platforms Websites like Freecycle, Nextdoor, and Craigslist’s free section allow you to offer equipment to local community members. When using online platforms, prioritize safety, schedule meetings in public places, and confirm that the recipient can handle pickup or delivery. Tax Benefits and Legal Considerations Donating exercise equipment can also provide financial incentives. Charitable Donations: If your equipment goes to a registered nonprofit, it may be tax-deductible. Documentation: Keep receipts or acknowledgment letters from the charity to claim deductions. Valuation: The IRS requires you to estimate the fair market value of the items donated. This is usually lower than the purchase price, depending on condition. Consult with a tax professional if you’re unsure how to accurately claim these benefits. Conclusion Donating exercise equipment is truly a win-win. By choosing to give away your unused gear, you not only reclaim space in your home but also support community wellness and promote environmental sustainability. Knowing where to donate exercise equipment or where to donate old exercise equipment ensures your items reach people and organizations that can benefit the most. Whether you donate to a local charity, school, community center, or through an online platform, your old gym gear can help children, seniors, and underserved communities stay active and healthy. Even small items like yoga mats, resistance bands, or dumbbells can make a big difference for someone starting their fitness journey. If moving bulky machines seems daunting, affordable junk removal services with Junk Masterz can

How to Upcycle Old Furniture: Creative Ideas to Transform Your Home Sustainably

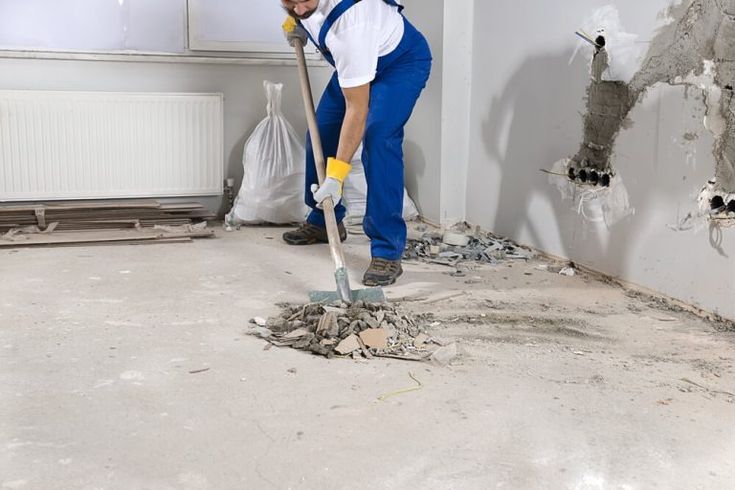
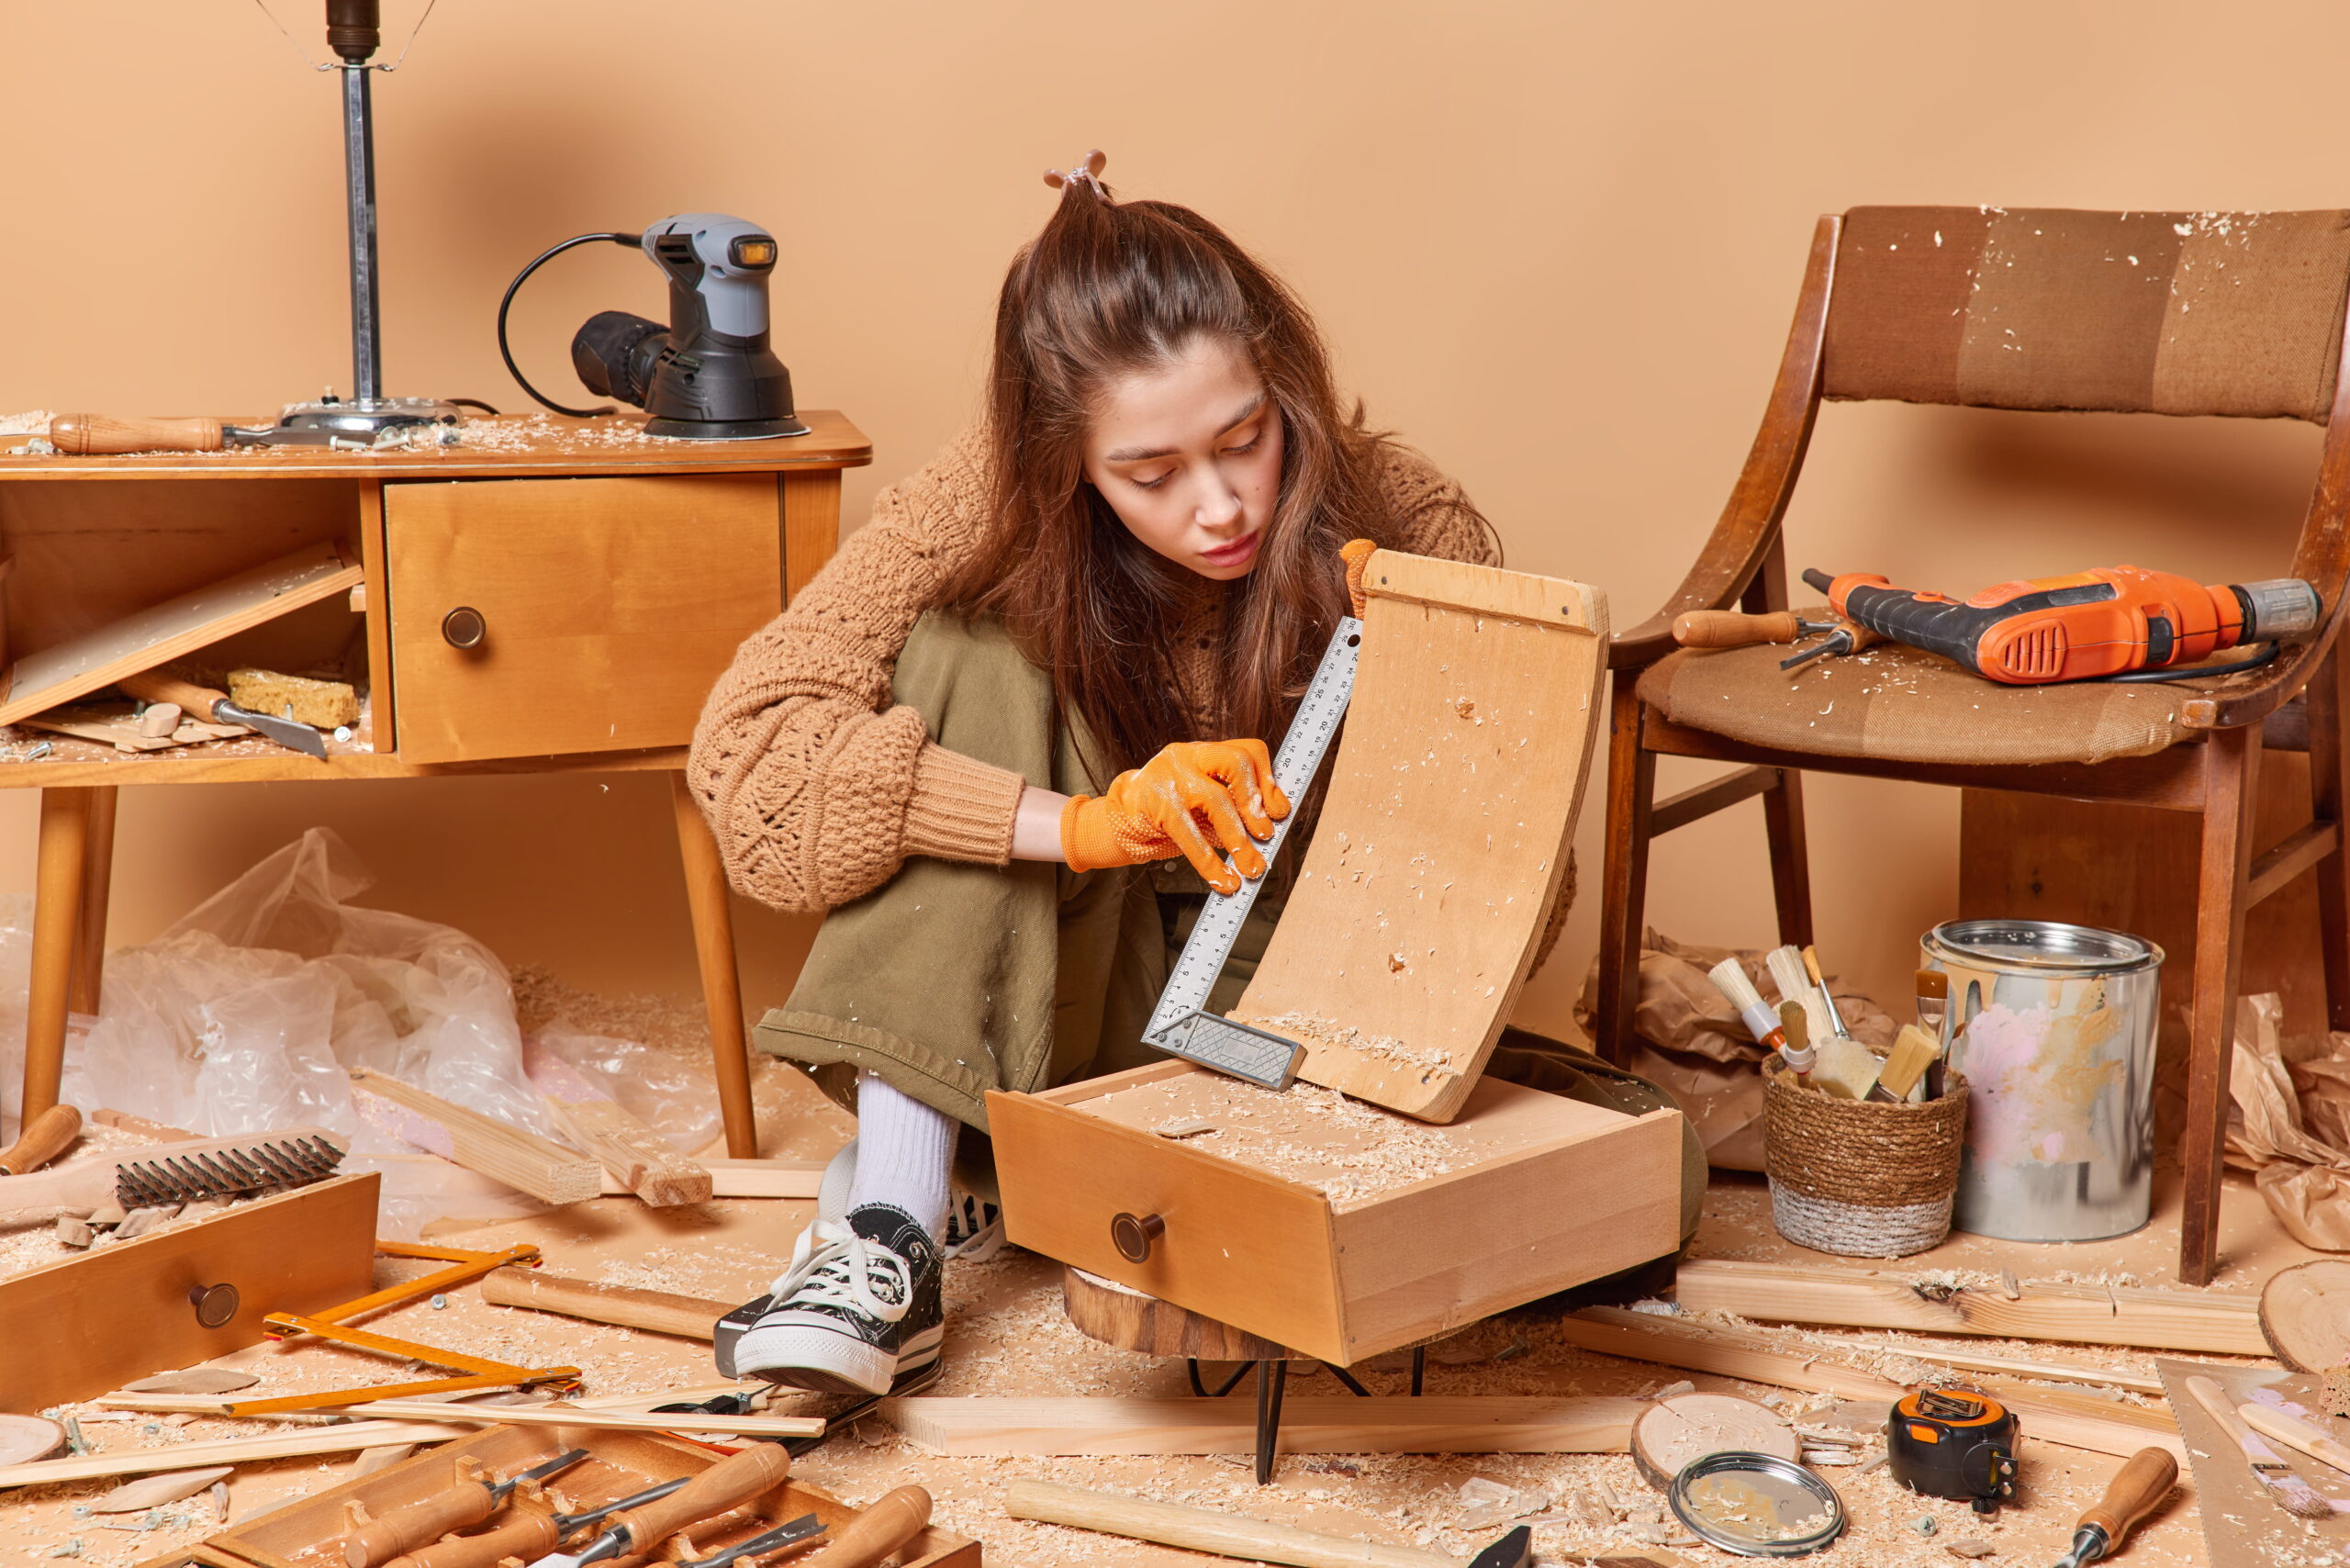
Old furniture often gets pushed into storage or thrown away when it starts to look worn out. Many people replace tables, chairs, or cabinets just because they no longer match their home style. Many people are now asking about how to upcycle old furniture and are looking for simple ways to reuse their old items instead of throwing them away. However, learning how to upcycle old furniture can help you turn these items into something useful and attractive again Upcycling old furniture is a practical solution for homeowners who want to save money and reduce waste. Instead of buying new items, you can improve what you already have. This guide explains how to upcycle furniture step by step, along with creative ideas and expert tips to help you get started.  What Is Upcycling Furniture? Before you begin, it is important to understand what upcycling means. Upcycling is the process of improving an old or unused item without breaking it down into raw materials. It is different from recycling. Recycling changes materials into something new, while upcycling keeps the original structure and enhances it. For example, you can: Turn an old dresser into a storage cabinet Repaint a table to give it a modern look Use wooden pallets to build a coffee table Upcycling old furniture allows you to reuse items in creative ways while reducing waste. Why More People Are Upcycling Old Furniture The demand for upcycling old furniture has increased in recent years. There are several reasons behind this shift. Saves Money New furniture can be expensive. Upcycling allows you to improve existing items at a much lower cost. A small investment in paint or tools can completely change the look of furniture. Reduces Waste Large furniture items take up a lot of space in landfills. When you upcycle instead of throwing items away, you help reduce household waste. Supports Sustainable Living Upcycling reduces the need for new materials like wood and metal. This helps conserve natural resources and lowers environmental impact. Encourages Creativity You can design furniture that matches your personal taste. Instead of buying mass-produced items, you create something unique. Provides a Better Alternative to Disposal Many people search for ways to dispose of old furniture. Upcycling gives you another option before sending items to landfills or recycling centers.  How to Upcycle Old Furniture (Step-by-Step Guide) If you are new to DIY projects, the process may seem difficult. However, learning how to upcycle your old furniture is easier when you follow simple steps. Step 1: Choose the Right Furniture Start with furniture that is still strong but looks outdated. Good options include wooden chairs, tables, cabinets, and dressers. Avoid items with major structural damage. Step 2: Clean the Furniture Remove dust, grease, and dirt using soap and water. Cleaning helps paint and finishes stick properly. Step 3: Repair Minor Issues Fix loose screws, cracks, or chipped areas. You can use wood filler and basic tools to make the furniture stable again. Step 4: Sand the Surface Sanding removes old paint and smooths the surface. This step prepares the furniture for a new finish. Step 5: Paint or Refinish Apply paint, polish, or stain depending on your design. Popular options include matte paint, natural wood finishes, or distressed styles. Step 6: Replace Hardware New handles, knobs, or legs can make a big difference. Small changes often improve the overall look of furniture. By following these steps, you can easily learn how to upcycle furniture at home. Creative Ideas for Upcycling Old Furniture If you are looking for inspiration, there are many simple ways to reuse old items. Turn Dressers into Storage Units An old dresser can be repainted and used as a storage cabinet for bedrooms or hallways. Convert Doors into Tables Old wooden doors can be transformed into dining tables or desks by adding legs. Use Bookshelves for Kitchen Storage Bookshelves can be reused to organize kitchen items or pantry supplies. Make Plant Stands from Chairs Broken chairs can hold plants and work as decorative pieces. Create Coffee Tables from Pallets Wooden pallets are commonly used in DIY projects. With sanding and finishing, they can become modern tables. These old furniture recycling ideas are simple and cost-effective.  Common Mistakes to Avoid When Upcycling Furniture Many beginners make small mistakes that affect the final result. Avoid these issues when learning how to upcycle old furniture. Skipping cleaning before painting Not sanding the surface properly Using low-quality paint Ignoring small repairs Choosing furniture with severe damage Taking the time to properly prepare the furniture leads to better results. When Furniture Cannot Be Upcycled Not every piece of furniture can be saved. Some items may be too damaged to repair. Examples include: Broken frames that cannot be fixed Mold-infested furniture Water-damaged materials In these cases, it is better to choose proper disposal methods. Recycling programs or professional removal services can handle large furniture safely. According to global waste statistics and furniture disposal impact, furniture contributes significantly to landfill waste each year.  Tips from Professional Furniture Upcyclers Experienced furniture upcyclers follow simple practices to achieve better results. Start with small projects if you are a beginner. Items like stools or side tables are easier to handle. Use good-quality tools because they improve your work. Choose durable paints that last longer and protect the surface. It is also helpful to study modern design trends. Styles like minimal, rustic, and industrial are popular and easy to recreate. If a piece cannot be restored, you can explore how to dispose of large furniture safely or consider professional junk removal services to handle unwanted items in an environmentally responsible way. Environmental Benefits of Upcycling Old Furniture Upcycling old furniture is not only useful for your home but also beneficial for the environment. Reduces Landfill Waste Furniture takes years to break down. Upcycling keeps items in use for a longer time. Conserves Natural Resources Reusing furniture reduces the need for new wood and raw materials. Saves Energy Manufacturing new furniture requires energy. Upcycling reduces production demand. Supports Circular

How to Recycle Fluorescent Tubes Safely?The Ultimate Guide for Homes and Businesses

Fluorescent tubes are widely used in offices, warehouses, schools, and homes because they are energy-efficient and provide bright, long-lasting illumination. However, these tubes contain mercury, a toxic substance that poses serious health and environmental risks if broken or disposed of improperly. Understanding how to recycle fluorescent tubes and how to recycle fluorescent light tubes safely is critical, as even a small amount of mercury can contaminate soil, water, and the food chain, making responsible disposal essential. Recycling fluorescent tubes is not just an eco-friendly choice—it’s a legal requirement in many regions and an important step toward protecting public health. By recycling, valuable materials such as glass, metals, and phosphors can be recovered, reducing the need for raw materials and minimizing environmental impact. For homeowners and businesses alike, understanding how to recycle fluorescent tube lights safely, the cost involved, and the latest recycling methods is essential. This guide provides a comprehensive, step-by-step approach to fluorescent tube recycling while highlighting the environmental, economic, and regulatory benefits. Understanding Fluorescent Tubes What Are Fluorescent Tubes? Fluorescent tubes are long, tubular lights that produce illumination through electrical discharge in mercury vapor. They are popular due to energy efficiency but pose environmental risks because of the toxic mercury content.  Why Recycling is Crucial Environmental Safety: Mercury and phosphor coatings can harm soil, water, and wildlife. Legal Compliance: Improper disposal can lead to fines under environmental laws. Resource Recovery: Recycled tubes can reclaim glass, metals, and phosphor, reducing landfill waste. How to Recycle Fluorescent Tubes  Step-by-Step Recycling Process Collection: Store spent fluorescent tubes safely in a rigid container to prevent breakage. Drop-Off Locations: Find certified recycling centers or hazardous waste facilities. Some hardware stores also offer recycling programs. Transportation: Avoid breaking the tubes; mercury can evaporate, posing health hazards. Processing: Recycling facilities crush and separate the tubes’ glass, metal, and mercury. Mercury is safely captured for reuse.  Home vs. Business Recycling Homeowners: Usually small quantities. Local collection programs and municipal drop-offs are ideal. Businesses Often deal with large volumes. Contracting waste management companies specializing in fluorescent tube recycling is cost-effective and compliant with regulations. Common Mistakes to Avoid Throwing tubes in regular trash. Breaking tubes before disposal. Ignoring local regulations. Cost of Recycling Fluorescent Tubes One common question: “How much does it cost to recycle fluorescent tubes?” Costs vary depending on volume, location, and service provider.  Average Costs Home Users: $1–$3 per tube at local collection points. Businesses: $50–$200 for bulk pickups, depending on quantity. Specialty Services: Some offer free recycling for large orders to encourage sustainability. Factors Influencing Cost Tube length and type. Collection and transportation distance. Local environmental regulations. Tip: Combining collections and scheduling pickups with certified facilities can reduce overall costs. How to Recycle Fluorescent Tube Lights Efficiently Partner With Certified Recyclers Look for EPA-certified facilities or licensed hazardous waste management companies. Check their website for tube acceptance policies.  Use Take-Back Programs Some lighting manufacturers or retailers offer take-back programs where you can return old tubes for free or minimal fees. Explore Mail-Back Options For remote locations, specialized mail-back kits are available for safe disposal. Maximize Safety Wear gloves and goggles when handling tubes. Avoid dropping or crushing tubes. Label boxes “Hazardous Material – Fluorescent Tubes” for safety during transport. By following these steps, both homeowners and businesses can safely and responsibly manage their lighting waste. Partnering with certified recyclers  like Junk Master is  offering Junk Removal   services ensures the process is convenient, compliant, and eco-friendly. Proper Way to Dispose of Fluorescent Light Tubes Disposing of fluorescent tubes safely is critical due to the mercury content and potential environmental risks. Whether you have a few old tubes at home or large quantities in a business, following the right disposal steps ensures safety and legal compliance. Broken bulbs or tubes can easily cut hands, release hazardous substances, or cause fires if mishandled. Using proper containment, following local recycling regulations, and leveraging certified recycling facilities ensures that fluorescent tubes and light bulbs are disposed of safely, protecting both people and the planet. You May Also Read: How to properly dispose of light bulbs  DIY Alternatives for Small Quantities If you only have a few tubes, you can follow safe DIY approaches: Wrap each tube in cardboard or bubble wrap. Place in a sturdy box labeled “Fluorescent Tubes – Hazardous Material.” Drop off at a local recycling center or municipal hazardous waste day. Avoid DIY mercury recovery; it’s unsafe and illegal in most regions. Environmental Benefits of Fluorescent Tube Recycling Recycling fluorescent tubes reduces environmental impact in multiple ways: Mercury Containment: Prevents soil and water contamination. Resource Conservation: Reuses glass, metals, and phosphors. Energy Savings: Manufacturing new tubes consumes more energy than recycling old ones. Businesses showcasing sustainability in lighting disposal also benefit from positive public perception, enhancing brand trust. At Junk Masterz, we help companies implement safe and eco-friendly fluorescent tube and light bulb recycling practices, reinforcing their commitment to sustainability while maintaining compliance with environmental regulations. Conclusion Recycling fluorescent tubes is not only environmentally responsible but also legally required in many regions. These tubes contain mercury and other materials that, if improperly disposed of, can harm the environment and human health. By understanding how to recycle fluorescent tube lights safely, knowing how much it costs to recycle fluorescent tubes, and following proper disposal practices, you can protect your home, business, and community from potential hazards. Beyond safety, recycling fluorescent tubes offers significant economic and environmental benefits. Valuable materials such as glass, metals, and phosphors can be reclaimed, reducing the demand for raw materials and conserving energy. Businesses that implement proper recycling practices also gain a competitive edge, showcasing sustainability and compliance with environmental regulations—an increasingly important factor for customers, partners, and regulators. Modern recycling programs and take-back initiatives make the process easier than ever. Whether you are a homeowner with a few tubes or a business managing large quantities, leveraging certified recycling centers, retailer programs, and professional waste management services ensures your tubes are handled safely, efficiently, and legally. Finally, taking the step to recycle

How to Get Rid of Yard Waste? Smart Strategies for Clean and Healthy Yards

Keeping your yard clean and healthy requires regular maintenance. Activities like mowing the lawn, trimming trees, and removing dead plants often leave behind large piles of organic debris. Many homeowners quickly realize that yard waste can pile up faster than expected. Understanding how to get rid of yard waste properly helps protect the environment, keeps your property clean, and prevents potential fines in areas where improper disposal is restricted. Yard waste typically includes grass clippings, leaves, branches, weeds, shrubs, and other organic materials that come from landscaping or gardening. While small amounts may fit into regular waste bins, large cleanups after storms, seasonal yard work, or landscaping projects often create much bigger piles. This guide explains how to get rid of a lot of yard waste, the best eco-friendly disposal methods, and when professional help may be the most efficient solution. Whether you are dealing with seasonal leaf piles or major yard renovations, the strategies below will help you manage yard debris safely and responsibly. Understanding Yard Waste: What Counts and Why It Matters Before deciding how to dispose of yard debris, it’s important to understand what qualifies as yard waste. Common Types of Yard Waste Typical yard waste materials include: Grass clippings Leaves Tree branches and limbs Shrubs and bushes Garden plants Weeds and vines Wood chips and bark These materials are organic and biodegradable, but they should not always be thrown in regular trash. Many municipalities separate yard waste from household garbage because organic materials can be composted or recycled. Why Proper Yard Waste Disposal Is Important Improper disposal can lead to several issues: Overfilled landfills Environmental pollution Pest problems in neighborhoods Potential local fines or penalties Improper yard waste disposal can lead to several issues: overfilled landfills, environmental pollution, pest problems in neighborhoods, and potential local fines or penalties. Leaving yard debris in the wrong place or mixing it with regular trash can reduce recycling effectiveness, increase methane emissions from anaerobic decomposition, and harm local ecosystems when clippings and leaves wash into storm drains and waterways — all issues that sustainable waste experts and environmental research organizations highlight as key problems when organic waste is not managed properly  (see why yard waste management is important at The Institute for Environmental Research and Education)When yard cleanup creates large piles of leaves, branches, or landscaping debris, many homeowners find it difficult to handle everything alone. In these situations, professional help from Junk Masterz can make the process much easier by safely collecting, loading, and disposing of yard waste in an environmentally responsible way. Best Methods for Getting Rid of Yard Waste There are several practical ways homeowners can handle yard debris, depending on the amount and type of material. 1. Composting Yard Waste at Home Composting is one of the most environmentally friendly ways to deal with yard debris. Instead of throwing organic materials away, they can be converted into nutrient-rich compost for gardening. Materials That Compost Well Good compost materials include: Leaves Grass clippings Small branches Plant trimmings Avoid adding diseased plants or invasive weeds to compost piles because they may spread when reused in gardens. Benefits of Composting Reduces landfill waste Improves soil health Saves money on fertilizers Creates sustainable gardening practices For homeowners with moderate yard waste, composting is often the simplest long-term solution. 2. Municipal Yard Waste Collection Programs Many cities provide seasonal yard waste pickup services. These programs typically allow residents to place organic debris in designated bins or paper yard bags for weekly or monthly collection. How These Programs Work Most municipalities require: Bundled branches tied with twine Leaves placed in biodegradable bags Specific pickup days for yard debris Check your local guidelines before placing yard waste on the curb to avoid rejected pickups. Municipal collection works well for routine yard maintenance but may not handle extremely large amounts of debris. 3. Yard Waste Recycling Centers Recycling facilities and composting centers accept organic materials from homeowners and landscaping companies. These facilities usually process: Leaves and grass Tree limbs Brush and plant debris After processing, the materials are converted into compost, mulch, or biomass energy. Recycling centers are a good solution when you need to get rid of bulk yard waste after seasonal cleanup or landscaping projects. 4. Mulching Yard Debris Mulching is another effective method for reusing organic materials directly in your yard. Materials That Work Well for Mulching Leaves Grass clippings Small branches processed with a chipper Mulch helps retain soil moisture, regulate temperature, and suppress weeds in garden beds. By turning yard debris into mulch, homeowners reduce waste while improving their landscape. How to Get Rid of Large Amounts of Yard Waste Sometimes, yard debris becomes too large to handle with normal disposal methods. This often happens after storms, tree removal, or major landscaping work. If you are wondering how to get rid of large amounts of yard waste, consider the following solutions. Rent a Yard Waste Dumpster Dumpster rentals are commonly used for landscaping projects because they allow homeowners to dispose of large volumes of organic material quickly. Benefits include: Convenient onsite disposal No repeated trips to recycling centers Ability to handle heavy branches and debris However, dumpsters may not always be ideal for small properties or quick cleanups. Cost of Yard Waste Removal The cost of yard waste removal can vary depending on the amount of debris, location, and the type of service used. On average, homeowners may pay between $100 and $600 for yard waste removal services. Small loads of leaves or grass clippings may cost less, while large piles of branches or storm debris can increase the price. Factors that influence yard waste removal costs include: Volume and weight of the debris Type of materials (branches, leaves, brush) Labor required for loading and hauling Local disposal or recycling fees For large projects, hiring a professional yard waste removal service can still be cost-effective because it eliminates the need for multiple trips, equipment rentals, and time spent hauling debris yourself. You May Also Read: Average cost of yard

What Is Bulky Items? Everything Homeowners and Businesses Need to Know

Every home eventually accumulates items that are too large to fit into regular trash bins. Old sofas, broken appliances, worn-out mattresses, and renovation debris often create a common problem for homeowners: how to get rid of them properly. These oversized objects are commonly referred to as what is bulky items in waste management. Many people search online to understand what are bulky items, how to dispose of bulky items, or how to throw away large items without violating local waste regulations. Unlike regular household garbage, bulky items require special handling because of their size, weight, and sometimes the materials they contain. If they are not disposed of correctly, they can create environmental problems and take up valuable landfill space. Understanding bulky waste is important not only for maintaining a clean home but also for protecting the environment and following local disposal guidelines. Many municipalities offer bulk pickup services, recycling programs, or designated disposal facilities for large items. In this guide, you will learn exactly what is bulky items, common examples of bulky waste, why these items cannot be placed in regular trash bins, and the most responsible ways to dispose of them safely. What Is Bulky Items? Bulky items are large household or commercial objects that are too big, heavy, or inconvenient to be collected through regular garbage services. Because of their size and weight, these items require special collection, recycling, or disposal procedures. In most waste management systems, bulky items are categorized separately from everyday trash. Standard garbage trucks are designed to collect bagged household waste, but oversized objects can damage equipment or slow down collection routes. As a result, municipalities often provide scheduled bulky waste pickup services or require residents to transport these items to designated disposal facilities. Bulky items may come from everyday household use, home renovation projects, or office upgrades. Items such as furniture, appliances, mattresses, and construction materials are commonly classified as bulky waste. Understanding this classification helps individuals dispose of these objects responsibly and avoid illegal dumping. What Are Bulky Items? Common Examples Bulky items can vary depending on local waste management regulations, but they generally include large objects that cannot fit into regular garbage containers. These items usually require special handling because they are difficult to transport and process. Household Furniture Furniture is one of the most common types of bulky waste found in homes. Over time, furniture becomes worn out, damaged, or replaced with newer pieces, leading to the need for disposal. Large furniture items such as sofas, couches, dining tables, wardrobes, and bed frames are considered bulky because they are heavy and difficult to move. These items often cannot fit into standard waste bins, and their size makes them unsuitable for regular garbage collection. Many people choose to donate usable furniture to charities or thrift stores. However, when furniture is broken or unusable, it must be disposed of through bulky waste services or recycling facilities. Large Appliances Household appliances are another common category of bulky items. Appliances such as refrigerators, washing machines, dryers, ovens, and dishwashers are large, heavy, and often contain recyclable metals and components. These appliances require careful disposal because some contain refrigerants or electrical components that must be handled according to environmental regulations. Many recycling centers accept old appliances and recover valuable materials such as steel, copper, and aluminum. Proper disposal of large appliances helps reduce environmental impact and allows valuable materials to be reused in manufacturing. Also Read: How to dispose of old household appliances Mattresses and Carpets Mattresses and carpets are frequently replaced during home renovations or when homeowners upgrade their bedding and flooring. Because of their size and materials, these items are classified as bulky waste. Old mattresses and box springs take up a large amount of landfill space if they are not recycled properly. Some recycling facilities break down mattresses into foam, fabric, and metal springs for reuse. Carpets and rugs are also bulky due to their length and weight. During flooring replacement projects, large sections of carpet may need to be removed and disposed of through specialized waste services. Also Read: Average cost to remove carpet Construction and Renovation Debris Home improvement projects often generate bulky construction materials that cannot be placed in regular trash bins. These materials may include concrete pieces, cabinets, wood panels, drywall, bathtubs, and large fixtures. Construction debris is typically heavy and may require special transportation to disposal or recycling facilities. In many cases, homeowners hire professional construction debris removal services, and Junk Masterz provides expert solutions for handling large renovation waste safely and efficiently. What is NOT considered a bulky item? Not everything large qualifies as bulky waste. Items that are usually not considered bulky items include: Regular household trash Small electronics (depending on local rules) Yard waste (leaves, branches) Hazardous materials (paint, chemicals) These categories often have separate disposal guidelines. Why Proper Bulky Item Disposal Matters Improper disposal of bulky items can lead to serious issues: 1. Environmental Impact Large waste in landfills breaks down slowly and can release harmful gases. According to the United States Environmental Protection Agency, landfill waste produces methane, a greenhouse gas that contributes to climate change. You can learn more about this from the EPA’s official resource on landfill emissions: 2. Legal Penalties Many municipalities issue fines for illegal dumping. 3. Safety Concerns Bulky waste left on streets can: Block pathways Attract pests Cause accidents How to Dispose of Bulky Items (Step-by-Step Guide) 1. Check Local Regulations Every city has different rules for bulky waste pickup. 2. Schedule a Pickup Most municipalities offer: Free bulk pickup (limited times per year) Paid scheduled pickups 3. Donate Usable Items If your items are still in good condition: Donate to charities Give away onlineIf your items are still in good condition, donation is a great option. Organizations like Habitat for Humanity accept furniture and household goods to support families in need. You can check donation guidelines. 4. Recycle When Possible Many bulky items contain recyclable materials like: Metal Wood Plastic Professional Junk Removal Services

How Much Does It Cost to Remove Concrete?

Removing concrete can be a daunting task, whether it’s an old driveway, patio, sidewalk, or foundation. If you’re planning a home renovation or just want to refresh your outdoor space, knowing how much does it cost to remove concrete is crucial for budgeting and planning. In this guide, we’ll break down the average costs, factors that influence pricing, and tips for reducing expenses while ensuring safety and efficiency. Concrete removal might seem straightforward, but the process involves careful planning, the right equipment, and proper disposal. By understanding the variables that impact the cost of concrete removal, you can make informed decisions and avoid unexpected expenses. What Is Concrete Removal? Concrete removal involves breaking up, demolishing, and hauling away old or unwanted concrete structures. This process is essential in many home improvement projects, including replacing driveways, patios, sidewalks, and even foundations. There are two main approaches to concrete removal: DIY Removal – Using hand tools, sledgehammers, or rented equipment to break and remove concrete yourself. Professional Removal – Hiring licensed contractors who bring heavy machinery and handle disposal efficiently. Choosing the right method often depends on the size of the project, accessibility, and your budget. The concrete demolition and removal cost can vary widely depending on these factors. Why People Remove Concrete Homeowners remove concrete for various reasons: Renovation and Remodeling: Upgrading driveways, patios, or garden pathways. Safety Concerns: Cracked or uneven concrete can pose tripping hazards. Landscaping Improvements: Removing concrete allows more natural space for gardens, lawns, or outdoor living areas. Structural Repairs: Old foundations may need removal to support new construction. Understanding why you need removal helps determine the method and scope of the project, which directly influences the cost of removing concrete.A well-planned schedule prevents surprise costs from rushed labor or last-minute disposal fees, and using Junk Masterz ensures your concrete debris is removed safely and responsibly. Factors That Affect the Cost of Concrete Removal The price of removing concrete is not one-size-fits-all. Several variables can influence the final cost: 1. Size and Thickness of Concrete Larger slabs require more labor and equipment. Similarly, thicker concrete takes more time and effort to break, increasing both labor and disposal costs. 2. Type of Concrete Structure Different structures have varying levels of complexity: Driveways: Often 4–6 inches thick, accessible, and easier to remove. Patios: May include irregular shapes, landscaping integration, or decorative finishes. This can increase the cost to remove concrete patio. Sidewalks and Pathways: Narrow and sometimes reinforced, requiring careful handling. Foundations: Often the most labor-intensive and expensive due to depth and reinforcement. 3. Accessibility and Location If the concrete is in a tight space, near obstacles, or on multiple levels, the job becomes more labor-intensive. Urban locations can also increase pricing due to disposal regulations and limited equipment access. 4. Labor and Equipment Manual removal is cheaper but more physically demanding and time-consuming. Hiring professionals usually involves heavy machinery like jackhammers, skid steers, or excavators, which increases the overall cost. 5. Disposal and Environmental Considerations Hauling away concrete to a landfill or recycling center adds to the price. Some local regulations may require specific disposal methods, especially for large projects. Using recycled concrete can sometimes reduce costs. Average Costs of Concrete Removal While prices vary by region and project size, here are some general estimates: 1. National Average Small slabs (under 100 sq. ft.): $150–$500 Medium slabs (100–500 sq. ft.): $500–$1,200 Large slabs (over 500 sq. ft.): $1,200–$4,000 On average, homeowners can expect to pay $2–$6 per square foot for residential concrete removal. These numbers include demolition, labor, and disposal, but not any additional site preparation or landscaping work. 2. Cost Breakdown by Project Type Driveway Removal: $800–$3,000 depending on size and thickness. Patio Removal: $300–$1,500, factoring in shapes and decorative finishes. Sidewalk Removal: $200–$800. Foundation Removal: $2,000–$5,000 or more, depending on depth and reinforcement. 3. DIY vs. Professional Costs DIY removal can save money, with small projects potentially costing only $50–$200 for tool rentals and disposal fees. However, for larger slabs or reinforced concrete, professional services ensure safety, efficiency, and compliance with local regulations. You May Also Read:How much is post construction cleaning How to Reduce the Cost of Concrete Removal Even professional removal doesn’t have to break the bank. Here are some ways to lower costs: Recycle Concrete: Many facilities accept concrete for reuse, reducing landfill fees. Get Multiple Quotes: Compare at least 3–4 professional estimates to find competitive pricing. Break Projects Into Sections: Smaller demolition sections may be cheaper and easier to handle. DIY Preparations: Removing furniture, landscaping, or non-structural obstacles before professionals arrive can save labor costs. Being proactive and planning carefully can significantly reduce the concrete demolition and removal cost while ensuring safety. Planning Your Concrete Removal Project Proper planning is key to staying within budget and avoiding delays. 1. Preparing the Site Remove obstacles and secure surrounding areas. Check for permits if local regulations require them. Ensure safety measures such as protective gear and proper signage are in place. 2. Hiring Professionals When choosing contractors: Look for licensed, insured, and experienced companies. Ask for detailed estimates that include labor, equipment, and disposal costs. Check references and online reviews to confirm credibility. 3. Timeline and Expectations Small projects may take a few hours; larger projects could take several days. Allow time for disposal and cleanup. A well-planned schedule prevents surprise costs from rushed labor or last-minute disposal fees. Small projects may take a few hours; larger projects could take several days. Allow time for disposal and cleanup. Junk Masterz offers professional Debris Construction Removal services to handle hauling and disposal efficiently, saving you time and effort. Conclusion Removing concrete doesn’t have to be overwhelming if you understand the costs and plan properly. By considering factors such as slab size, type, accessibility, labor, and disposal, homeowners can budget effectively and make informed decisions. Whether you choose DIY removal or hire professionals, knowing how much does it cost to remove concrete ensures your project runs smoothly without unexpected expenses. Remember to request multiple quotes,

How Much Does House Cleaning Cost? A Complete Pricing Guide for Homeowners

House cleaning is one of the most requested home services today. Busy homeowners, families, and property managers often rely on professional cleaners to maintain a clean and healthy living space. However, one of the most common questions people ask before hiring a cleaner is how much does house cleaning cost. The cost of professional house cleaning can vary widely depending on several factors such as home size, location, level of cleaning required, and whether the service is recurring or a one-time deep clean. Some homeowners may only need a quick tidy-up, while others require extensive cleaning after renovations or move-outs. Understanding pricing helps you budget properly and avoid surprises when hiring a cleaning service. In this guide, we’ll break down the typical pricing structures used by cleaning companies, explain what influences the cost, and provide real examples to help you estimate what you might pay. By the end of this article, you will clearly understand how much does a house cleaner cost, what services are included, and how to choose the right cleaning service for your home. Average House Cleaning Costs in 2026 For most homeowners, professional cleaning services typically cost between $100 and $400 per visit depending on the home size and service type. Here is a quick breakdown of average cleaning costs: Home Size Average Cleaning Cost Small apartment (1 bed, 1 bath) $80 – $150 Medium home (2–3 bedrooms) $120 – $250 Large home (4+ bedrooms) $200 – $400 Many cleaning companies charge per visit, per hour, or per square foot, depending on the service type. If you’re wondering how much does it cost to get your house cleaned, the answer largely depends on the amount of work required. Routine cleaning tends to be more affordable, while deep cleaning services cost more due to the additional time and effort involved. How Much Does House Cleaning Cost Per Hour? Another common pricing model is hourly rates. On average, professional cleaners charge between $25 and $60 per hour per cleaner. Hourly pricing is often used for: One-time cleaning jobs Custom cleaning requests Homes with unpredictable cleaning needs For example: A small apartment may take 2–3 hours A standard home may take 3–5 hours Large homes may require 6+ hours If two cleaners are working together, the time is shorter but the hourly cost increases accordingly. So when people ask how much does house cleaning cost per hour, the final price depends on both the hourly rate and the time required to complete the job. Cost Per Square Foot for House Cleaning Some cleaning companies calculate pricing based on the size of the property. Typical rates range from: $0.10 to $0.30 per square foot Example estimates: Home Size Estimated Cost 1,000 sq ft $100 – $250 1,500 sq ft $150 – $350 2,500 sq ft $250 – $600 Larger homes usually cost more, but companies may offer discounts for recurring cleaning schedules.  How Much Does a One-Time House Cleaning Cost? One-time cleaning services are usually more expensive than recurring cleaning. The average cost for a one-time house cleaning ranges between: $150 and $450 This type of service is commonly used for: Move-in cleaning Move-out cleaning Seasonal deep cleaning Post-construction cleaning Because the cleaner may need to tackle built-up dirt, grease, and clutter, the job typically requires more time. If you’re asking how much does a one time house cleaning cost, expect to pay slightly more than regular maintenance cleaning. You May Also Read: Fastest way to clean the house How Much Does a Deep House Cleaning Cost? Deep cleaning goes far beyond standard cleaning by focusing on areas that are often overlooked during regular visits. It is more labor-intensive, thorough, and typically requires specialized cleaning products and tools. Scrubbing Baseboards: Over time, baseboards collect dust, dirt, and scuff marks. Deep cleaning involves carefully wiping, scrubbing, and sometimes using specialized cleaners to remove stubborn buildup. Cleaning Behind Appliances: Standard cleaning usually stops at the front of appliances, but deep cleaning includes moving or reaching behind ovens, refrigerators, and washers to remove hidden dust, crumbs, and grime. Washing Interior Cabinets: Kitchens and bathrooms often accumulate grease, spills, and dust inside cabinets. Deep cleaning ensures the interiors are wiped, sanitized, and free of residues. Detailed Bathroom Sanitation: Bathrooms harbor germs, soap scum, and mold. Deep cleaning involves scrubbing tiles, grout, sinks, tubs, toilets, and fixtures thoroughly to ensure a hygienic and sparkling result. Removing Built-Up Grime and Dust: Areas like ceiling fans, vents, light fixtures, and window sills collect long-term dust and dirt. Deep cleaning addresses these neglected spots for a fully refreshed home. Many homeowners schedule deep cleaning once or twice a year to “reset” the home’s cleanliness, making regular maintenance easier and reducing the need for costly future cleaning services. When people search how much does a deep house cleaning cost, the price reflects the additional labor and attention required. Factors That Affect House Cleaning Prices Several variables influence the final price of a cleaning service. Home Size Larger homes require more time and supplies, increasing the overall cost. Number of Bathrooms Bathrooms are the most labor-intensive areas to clean, so homes with more bathrooms usually cost more. Cleaning Condition Homes that haven’t been cleaned for a long time require more effort and time. Pets Pet hair, odors, and stains may increase cleaning time. Frequency of Cleaning Recurring services are usually cheaper than one-time visits. For example: Weekly cleaning → lowest cost per visit Bi-weekly cleaning → moderate price Monthly cleaning → higher price Standard Cleaning vs Deep Cleaning: What’s the Difference? Understanding service types helps explain pricing differences. Standard Cleaning Includes Dusting surfaces Vacuuming carpets Mopping floors Cleaning kitchen counters Bathroom sanitizing Trash removal Deep Cleaning Includes Cleaning baseboards Scrubbing grout Cleaning inside appliances Detailed kitchen and bathroom work Removing built-up dirt and grease Because deep cleaning requires significantly more time, it explains how much does it cost for a house cleaner when additional services are requested. How Often Should You Hire a House Cleaner? The frequency of hiring

How to Finish a Basement ?For Maximum Value and Comfort

A basement is one of the most valuable yet underused spaces in many homes. Instead of leaving it unfinished or used only for storage, homeowners can transform it into a comfortable living area, home office, entertainment room, or even a rental suite. Knowing how to finish a basement  can significantly increase both the functionality and value of your property. However, finishing a basement is not just about adding drywall and flooring. It requires careful planning, moisture protection, insulation, electrical work, and compliance with local building codes. Without the right approach, homeowners can face issues like mold growth, poor ventilation, or structural damage. This guide explains the best way to finish a basement using practical, easy-to-follow steps. Whether you plan to complete the project yourself or hire professionals, understanding the how to finish basement steps will help you avoid costly mistakes and create a safe, comfortable space. By the end of this guide, you’ll have a clear roadmap, expert tips, and realistic expectations for completing a successful basement renovation. Why Finishing a Basement Is a Smart Home Investment? Finishing a basement offers multiple advantages for homeowners. Increased Living Space An unfinished basement can be converted into a guest bedroom, entertainment room, gym, office, or playroom. This additional square footage improves comfort and usability. Higher Property Value Real estate experts often note that finished basements can significantly increase resale value. Buyers appreciate extra living space that does not require further renovation. Improved Energy Efficiency Proper insulation and wall finishing help regulate temperature, reducing heating and cooling costs. Rental or Income Potential In some areas, homeowners convert finished basements into legal rental units, creating a new source of income. When considering the best way to finish a basement, think about long-term goals. Designing the space for flexibility ensures it can adapt to changing needs. Planning Your Basement Renovation Planning is the most important stage when learning how to finish a basement successfully. Assess the Basement Condition Before beginning construction, inspect for: Water leaks Foundation cracks Mold or mildew Poor drainage These issues must be fixed before any renovation begins. Check Local Building Codes and Permits Many municipalities require permits for electrical, plumbing, and structural work. Ignoring regulations can cause problems during resale or inspections. Decide the Purpose of the Basement The design will depend on how the space will be used. Common finished basement ideas include: Family entertainment room Home theater Office or workspace Guest bedroom Home gym Set a Realistic Budget Basement finishing costs vary depending on materials, labor, and square footage. Planning early helps prevent unexpected expenses. Following these steps ensures a smoother renovation process. Moisture Control and Waterproofing Moisture is one of the biggest challenges when finishing a basement. Without proper waterproofing, homeowners risk mold growth, damaged walls, and unpleasant odors. Common Sources of Basement Moisture Poor exterior drainage Cracked foundation walls High humidity levels Leaking pipes How to Prevent Moisture Problems Experts recommend these solutions: Install a vapor barrier Use waterproof sealants on foundation walls Improve exterior drainage and gutters Install a sump pump if necessary Use a dehumidifier to control humidity Moisture prevention is often considered the best way to finish a basement because it protects your investment and ensures long-term durability. Proper waterproofing, drainage improvements, and humidity control can help prevent common basement issues such as mold growth, wall damage, and unpleasant odors. Skipping this step can lead to costly repairs later and may even damage newly installed walls, flooring, and insulation. Many homeowners also rely on experienced service providers during renovation projects to manage debris and maintain a clean work environment. For example, Junk Masterz helps homeowners by handling construction debris and cleanup during basement finishing projects, allowing the renovation process to stay organized and efficient. Framing the Basement Walls After waterproofing is complete, framing is the next stage in the how to finish basement steps. Framing creates the structure for walls, doors, and room divisions. Basic Framing Process Measure and mark the layout. Install pressure-treated bottom plates. Build wall frames using wooden or metal studs. Secure frames to floor joists above. Leave space for electrical outlets and plumbing lines. Tips for Basement Framing Maintain a gap between concrete walls and framing to avoid moisture contact. Use pressure-treated wood for areas touching concrete. Plan wall locations carefully before construction begins. Good framing ensures a strong and durable structure for drywall and insulation. Electrical, Plumbing, and Insulation Before closing walls with drywall, electrical wiring, plumbing, and insulation must be installed. Electrical Installation Basements typically require: Lighting fixtures Wall outlets Dedicated circuits for appliances Smoke detectors Hiring a licensed electrician ensures compliance with safety codes. Plumbing Considerations If the basement includes a bathroom or kitchenette, plumbing lines must be installed during this stage. Insulation Options Proper insulation improves comfort and energy efficiency. Common basement insulation materials include: Rigid foam boards Spray foam insulation Fiberglass batts Insulation also helps control moisture and temperature fluctuations. When planning how to finish basement steps, installing insulation properly is essential for creating a comfortable living environment. Drywall, Flooring, and Ceiling Installation Once framing and utilities are complete, the finishing stage begins. Drywall Installation Drywall panels are attached to wall studs and then taped, mudded, and sanded to create smooth walls. Moisture-resistant drywall is often recommended for basements. Basement Flooring Options Not all flooring works well in basements due to humidity. Popular choices include: Vinyl plank flooring Engineered wood Tile flooring Carpet tiles with moisture barriers Ceiling Choices Basements often use drop ceilings or drywall ceilings. Drop ceilings provide easier access to electrical wiring and plumbing lines, while drywall ceilings create a more polished look. Choosing the right materials is key when determining the best way to finish a basement. You May Also Read: What is the best way to dispose of drywall? Lighting, Ventilation, and Safety Lighting and ventilation can dramatically improve basement comfort. Lighting Ideas Basements often lack natural light, so proper lighting is essential. Common solutions include: Recessed LED lighting Wall sconces Floor lamps Ventilation Proper airflow prevents humidity and

How Much Does Post Construction Cleaning Cost? A Complete Guide for Homeowners

After finishing a renovation or construction project, your space may look great—but it’s far from clean. Dust, debris, and leftover materials can make your property unsafe and messy. That’s where post-construction cleaning comes in. But the big question is: how much does post construction cleaning cost? Understanding post construction cleaning pricing, using tools like a post construction cleaning calculator, and reviewing a detailed post construction cleaning price list can help you budget effectively and avoid unpleasant surprises. In this guide, we will break down all the factors affecting post construction cleaning costs, provide average pricing, explain how to estimate costs using calculators, and answer the most frequently asked questions. What Is Post Construction Cleaning? Post construction cleaning is a specialized service that removes dust, debris, and leftover materials from a construction site. Unlike regular cleaning, construction cleaning requires extra care and professional tools to handle heavy dust, leftover paint, nails, and other hazards. This service ensures your property is safe, hygienic, and visually appealing after renovations or new construction. Whether you’re managing a small home project or a large commercial build, understanding the construction cleanup cost is crucial for budgeting. Average Post Construction Cleaning Cost The cost of post-construction cleaning mainly depends on two things: the size of your property and how much cleaning is required after the project. A small renovation with light dust will cost much less than a full construction site with heavy debris. Typical price range: $300 to $800 for small projects(like a single room remodel or minor renovation) $800 to $2,500 for medium homes(standard houses after renovation work) $2,500+ for large or commercial spaces(big homes, offices, or newly built properties) These are average estimates, and actual costs may vary based on location and service level. Factors That Affect Construction Site Cleaning Price The cost of construction cleanup can vary widely depending on several factors. Here’s a breakdown of the main elements that influence pricing: 1. Size of the Property Larger properties require more time, labor, and equipment to clean. A small residential home will typically cost less than a commercial building or large apartment complex. 2. Type of Construction Different types of construction generate different amounts and types of debris. New construction may involve drywall dust, paint splatters, and leftover materials, while renovation projects often include old fixtures, flooring debris, and hazardous materials. 3. Level of Cleaning Required Post construction cleaning is often divided into three levels: Rough Cleaning: Removes large debris, trash, and leftover construction materials. Intermediate Cleaning: Includes sweeping, vacuuming, dusting, and basic cleaning of surfaces. Final Cleaning: Deep cleaning, polishing surfaces, sanitizing bathrooms, and preparing the property for occupancy. After construction, it’s important to follow proper cleaning and disinfecting practices recommended by the Centers for Disease Control and Prevention to maintain a healthy indoor environment. The more thorough the cleaning, the higher the construction site cleaning price. 4. Labor and Equipment Costs Professional cleaning companies bring specialized tools, vacuums, and cleaning solutions. Labor costs, including the number of cleaners and hours required, directly affect pricing. 5. Location Prices may vary depending on your city or region. Urban areas with higher living costs often have higher post construction cleaning rates compared to smaller towns or rural areas. You May Also Read: How Much Cost Of  Construction Debris Removal  Why Post Construction Cleaning Is Worth the Investment Some people may wonder if cleaning the site themselves could save money. While DIY cleaning is possible, professional cleaning offers several advantages: Safety: Professional cleaners know how to handle hazardous materials like nails, broken glass, or chemical residues. Efficiency: Trained teams clean faster with the right tools and techniques. Quality: You get a spotless finish, which is especially important for new construction properties or real estate sales. Compliance: Some commercial projects require certified cleaning for safety and legal reasons. By investing in professional cleaning, you avoid costly mistakes and ensure the property is ready for use immediately. After cleaning, you can improve your space further by following home renovation energy efficiency tips from the U.S. Department of Energy. Cost Per Square Foot Many cleaning companies calculate pricing based on square footage, which helps give a more accurate estimate for different property sizes. Post construction cleaning pricing per square foot: $0.10 to $0.50 per sq ft (light cleaning)– Basic dusting, sweeping, and surface wiping $0.50 to $1.00 per sq ft (deep cleaning)– Detailed cleaning, sanitizing, and removing fine dust Example: 1,500 sq ft home = $300 to $1,500 3,000 sq ft home = $600 to $3,000 The more detailed the cleaning, the higher the cost per square foot. Typical Post Construction Cleaning Pricing To answer how much does post construction cleaning cost, let’s look at average pricing in the market. Type of Cleaning Price Range Light Clean (dust and debris removal) $0.10 – $0.30 per sq. ft. Standard Post Construction Clean $0.30 – $0.60 per sq. ft. Deep Cleaning (detailed cleaning of every surface) $0.60 – $1.00+ per sq. ft. Extra Services (window cleaning, pressure washing) Additional 10-25% of total cost For example, a 2,000 square foot property may cost between $600 and $2,000 depending on the level of cleaning required. Post Construction Cleaning Price List Explained A post construction cleaning price list is a detailed breakdown of the services included in the cleaning process. Understanding this list helps you know exactly what you are paying for. Common services included are: Removal of construction debris and trash Dusting all surfaces, including walls, ceilings, and vents Vacuuming and mopping floors Cleaning and sanitizing bathrooms and kitchens Washing windows and frames Polishing fixtures and appliances Additionally, knowing how to hire reliable professionals, such as Junk Masterz, is offering  optional services such a Professional Construction Debris Removal or specialized deep cleaning. Always request a detailed price list before hiring a cleaning service. Using a Post Construction Cleaning Calculator A post construction cleaning calculator helps estimate costs for your specific project. By entering information such as: Total square footage Type of flooring and surfaces Level of debris and mess Required cleaning

How to Get Rid of Old Washer and Dryer (Complete Homeowners Guide)

Getting rid of an old washer and dryer can feel overwhelming. These appliances are heavy, difficult to move, and not something you can simply leave at the curb in many cities. Whether your units stopped working, you upgraded to energy-efficient models, or you’re clearing out a property, knowing how to get rid of old washer and dryer the right way saves time, money, and the environment. This guide will explain safe ways to dispose of your appliances, including getting rid of washer and dryer, disposing of a washing machine, how to get rid of a dryer, and washer removal. You will learn step‑by‑step options, laws, costs, and smart choices so you can make the best decision. Why You Should Care About Proper Appliance Disposal Old washers and dryers are big, heavy, and made of metal, plastic, and parts that cannot just be thrown in the trash. When you learn how to get rid of old washer and dryer correctly, you help: Protect the environment Avoid fines from local waste rules Recycle metals and parts Make space in your home Big appliances are often regulated by law. Your city, state, or local waste management may have special rules. For example, many recycling centers will not accept washers and dryers unless they are prepared correctly. The U.S. Environmental Protection Agency explains recycling guides for home appliances. You can visit their site to see official advice on recycling large appliances Why Proper Disposal of Washers and Dryers Matters Washers and dryers are large appliances made from metal, wiring, plastic, and electronic components. Dumping them illegally can lead to serious consequences for both homeowners and the community. Environmental Damage When appliances are dumped in open areas or landfills without proper processing, harmful materials can leak into the soil and groundwater. Components such as lubricants, electronic circuit boards, and residual detergents may contaminate natural resources. Recycling prevents unnecessary landfill waste and allows valuable metals like steel, aluminum, and copper to be reused instead of mined again. Fines from Local Authorities Many cities have strict waste disposal laws. Leaving a washer or dryer on the curb without scheduling bulk pickup, or dumping it in unauthorized areas, can result in penalties or municipal fines. Some areas also require proper documentation for appliance recycling, especially for units with electronic components or gas connections. Safety Hazards Abandoned appliances can become dangerous. Sharp metal edges may cause injuries, while old dryers with gas connections can pose fire or explosion risks if not disconnected properly. In addition, unsecured appliances can tip over and cause accidents, especially around children. Space and Property Value Concerns (Old Appliance Clutter) Keeping old appliances on your property can reduce usable space and negatively affect your home’s appearance. Broken washers and dryers stored in garages, basements, or backyards create clutter and may even attract pests. For landlords and homeowners planning to sell, visible junk appliances can lower perceived property value and make the space look poorly maintained. Removing old appliances promptly keeps your home safer, cleaner, and more organized. Modern washers often include electronic control boards, and gas dryers contain components that require trained handling. Proper disposal ensures these materials are removed safely and recycled responsibly, protecting both people, property value, and the environment. Also Read: How to dispose of old appliances properly Option 1: Sell or Give It Away (If Still Working) If your appliance is still functional, selling or donating is often the easiest solution. Sell It Online You can list your washer and dryer on platforms like: Facebook Marketplace Craigslist OfferUp Be honest about the condition and mention whether the buyer must handle pickup. Donate to Charity Many charities accept working appliances, including: Habitat for Humanity The Salvation Army Goodwill Call ahead to confirm acceptance policies. Some offer free pickup, which makes this a convenient option if you’re wondering where to get rid of washer and dryer without heavy lifting. Option 2: Retailer Take-Back Programs If you’re buying new appliances, ask the retailer about haul-away services. Major retailers like: Home Depot Lowe’s Best Buy often offer removal of your old unit when delivering a new one. This is one of the simplest answers to how to get rid of a dryer or washing machine during an upgrade. Some manufacturers also offer recycling incentives for energy-efficient replacements. Option 3: Local Bulk Trash Pickup Many cities provide bulk waste collection days. How It Works: Contact your local waste management department. Schedule a pickup (fees may apply). Place the appliance at the curb on the assigned day. Before scheduling, check: Door removal requirements (for safety) Drainage of water lines Gas line disconnection (for gas dryers) This option is common for homeowners searching for how to get rid of washing machine units without hiring private services. Option 4: Appliance Recycling Centers Recycling is one of the most environmentally responsible methods. Washers and dryers contain valuable metals that can be recovered and reused. Search for: Local scrap metal recycling centers Municipal recycling facilities Certified e-waste recyclers Many scrap yards will even pay you for metal value depending on market rates. If you are serious about eco-friendly disposal, recycling is the best long-term solution when deciding how to get rid of old washer and dryer responsibly. Option 5: Hire a Professional Junk Removal Service If lifting and transportation are difficult, professional junk removal companies handle everything for you. Benefits: No heavy lifting Safe removal from basements or tight spaces Responsible recycling Same-day service in many areas This option is ideal for landlords, property managers, and homeowners doing renovations. While this is typically the most expensive option, it’s also the most convenient if you’re unsure how to get rid of washer and dryer safely. For homeowners looking for reliable help, Junk Masterz is providing residential junk removal services, including washer and dryer pickup, heavy lifting, and responsible disposal. Professional teams ensure safe removal from basements, laundry rooms, and tight spaces while prioritizing recycling whenever possible How to Prepare Your Washer and Dryer for Disposal Before removing your appliance: 1. Disconnect

Color Palette