Archive for Lunch7

How to Dispose of Roofing Shingles: Your Complete 2026 Guide

If you’re staring at a pile of torn-off roofing after a home improvement project, you’re probably wondering exactly how to dispose of roofing shingles the right way. It’s not as simple as tossing them in the trash—shingles are heavy, bulky, and sometimes contain materials that need special handling. Whether you’re a DIYer tackling how to remove shingles yourself or hiring pros and need to know where to dispose of roofing shingles, getting this step right saves you money, protects the environment, and keeps you out of trouble with local rules. Why Proper Shingle Disposal Matters More Than Ever Roofing shingles—mostly asphalt types—make up millions of tons of construction waste every year. Improper disposal clogs landfills, wastes reusable materials, and can even create health risks if old shingles contain asbestos. Doing it right isn’t just eco-friendly; it’s often cheaper in the long run thanks to growing recycling programs from big names like Owens Corning and GAF. Plus, many areas now offer lower fees for separated shingles headed to recycling instead of the dump. How To Dispose Of Roofing shingles (Before Disposal Even Begins) You can’t dispose of what you haven’t removed. How to remove shingles starts with safety and the right technique. Step-by-step process: Gear up Wear sturdy boots with soft soles, gloves, eye protection, a dust mask, and a hard hat. Fall protection is non-negotiable on steep roofs. Work from the top down Start at the ridge and move toward the eaves. This lets gravity help and prevents you from walking on loose shingles. Use the right tools A shingle scraper (or “roofing shovel” with teeth), pry bar, hammer, and pitchfork work best. The scraper slides under shingles and pops nails easily. Remove in sections Lift tabs, pry out nails, and toss shingles into a tarp or bucket system to slide down to the ground. Avoid throwing them off the roof—they can damage landscaping or injure someone below. Handle nails Most recyclers use magnets later, so you don’t need to pull every single one; just rake the roof clean to avoid punctures. Pro Tip If your roof has multiple layers (common on older homes), removal gets heavier and slower. Consider hiring a licensed company; they often include disposal in their quote. Can You Throw Away Shingles in the Garbage? Short answer: Usually no. Regular curbside garbage trucks and bins aren’t built for the weight and volume of roofing shingles. One square (100 sq ft) of asphalt shingles weighs about 250 pounds. Most municipal services limit roofing debris or ban it outright because it damages compactors and creates extra costs. Some rural areas or small projects let you bag a few shingles at a time and sneak them into regular trash over weeks—but that’s not practical or recommended for a full roof tear-off. Always check your local waste hauler’s rules first. Violating them can mean fines or refused pickup. Where to Dispose of Roofing Shingles: Your Main Options When figuring out where to dispose of roofing shingles, you basically have three practical routes. 1. Construction & Demolition (C&D) Landfills or Transfer Stations Most cities have dedicated facilities that accept roofing debris. You haul it yourself or pay a hauler. Fees are usually charged by the ton (expect $30–$80 per ton depending on location). Call ahead—some want shingles separated from other trash. 2. Dumpster Rental Easiest for homeowners. A 10- or 20-yard roll-off dumpster holds a typical residential roof. Companies like those listed on Dumpsters.com specialize in roofing waste and handle the transport. Price range: $300–$600 for a week, including delivery and pickup. 3. Professional Junk Removal Services Professional junk removal services show up, load everything, and take it to the right facility. This option is ideal if you don’t have a truck or want a completely hassle-free experience. They understand local regulations and often sort items for recycling, ensuring proper and responsible disposal. How to Dispose of Old Roof Shingles Through Recycling (The Smart Choice) How to dispose of old roof shingles? Disposing of old roof shingles responsibly often means recycling—and 2026 is a great time to do it. Asphalt shingles can be repurposed into new pavement, road base, or even used in manufacturing brand-new shingles, reducing landfill waste and supporting sustainable construction practices. You can take shingles to a local recycling facility, construction debris landfill, or hire a professional junk removal service to handle the process efficiently. Many services will also ensure materials are sorted properly for recycling. If you’re planning broader home upgrades, you may also have to learn how to remove popcorn ceiling, especially when renovating older properties alongside roofing projects. Big benefits: Diverts up to 13 million tons of waste yearly from landfills. Saves raw materials (asphalt and aggregate). Many programs now pay lower tipping fees or even offer rebates. How to find a recycler near you: Visit Earth911’s recycling search and enter your ZIP code. Check ShingleRecycling.org—the most comprehensive directory for asphalt shingle programs. Ask your roofer if they partner with manufacturers. Manufacturer programs making waves: Owens Corning runs a nationwide network with contractors who pledge to recycle. Look for the green recycling icon in their contractor search tool. GAF RoofCycle™ collects tear-offs and turns them into new products through patented processing. Tip: Keep shingles as clean as possible—no wood, metal flashing, or excessive nails mixed in. Most facilities accept them “as is,” but call ahead. Special Considerations: Asbestos in Older Shingles Homes built before the 1980s may have asbestos in shingles or underlayment. Asbestos is a known health hazard when fibers become airborne. Never try to remove or break suspected asbestos shingles yourself. Wet them down, double-bag in heavy plastic, and hire a certified abatement professional. Disposal must go to specially permitted facilities. If you’re unsure, get a professional test kit or inspection before starting work. Local health departments or environmental agencies can guide you. Cost Breakdown: What to Expect in 2026 Dumpster: $300–$700 Hauling to landfill yourself: $50–$150 per ton Recycling drop-off: Often cheaper than landfill—sometimes free with separation Professional removal + disposal: $1,000–$3,000

How Long Is a Cubic Yard? The Complete Guide to Volume, Measurements, and Real-World Use

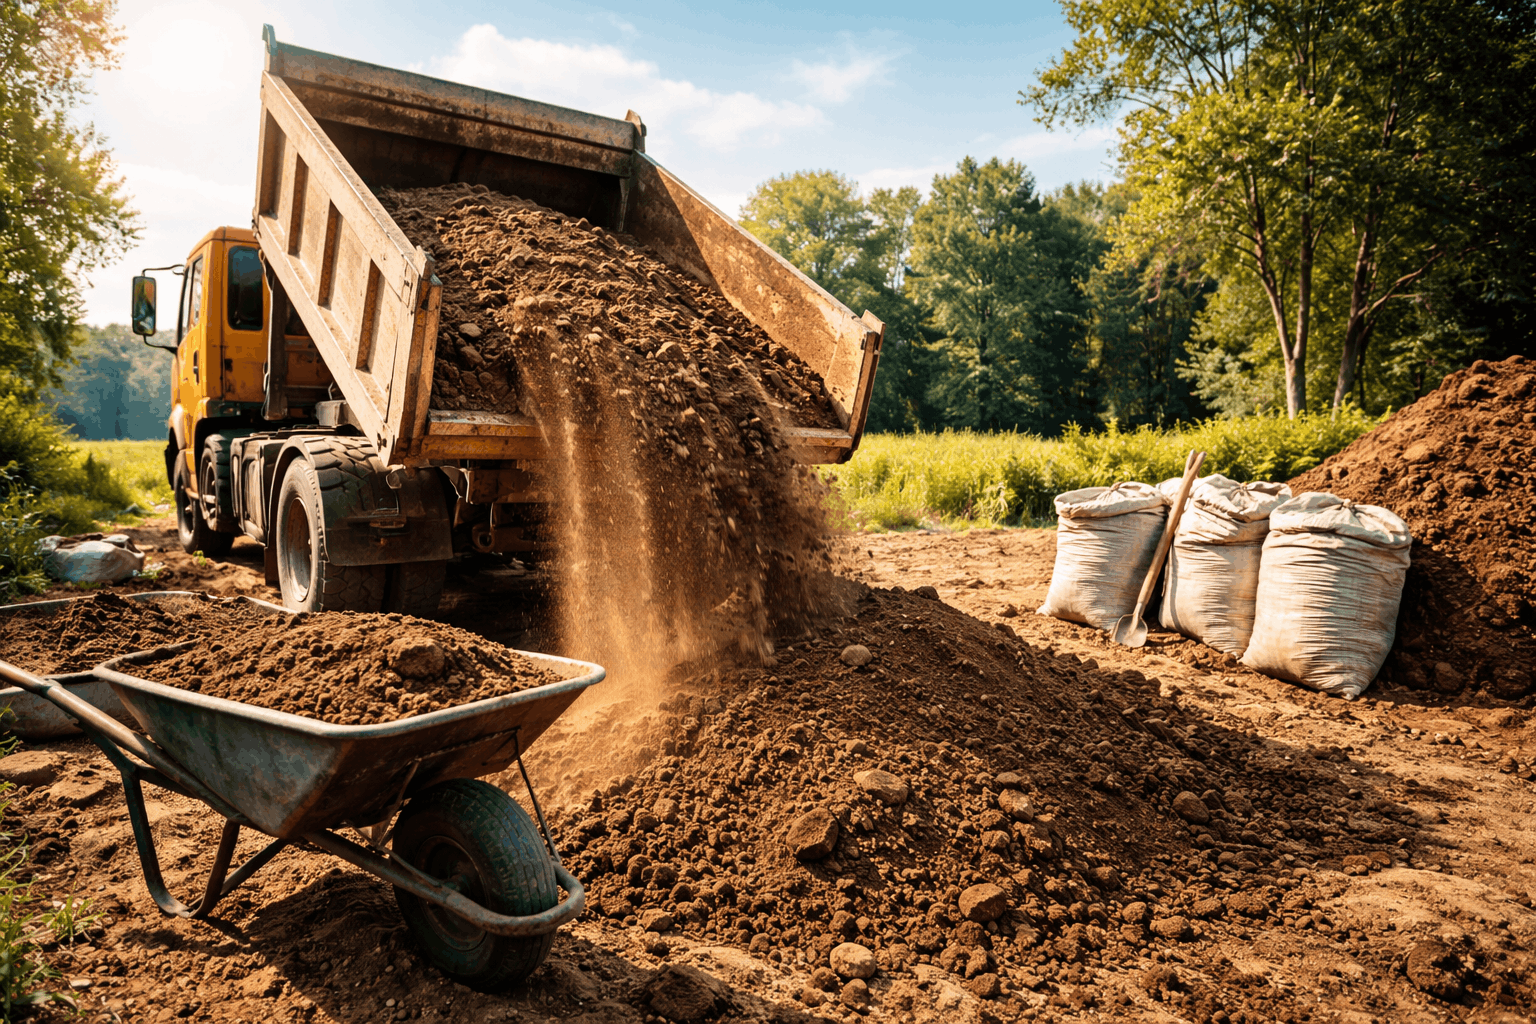
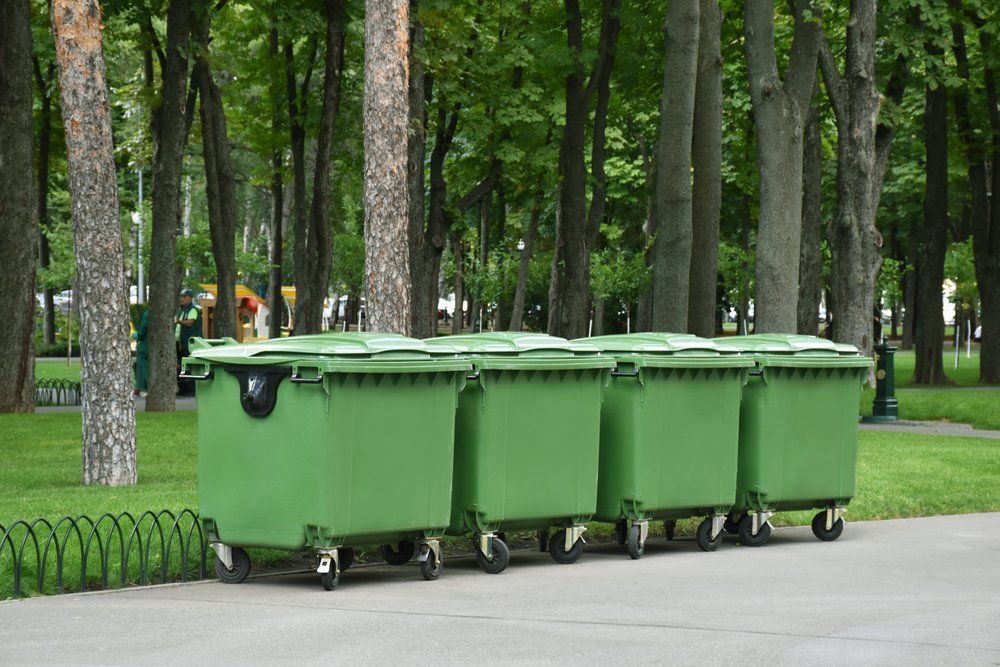
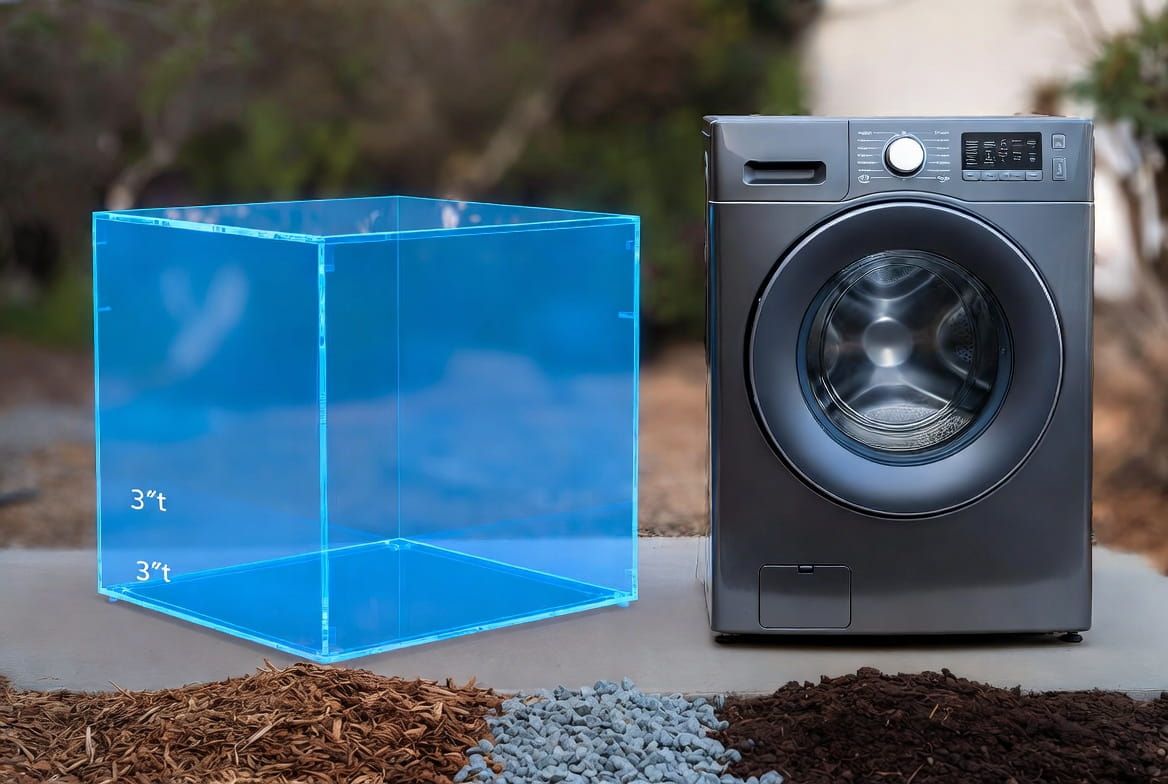
Have you ever stood in your backyard, staring at a pile of mulch or a truckload of topsoil, and wondered, “How long is a cubic yard, anyway?” It’s a question that pops up all the time for homeowners tackling landscaping projects, DIYers pouring concrete, or anyone ordering bulk materials. The short answer? A cubic yard isn’t about length—it’s a measure of volume. But that simple cube of space turns out to be one of the most practical units you’ll ever use around the house or job site. In this guide, we’ll unpack everything clearly and conversationally so you can order the right amount of material without guesswork or costly mistakes. Whether you’re asking “what is a cubic yard,” “what are the dimensions of a cubic yard,” or “how to measure for cubic yards,” we’ve got you covered with straightforward explanations, real-world examples, and step-by-step calculations. By the end, you’ll feel confident tackling your next project—and your content will align perfectly with how people actually search today. What Is a Cubic Yard? A cubic yard is a standard unit of volume in the imperial (U.S.) system. It represents the space inside a cube that measures one yard in length, width, and height. Since 1 yard = 3 feet, one cubic yard equals a 3 ft × 3 ft × 3 ft cube. That’s exactly 27 cubic feet of material. What is a cubic yard measurement? It’s pure volume — not weight. The same cubic yard of dry mulch weighs far less than the same volume of wet concrete. Suppliers sell bulk materials by volume (cubic yards) because it’s consistent regardless of material type. This unit has been the go-to in construction and landscaping for decades because it’s practical for large quantities. One cubic yard is big enough to matter but small enough to visualize. What Are the Dimensions of a Cubic Yard? How Long Is a Cubic Yard? The Complete Guide to Volume, Measurements, and Real-World Use Here’s the simple answer to what the dimensions of a cubic yard: Length: 3 feet (36 inches) Width: 3 feet (36 inches) Height: 3 feet (36 inches) Visualize it as a large household appliance — roughly the size of a standard washing machine or three stacked kitchen trash cans. A full-size pickup truck bed (typically 8 feet long) holds about 2 to 3 cubic yards when loaded level. That mental picture helps when suppliers quote “five yards” — you can picture five washing-machine-sized piles. Why Cubic Yards Matter When You Rent a Dumpster When it’s time to clean out your garage, renovate your home, or tackle a big landscaping project, one of the most important decisions you’ll make is what size dumpster to rent. And that decision almost always comes down to cubic yards. Dumpster rental companies size and price their containers based on cubic yard capacity. Understanding what a cubic yard is and how to measure for cubic yards helps you choose the right dumpster — so you don’t pay for space you don’t need or run out of room halfway through your project. Common Dumpster Sizes (in Cubic Yards) Dumpster Size Best For Approximate Dimensions (L x W x H) Holds Roughly 10 Yard Small cleanouts, minor renovations 12 ft x 8 ft x 4 ft 1–2 rooms 15 Yard Kitchen or bathroom remodels 14 ft x 8 ft x 4.5 ft 3–4 rooms 20 Yard Medium home cleanouts 16 ft x 8 ft x 5 ft Garage + basement 30 Yard Major renovations, roofing 20 ft x 8 ft x 6 ft Whole house projects 40 Yard Large construction or demolition 22 ft x 8 ft x 8 ft Commercial jobs Why Cubic Yards Make a Big Difference Cost Control: A 20-yard dumpster usually costs significantly less than a 30-yard one. If you only need 18 cubic yards but rent a 30-yard container, you’re overpaying for unused space. Space Efficiency: Knowing the dimensions of a cubic yard helps you estimate how much debris you’ll actually generate. One cubic yard is roughly the size of a washing machine — so 20 cubic yards equals about 20 washing machines worth of material. Avoiding Overflows: Most rental companies charge extra fees if your dumpster goes over the fill line. Accurate estimation using cubic yard measurement prevents surprise charges. Weight Limits: Heavier materials (concrete, dirt, brick) often have weight restrictions even in large dumpsters. Understanding volume helps you combine it with weight awareness. Pro Tip for Estimating Dumpster Size Use this simple method: Measure the length, width, and height of the pile of waste you expect (in feet). Multiply: Length × Width × Height = cubic feet. Divide by 27 → cubic yards. Add 20–30% extra space for easy loading and safety. For example, a standard single-car garage cleanout usually needs a 15–20 yard dumpster. A full house renovation often requires a 30–40 yard dumpster. How Much Does 1 Cubic Yard Weigh? Before you rent a dumpster or order materials, you need to know this important fact: volume and weight are not the same. One cubic yard of material can weigh anywhere from 400 pounds to over 4,000 pounds depending on what it is. This is critical when renting a dumpster because most companies set both volume limits (cubic yards) and weight limits (tons). Filling a dumpster with heavy material like concrete can reach the weight limit long before you reach the volume limit — and that means extra fees. Here’s what 1 cubic yard typically weighs for common materials: Material Type Weight (Pounds) Weight (Tons) Notes Mulch (dry shredded) 400 – 750 lbs 0.2 – 0.38 tons Lightweight, fluffy Yard Waste / Leaves 350 – 700 lbs 0.18 – 0.35 tons Very light when dry Household Junk / Trash 450 – 800 lbs 0.23 – 0.4 tons Mixed furniture, boxes Drywall / Sheetrock 750 – 1,100 lbs 0.38 – 0.55 tons Broken pieces Topsoil / Dirt (dry) 1,800 – 2,200 lbs 0.9 – 1.1 tons Common for landscaping Gravel / Crushed Stone 2,500 –

How Do You Dispose of Dirt? Safe and Easy Methods Explained

If you’ve recently dug up your yard, completed a landscaping job, or handled a construction project, one question quickly comes up: how do you dispose of dirt properly? It may seem like a simple task, but disposing of dirt is not always straightforward. Many homeowners are surprised to learn that soil cannot always be thrown in regular trash bins, and dumping it illegally can lead to fines or environmental damage. That’s why so many homeowners and contractors search for answers like how to get rid of dirt, where to throw dirt away, or where to get rid of dirt without spending too much money. The truth is, there isn’t a one-size-fits-all solution. The right approach depends on how much dirt you have, what type it is, and how quickly you need it gone. This guide is designed to give you clear, practical answers in simple language. Instead of confusing technical advice, you’ll get real-world solutions that actually work. From quick disposal methods to eco-friendly alternatives, we’ll help you understand how to get rid of dirt efficiently, legally, and responsibly. Understanding Dirt Types Before Disposal (Why It Matters) Before deciding where to get rid of dirt, it’s important to understand what kind of soil you’re dealing with. This step is often skipped—but it can save you money and prevent legal issues. 1. Clean Fill Dirt This is natural soil that is free from: Chemicals Trash Organic waste It typically comes from digging foundations, landscaping, or leveling projects. Best part: Clean dirt is highly reusable and often accepted for free. 2. Contaminated Dirt This includes soil that contains: Oil or fuel residue Chemicals or pesticides Construction pollutants This type of dirt must be handled carefully and may require specialized disposal facilities. 3. Mixed Dirt This is soil combined with: Rocks Roots Concrete pieces It may need sorting before disposal. Expert Insight:It’s important to understand proper waste management before disposing of dirt. Organizations like Waste Management emphasize separating materials before disposal because it improves recycling efficiency and significantly reduces landfill waste. By managing dirt and debris correctly, you not only make disposal easier but also help protect the environment and support more sustainable waste practices. How Do You Dispose of Dirt? You can dispose of dirt by taking it to a landfill, donating it, reusing it for landscaping, or using soil recycling facilities. For large amounts, hiring a junk removal service is often the easiest option because they handle pickup, transportation, and proper disposal. Clean fill dirt can sometimes be reused for garden leveling, construction projects, or erosion control. Many landscaping companies or local builders may also accept it for free if it’s uncontaminated. If you want a cost-effective option, consider posting the dirt online to see if someone in your area needs it. However, if the dirt is mixed with debris or waste, it should be taken to an approved disposal or transfer station. The best method depends on the type, amount, and condition of the dirt, as well as local disposal regulations. Where to Throw Dirt Away: 7 Practical Options Let’s break down the most effective solutions depending on your situation. 1. Local Landfills or Transfer Stations This is one of the most common answers to where to throw dirt away. Best for: Large quantities Mixed or unusable dirt Things to know: Fees are usually based on weight Some landfills only accept clean fill dirt Rules vary by location 2. Landscaping Companies and Contractors If your dirt is clean, this is one of the smartest ways to handle where to get rid of junk Why it works: Contractors often need fill dirt You may get free pickup Saves disposal costs 3. Soil Recycling Centers Many cities now promote soil recycling to reduce environmental impact. Organizations like the Institute for Local Self-Reliance support reuse programs that turn excess soil into valuable resources. Benefits: Eco-friendly Sometimes free Supports sustainability 4. Junk Removal Services If convenience is your priority, this is the easiest answer to how to get rid of dirt quickly. Certified companies handle everything from loading and hauling to proper disposal, making the entire process simple and stress-free. Advantages: No heavy lifting Fast removal Handles large volumes Downside: Higher cost compared to DIY options. 5. Reuse Dirt at Home Before searching for how to get rid of dirt, consider whether you actually need to dispose of it at all. Reuse ideas: Level uneven ground Build garden beds Fill holes or trenches This is the most cost-effective and environmentally friendly option. 6. Offer Dirt for Free Online Many people actively look for free dirt. You can: Post on local marketplaces Share in community groups Pro Tip:Label it as “clean fill dirt” to attract interest. 7. Community Projects and Gardens Community gardens often need soil for landscaping. Environmental organizations like the National Wildlife Federation encourage the reuse of natural materials to support local ecosystems. Step-by-Step: How to Get Rid of Dirt Properly If you want a clear process, follow this: Step 1: Measure the Amount Estimate how much dirt you have: Small: a few bags Medium: pickup truck load Large: multiple truckloads Step 2: Clean and Sort the Dirt Remove: Trash Roots Rocks Clean dirt is easier to reuse or donate. Step 3: Choose the Right Disposal Method Small → reuse or trash (if allowed) Medium → landfill or donation Large → professional service Step 4: Transport Safely Use heavy-duty bags Cover loads during transport Avoid overloading vehicles Eco-Friendly Dirt Disposal Here are smarter alternatives: 1. Composting Support Dirt can be used as a base layer for compost systems. 2. Land Restoration Projects Some projects require soil for leveling or rebuilding land. 3. Erosion Control Excess dirt can help prevent soil erosion in certain areas. Key takeaway:Before asking where to throw dirt away, always check if it can be reused. What NOT to Do When Disposing of Dirt Avoid these common mistakes: Illegal Dumping Harmful to the environment Can result in fines Mixing Dirt with Garbage Makes recycling impossible Increases landfill waste Ignoring

Complete Foreclosure Clean Outs Guide: Costs, Tips, and Preparation

Facing a foreclosure is stressful, both emotionally and financially. Amid the paperwork, legal steps, and financial decisions, the physical state of the property can often be overlooked. A proper foreclosure clean outs can not only make the house more marketable but may also streamline negotiations with lenders, real estate agents, and potential buyers. This guide will walk you through everything you need to know about foreclosure cleanup and foreclosure preparation cleaning, from understanding the process to estimating costs and avoiding common mistakes. Whether you’re a homeowner, investor, or real estate professional, these practical tips will ensure a smoother transition through a challenging situation. What is a Foreclosure Clean Out? A foreclosure clean-out refers to the process of clearing a property of personal belongings, debris, and potential hazards after a foreclosure notice. Unlike standard home cleaning, it often involves heavy-duty cleanup, including junk removal, deep cleaning, and sometimes minor repairs to make the property safe and appealing. Why Foreclosure Clean Outs Are Important Proper foreclosure cleanouts are about more than just removing junk — they directly impact safety, property value, legal compliance, and the ease of preparing a home for sale or renovation. Safety and Hygiene Foreclosed homes are often left vacant for extended periods, which can lead to the buildup of trash, mold, pests, or other hazards that pose health risks to anyone entering the property. According to housing quality standards set by the U.S. Department of Housing and Urban Development (HUD), properties must be free from health and safety hazards — including excessive trash, rodent infestations, or structural issues — to be considered decent and safe. Ensuring a thorough cleanout aligns with these principles of maintaining a safe, habitable environment. Market Appeal A clean, well‑cleared home attracts more potential buyers and investors. Properties cluttered with debris or personal belongings can deter interest and lower offers. By removing all unwanted items and presenting a clean space, sellers and realtors improve the chances of a faster sale at a better price. Legal Compliance  Some lenders and local jurisdictions require a property to be cleared and cleaned before ownership transfer or listing. This helps ensure that the home meets local maintenance codes and environmental guidelines before any repairs or sales take place. Preparation for Repairs or Renovation A cleared space allows inspectors, contractors, and renovators to assess the property accurately. Without leftover debris or clutter, they can evaluate the home’s key systems and structure — such as electrical, plumbing, roofing, and foundation — without obstruction or guesswork. According to This Old House, decluttering and organizing rooms before an inspection helps professionals move freely and conduct a more thorough evaluation, reducing the chance of missed issues or costly surprises later on. Step-by-Step Foreclosure Clean Out Process   Cleaning a foreclosed property can feel overwhelming, but breaking it into stages makes the process manageable. 1. Assessment and Planning Walk through the property to identify all items and potential hazards. Create a list of items to keep, donate, recycle, or dispose of. Consider hiring a professional for large or heavily damaged properties. 2. Decluttering and Removal Remove personal belongings, furniture, appliances, and trash. Decide which items can be donated to local charities or sold. Properly dispose of hazardous materials like chemicals, paint, or old electronics. 3. Deep Cleaning Sweep, mop, and vacuum floors. Clean walls, windows, and surfaces. Address mold, water damage, or pest infestations. Use professional-grade cleaners for tough stains or biohazards. 4. Final Inspection and Touch-Ups Walk through the property to ensure all areas are clean and safe. Patch holes, repaint if necessary, and replace broken fixtures. Document the condition with photos to provide proof for lenders or buyers. A well-executed foreclosure preparation cleaning ensures the property is ready for sale or occupancy while protecting its value. Foreclosure Cleanout Costs The cost of a foreclosure clean-out varies depending on property size, level of clutter, and professional services. Factors That Affect Cost Property Size: Larger homes naturally require more time and resources. Condition: Extensive trash, water damage, or pest issues increase costs. Service Level: DIY cleaning saves money, but hiring professionals ensures thorough results. Typical Cost Ranges Small homes or condos: $300–$800 Medium-sized homes: $800–$1,500 Large or heavily damaged properties: $1,500–$3,000+ Tips for Reducing Costs Remove items yourself before hiring a professional. Donate usable furniture or appliances. Obtain multiple quotes from trusted foreclosure cleanout services. Understanding home cleaning costs upfront helps homeowners and investors plan effectively and avoid unexpected expenses during the foreclosure process How to Get a House Out of Foreclosure A clean property is only one part of the solution. Addressing the legal and financial side is equally important. 1. Explore Loan Modification or Repayment Plans Contact your lender to discuss options for preventing foreclosure. Demonstrating a well-maintained property can strengthen your case. 2. Consider Selling the Property Selling before foreclosure can help pay off the mortgage and prevent credit damage. A clean and prepared house is more likely to sell quickly and at a better price. 3. Work with Professionals Real estate agents specializing in foreclosure sales can provide guidance. Licensed foreclosure cleanup services ensure residential cleanouts, property readiness, and compliance. By combining financial strategies with property preparation, homeowners improve their chances of getting the house out of foreclosure successfully. Tips and Best Practices for Efficient Foreclosure Clean Outs Prioritize Safety: Wear protective gear and handle hazardous materials carefully. Organize Items: Separate trash, donations, resale, and hazardous materials. Hire Trusted Professionals: Check licensing, reviews, and insurance. Consider working with reputable foreclosure cleanup or  Certified junk removal companies that specialize in residential cleanouts. Document Everything: Take photos and maintain receipts for accountability and proof. These best practices make the process smoother, faster, and more cost-effective while reducing risks. Common Mistakes to Avoid During Foreclosure Cleanouts Ignoring Hazardous Materials: Chemicals, mold, or asbestos can cause serious health risks. Skipping Deep Cleaning: Surface cleaning is not enough; thorough preparation is essential. Not Budgeting Properly: Unexpected issues can drive costs higher if not planned. Delaying the Process: The longer the property sits uncleaned, the harder

Is It Illegal to Dump Trash in a Dumpster? Laws, Fines & What You Need to Know

It might seem harmless to toss a bag of trash into the nearest dumpster, especially if it’s not full. But many people still ask: Is it illegal to dump trash in a dumpster? The answer isn’t as simple as yes or no—it depends on ownership, location, and permission. A common assumption is that dumpsters placed behind stores, apartment buildings, or construction sites are free for anyone to use. In reality, most dumpsters are privately owned, and using them without permission can lead to fines or even legal trouble. Whether you’ve wondered can I dump my trash in any dumpster or you’ve considered throwing garbage in a dumpster behind a business, this guide will break everything down in plain language. You’ll learn what the law says, what penalties you could face, and the safest alternatives for disposing of your waste properly. What Is Considered Dumpster Dumping? Dumpster dumping refers to placing trash into a dumpster that you do not own or have permission to use. While it may seem minor, it can fall under illegal dumping laws in many areas. Legal Definition of Dumpster Use Most dumpsters belong to: Businesses Property managers Construction companies Apartment complexes These entities pay waste management companies for pickup services. This means the dumpster is not public property, even if it’s accessible from the street. What Counts as Illegal Dumping? Illegal dumping in dumpster situations includes: Using a private dumpster without permission Overfilling bins with extra waste Disposing of prohibited items like chemicals or electronics Even tossing a single bag into someone else’s dumpster can be considered unauthorized use. According to the United States Environmental Protection Agency, improper waste disposal—including unauthorized dumping—can harm communities and the environment. Common Real-Life Examples Throwing household trash into a retail store dumpster Dumping furniture in an apartment complex bin that you don’t live in Leaving construction debris in a commercial dumpster All of these fall under illegal dumping in dumpster situations. Is it illegal to dump trash in a dumpster? Yes, in most cases, it is illegal to put trash in a dumpster if you do not have permission from the owner. Dumpsters are typically considered private property. Businesses and property owners pay for waste removal, so unauthorized use may be treated as theft of services or trespassing. For example, many local governments clearly state that using someone else’s dumpster without permission is a violation of municipal law. The City of Los Angeles Bureau of Sanitation outlines that illegal dumping can result in fines and enforcement actions. However, laws can vary by city or municipality. Some areas enforce strict penalties, while others may issue warnings for minor violations. Still, it’s always safest to assume that using a dumpster without permission is not allowed. Laws and Regulations Around Dumpster Dumping Understanding the legal side of throwing trash in dumpster situations can help you avoid unnecessary trouble. Local Municipal Laws Most cities have ordinances that prohibit unauthorized dumping. These laws are designed to: Prevent overflow and litter Reduce illegal waste disposal Protect sanitation systems Fines and enforcement vary by location, but the rule is generally consistent: no permission means no dumping. Trespassing and Theft Laws When you use someone else’s dumpster, you may be violating: Trespassing laws (entering private property) Theft of service laws (using a paid service without permission) This is why it is illegal to put trash in a dumpster, which often has a firm “yes” as an answer. Environmental Regulations If hazardous materials are involved, penalties can be much more severe. Items like: Paint Chemicals Batteries Dumping them in a regular dumpster may violate environmental laws. Certain materials—like paint, chemicals, or batteries—must be disposed of properly. The Environmental Protection Agency guides safe and legal disposal practices. What Happens If You Get Caught Dumping Trash? Many people assume they won’t get caught—but businesses are increasingly taking steps to prevent unauthorized dumping. Fines and Penalties Penalties can include: Small fines: $50–$500 Larger violations: $500–$1,500+ Additional cleanup fees The more waste you dump, the higher the fine may be. Possible Legal Charges (Explained Clearly) In some cases, throwing garbage in a dumpster without permission can lead to the following legal consequences: Misdemeanor Charges A misdemeanor is a minor criminal offense. It is more serious than a simple fine but less severe than a felony.If illegal dumping is charged as a misdemeanor, you may face: A higher fine A criminal record (in some cases) Short-term penalties set by local law This usually applies when the dumping is repeated, intentional, or involves larger amounts of waste. Court Appearances A court appearance means you are legally required to show up before a judge to respond to the charge. During the hearing: The judge reviews the evidence You may explain your side A decision is made about fines or penalties Failing to appear in court can lead to additional legal trouble. Community Service Community service is a penalty where you must complete unpaid work to benefit the community. Examples include: Cleaning public areas Assisting with waste cleanup programs Participating in environmental initiatives This is often given instead of—or in addition to—fines, especially for first-time offenders. How People Get Caught You might be surprised how often people are identified. Common methods include: Security cameras Witness reports Evidence found in trash (mail, receipts) Businesses and property managers are actively monitoring their dumpsters more than ever. Can I Dump My Trash in Any Dumpster? (Myths vs Reality) This is one of the most common questions people ask: Can I dump my trash in any dumpster? Common Misconceptions “It’s outside, so it’s public.” “It’s not full, so it doesn’t matter.” “One small bag won’t hurt.” These assumptions are incorrect and can still result in penalties. The Reality Dumpsters are almost always privately owned Waste disposal is a paid service Extra trash can cause overflow issues Even small actions like throwing trash in a dumpster without permission can create problems for the owner. When Is It Legal to Use a Dumpster? There are situations where using a dumpster is perfectly legal.

How to Dispose of Butane Cans Safely: Step-by-Step Guide

Butane can power your camping stove, refill your lighter, or heat a small workshop. They’re handy, lightweight, and everywhere—until it’s time to get rid of them. Many people ask, “Can I just toss butane cans in the trash?” The short answer is no, especially if they still have fuel inside. Doing it wrong can spark a fire, cause an explosion, or hurt the environment. This guide walks you through exactly how to dispose of butane cans, empty, full, or somewhere in between. You’ll learn safe steps that keep your family protected and follow the law. By the end, you’ll feel confident handling these small metal cylinders the right way. Why Proper Butane Disposal Matters Butane is a flammable gas stored under pressure. Even a tiny spark near a can can start a blaze. Landfills and garbage trucks get extremely hot and are often crushed—exactly the conditions that make pressurized cans explode. Beyond safety, throwing cans away wastes good metal and lets leftover butane pollute the air. Recycling empty cans turns them into new products and keeps landfills cleaner. Proper disposal is a small habit that protects your neighborhood and the planet. What Are Butane Cans and Why Are They Dangerous? A butane can is a thin metal cylinder filled with liquefied petroleum gas. You’ll find two common sizes: Small refill cans for lighters and tiny stoves. Larger fuel cans for camping burners and portable heaters. The gas inside is highly flammable. The can itself stays under pressure, so heat, punctures, or rough handling can turn it into a mini bomb. Never store them near heaters, in direct sun, or in a hot car. Treat every can like it still has fuel until you prove otherwise. Always Check Your Local Rules First Disposal rules change by city, county, and even neighborhood. Some places let you recycle truly empty cans with scrap metal. Others want every can taken to a household hazardous waste (HHW) facility. Quick steps to find your options: Go to your city or county waste-management website. Search for “household hazardous waste” or “HHW collection.” Call the recycling center if you’re unsure. Check the EPA’s Household Hazardous Waste Guide for general U.S. advice. Taking five minutes now can save you a fine later. How to Find Your Local Disposal Options Visit your city’s official waste management or environmental services website. Look for “household hazardous waste collection” or “hazardous materials disposal.” Check EPA guidelines for hazardous waste handling: EPA Household Hazardous Waste Guide. Call your local recycling or waste facility for specific instructions on how to dispose of butane fuel cans.  Taking the time to check regulations ensures safe handling of both full and empty butane cans.  How to Dispose of Butane Cans? Empty butane cans are easier to handle than full ones, but you still need to follow the right steps. Here’s a detailed process: Step 1: Ensure the Can is Completely Empty Even if the can feels light, it may contain residual gas. To safely empty the can: Release leftover gas outdoors, away from any flames, sparks, or electrical appliances. Shake the can to detect remaining liquid or gas. Never attempt to empty the can indoors. Step 2: Prepare the Can for Recycling or Disposal Check if your local recycling program accepts empty butane cans. Some areas allow you to label the can as “empty butane” before recycling. Avoid puncturing the can unless specifically instructed by local regulations. Step 3: Recycling vs. Trash Recycling: Many scrap metal facilities accept empty butane cans, which keeps metal out of landfills. Trash: Only permitted if local authorities confirm empty cans are safe to dispose of with regular waste.  Following these steps ensures safe management of how to dispose of empty butane cans while reducing environmental impact.  Safely Disposing of Full Butane Cans Full butane cans are highly flammable and require extra caution. They should never be thrown in regular trash. Step 1: Never Throw Full Cans in Regular Trash Full cans are pressurized. Throwing them in garbage trucks, landfills, or near heat sources can result in fires or explosions. Step 2: Hazardous Waste Collection Locate your local household hazardous waste facility or event. Transport full cans in a cool, upright position. Do not puncture, shake, or drop the cans.                                                                                                                      While disposing of propane tanks, it’s also important to know how to dispose of butane cans safely to prevent fire hazards and environmental damage. Step 3: Alternative Options Some suppliers allow returns or exchanges for unused cans. Specialized scrap metal or hazardous waste recycling centers may accept full butane cans. Understanding how to dispose of full butane cans is essential for home safety and environmental protection.  Eco-Friendly Disposal and Recycling Recycling butane cans is not just safe—it’s environmentally responsible. Metal recycling: Empty cans can be melted down and repurposed, reducing waste. Hazardous waste programs: Facilities are designed to safely manage residual chemicals. Scrap collectors: Local scrap yards often accept empty butane cans for metal recycling.  By recycling, you prevent hazardous chemicals from entering the soil or air and help reduce landfill waste. Knowing how to dispose of butane fuel cans responsibly contributes to a cleaner planet. Safety Tips for Handling and Disposing of Butane Cans Store cans safely: Keep butane cans in a cool, ventilated area away from sunlight and heat sources. Avoid indoor puncturing: Never puncture, burn, or tamper with cans indoors, as this can cause explosions or fire. Use protective gear: Wear gloves and eye protection when handling old, damaged, or leaking cans to prevent injuries. Keep out of reach: Ensure children, pets, and unauthorized persons cannot access butane cans. Hire a professional service: For full or damaged butane cans, consider hiring

How Long Does Trash Live? Understanding Trash Lifespan and Its Environmental Impact

Trash. We create it every single day, yet few of us pause to consider what really happens after we toss it away. Have you ever stopped to think how long does trash live once it leaves your home? The answer may surprise you. While some waste, like food scraps or paper, decomposes in weeks or months, other items—plastics, metals, and glass—can linger in landfills for decades or even centuries, quietly impacting the environment and wildlife. But it’s not just the trash itself that matters—our tools for managing waste, like bins and containers, play a role too. Thinking about how long does a trash can lives can influence when and how we replace or maintain them, ensuring that we minimize environmental impact while keeping our homes tidy. What Does “Trash Lifespan” Mean? Trash lifespan means the time it takes for waste to break down naturally in the environment. This process is called decomposition. Different types of trash break down at different speeds depending on: Material type Weather conditions Presence of bacteria Whether it is in landfills or open environments For example: A banana peel disappears quickly A plastic bottle can last for centuries That is why learning how long does trash live is important for environmental protection.  Understanding these waste management timelines can help us make better choices about what we throw away. How Long Does Trash Live in General? Trash does not all behave the same way. Some items break down fast, while others last almost forever. Here is a simple breakdown: Fast-decomposing trash: weeks to months Medium-decomposing trash: months to years Slow-decomposing trash: decades to centuries The biggest problem is that most modern waste includes materials that last extremely long, especially plastics and metals. Decomposition Timeline: How Long Different Trash Lives Different materials have drastically different lifespans. Here’s a breakdown: 1. Plastic Waste Lifespan: 450–1000 years, depending on type. Plastics are notoriously slow to decompose and often break into microplastics, polluting oceans and harming wildlife. Environmental Tip: Reducing single-use plastics and recycling whenever possible minimizes long-term damage. 2. Paper and Cardboard Lifespan: Paper ~2–6 weeks; cardboard up to 2 months. These materials decompose quickly but should still be recycled to save trees and energy. 3. Metal Items Lifespan: Aluminum cans ~200 years, steel items ~50 years. Metals can corrode, but proper recycling drastically reduces environmental impact. 4. Glass Lifespan: Virtually infinite if left in a landfill. Glass is non-biodegradable but 100% recyclable, and reuse is highly encouraged. 5. Organic Waste Lifespan: 1 month – 2 years, depending on material and whether composted. Composting accelerates decomposition and returns nutrients to the soil. Trash Lifespan Table Material Decomposition Time Notes Plastic 450–1000 years Breaks into microplastics Paper 2–6 weeks Biodegradable, but recycling is preferred Cardboard 2 months Compostable if uncoated Aluminum 200 years Highly recyclable Steel 50 years Corrodes slowly Glass Infinite Recyclable and reusable Organic Waste 1 month – 2 years Composting accelerates decomposition How Long Does a Trash Can Live? Trash cans themselves have a lifespan that varies by material: Plastic Trash Cans: 5–10 years Metal Trash Cans: 10–20 years Prolonging a trash can’s life is simple: keep it clean, avoid exposure to harsh sunlight, and choose sturdy, high-quality materials. You can also consider eco-friendly bins made from recycled or biodegradable materials. Plastics can persist for centuries and break down into microplastics that harm marine life, as explained by Scientific American. Environmental Impact of Long-Lasting Trash When trash stays in the environment for too long, it causes serious problems. 1. Landfill Pollution Landfills release gases like methane and take up huge land space. 2. Ocean Damage Plastic waste harms fish, birds, and marine animals. 3. Soil and Water Contamination Chemicals from waste can enter groundwater. Every piece of trash that lingers in the environment has a direct and lasting impact on ecosystems. Plastics, metals, and other long-lasting materials can harm wildlife, contaminate soil and water, and disrupt natural processes. By understanding how long trash lives for, we can make more informed choices about what we throw away, how we recycle, and how we manage waste at home and in our communities. These small decisions collectively help reduce environmental damage and preserve biodiversity for future generations. According to the United Nations Environment Programme (UNEP), plastic pollution is one of the most critical threats to ecosystems worldwide. Plastics can take hundreds of years to decompose, breaking down into microplastics that are ingested by marine life and birds. This not only harms wildlife but can also make its way up the food chain, ultimately affecting human health. UNEP emphasizes the importance of reducing single-use plastics, improving recycling systems, and promoting sustainable alternatives to mitigate these risks. Furthermore, National Geographic highlights that trash accumulation, especially in oceans and waterways, has far-reaching consequences. From disrupting marine habitats to harming coastal wildlife, unmanaged waste poses serious threats to the planet. By understanding the lifespan of different types of trash and adopting responsible disposal practices, we can actively contribute to reducing this global problem. Simple Ways to Reduce Waste Impact You can reduce your trash footprint easily: Reduce Buy only what you need. Reuse Use containers and items again instead of throwing them away. Recycle Sort waste properly. Compost Turn food waste into soil. Use Junk Removal Services Professional waste removal helps dispose of large items safely and responsibly. Why Understanding Trash Lifespan Matters Knowing how long trash lives helps us understand our impact on the planet. Every item we throw away has a future. Some disappear quickly, but others remain for centuries. By making better choices, we can: Reduce pollution Protect wildlife Save natural resources Tips to Reduce Your Trash Lifespan Impact Small changes can make a big difference: Reduce: Buy only what you need, and avoid single-use items. Reuse: Upcycle containers, donate old items. Recycle: Sort recyclables correctly to keep materials in circulation. Compost: Organic waste decomposes faster and enriches soil. Community Actions: Participate in local clean-ups and recycling programs. Conclusion Knowing How long does trash live isn’t just an interesting fact—it’s crucial

How to Clean Attic? Safely and Efficiently A Complete Step-by-Step Guide

Many homeowners rarely think about their attic until it becomes overcrowded with old boxes, forgotten decorations, broken furniture, and layers of dust. Over time, attics can turn into storage spaces filled with clutter, allergens, and even pests. Learning how to clean attic not only improves your home’s cleanliness but also protects indoor air quality and prevents long-term damage. Cleaning an attic may seem overwhelming at first. However, with the right planning, tools, and safety precautions, the process becomes much easier. Whether you are cleaning out the attic for storage, renovation, or seasonal organization, following a structured approach can help you finish the job efficiently. In this guide, you’ll learn step-by-step attic cleaning methods, safety tips, attic dust removal techniques, and smart ways to dispose of unwanted items. If the clutter becomes too much to handle, professional residential junk removal services can help remove heavy or unwanted materials quickly and responsibly. Why Cleaning Your Attic Is Important Many homeowners overlook the attic because it is rarely used. However, a cluttered attic can negatively affect the health and safety of your home. Improves indoor air quality Dust, insulation particles, and allergens often accumulate in attic spaces. When air circulates through vents, these particles can spread throughout the house. According to Indoor Air Quality Guidelines by the EPA, poor air quality can contribute to allergies and respiratory irritation. Prevents pest infestations Rodents, insects, and birds frequently nest in cluttered attics. Removing debris eliminates hiding spots and reduces pest problems. The CDC Home Pest Prevention Guide explains that cluttered storage areas often attract rodents and insects. Creates usable storage space A well-organized attic can become a practical storage area for seasonal items, decorations, and household supplies. Protects your home structure Moisture buildup and neglected insulation can lead to mold and wood damage. The “Energy.gov Attic Maintenance Guide” (External Link) recommends regular attic inspection to maintain proper insulation and ventilation. Safety Tips Before Cleaning Out the Attic Before beginning your attic clean out, safety preparation is essential. Attics can contain dust, sharp objects, and uneven flooring. Wear protective gear Use gloves, long sleeves, eye protection, and a mask to protect yourself from insulation particles and debris. Safety organizations like recommend protective equipment when working in dusty environments. Ensure proper lighting Most attics have limited lighting. Portable LED lights or headlamps help improve visibility and prevent accidents. Check attic flooring Only step on secure joists or floor boards. Unsupported drywall can collapse under weight. Watch for pests Look for nests, droppings, or chewed materials before starting your cleaning process. Work during cooler hours Attics can reach extremely high temperatures. Cleaning during morning hours reduces the risk of heat exhaustion.  How to Clean Attic (Step by Step) Cleaning an attic becomes manageable when broken down into simple steps. Step 1: Remove Everything From the Attic Begin by removing all boxes, furniture, and stored items from the attic. Taking everything out allows you to see the entire space clearly and makes cleaning out the attic much easier. It also helps you identify items you truly need versus things that have simply been sitting in storage for years. Once the attic is empty, sort the items into three simple categories: Keep Place items you still use or want to store safely in this category. These may include seasonal decorations, important documents, family keepsakes, or equipment you use occasionally. Store them in labeled containers so they remain organized when you place them back in the attic. Donate If items are still in good condition but you no longer need them, consider donating them. Clothing, small furniture, household goods, and decorations can often be donated to local charities, thrift stores, or community organizations. Donating helps reduce waste while allowing others to benefit from usable items. Dispose Items that are broken, outdated, damaged, or no longer usable should go into the disposal pile. This may include damaged boxes, old furniture, or unusable household items. Removing these items is an important part of attic clean-out projects, and larger debris can be handled. Step 2: Declutter and Organize Items Carefully evaluate each item before returning it to the attic. Ask yourself: Do I still need this item? Have I used it in the past year? Is it damaged or outdated? Large or broken items may require professional help. In these situations, scheduling residential junk removal services can help safely remove bulky debris and unwanted materials. Decluttering is one of the most important steps in any storage unit cleanout. Step 3: Perform Thorough Attic Dust Removal Once the attic is empty, begin the attic dust removal process. Dust commonly collects on: Rafters and Beams – The wooden or metal supports that form the framework of the attic and hold up the roof. Insulation – Material placed between walls, floors, or roof to keep the house warm in winter and cool in summer. Floorboards – The wooden or plywood panels that make up the attic floor, providing a surface to walk on and store items. Stored Items – Boxes, furniture, decorations, or other belongings kept in the attic for storage. Ventilation Openings – Vents or openings that allow air to circulate in the attic, preventing moisture buildup and maintaining proper airflow. Effective dust removal techniques Use a HEPA vacuum A vacuum with a HEPA filter captures fine particles and prevents dust from circulating in the air. The American Lung Association Guide to HEPA Filtration recommends HEPA filters for removing airborne allergens. Use microfiber cloths Microfiber cloths trap dust particles more effectively than traditional cleaning cloths. Clean ventilation areas Dust buildup near vents can reduce airflow and ventilation efficiency. Step 4: Inspect for Damage or Moisture After cleaning, carefully inspect the attic for structural problems. Look for: Roof Leaks – Water entering the attic through cracks, missing shingles, or damaged roofing, which can cause structural damage. Mold Growth – Fungal growth on wood, insulation, or other surfaces due to moisture, which can affect air quality and health. Damaged Insulation – Insulation that is wet, compressed, or deteriorated, reducing

How to Dispose of Grease from Bacon? Easy Tips for a Clean Kitchen

Bacon is a beloved breakfast staple, but the greasy residue it leaves behind can create headaches if not disposed of properly. Pouring bacon grease down the sink may seem convenient, but it can clog pipes, attract pests, and even harm the environment. Understanding how to dispose of grease from bacon is essential for every household. In this guide, we’ll walk you through practical and safe ways to handle bacon grease. From storage and repurposing to environmentally responsible disposal methods, you’ll gain tips that protect your plumbing and contribute to a cleaner home. We’ll also answer common questions like how to dispose of old bacon grease and how to properly dispose of bacon grease in ways that won’t harm your home or surroundings. Whether you’re cooking for your family or managing kitchen waste responsibly, these insights will make bacon cleanup stress-free. And for residents needing extra help, Junk Masterz provides services to handle greasy or kitchen waste safely, keeping your home tidy and efficient. Why Proper Bacon Grease Disposal Matters  1.1 The Plumbing Risks of Pouring Grease Down the Sink Many people make the mistake of pouring leftover bacon grease down the kitchen drain. While it may seem harmless, grease solidifies as it cools, creating blockages in your pipes. Over time, these clogs can cause costly plumbing repairs. 1.2 Environmental Impact Bacon grease is not biodegradable in large quantities. When it enters water systems, it can harm aquatic life and pollute rivers and lakes. Responsible disposal helps reduce environmental damage. 1.3 Health Considerations “Improper storage or disposal of bacon grease can attract bacteria, mold, and pests, creating an unhygienic kitchen environment. By following safe disposal practices recommended by Junk Masterz, you can maintain a cleaner, healthier, and safer home. How to dispose of grease from bacon? Safe Methods for Disposing of Bacon Grease  Whether you’re cooking for your family or entertaining guests, following safe disposal practices keeps your kitchen mess-free and stress-free 2.1 Reuse for Cooking Instead of throwing it away, consider reusing bacon grease. Filter it through a fine strainer or cheesecloth to remove solid bits, then store it in a clean container in the refrigerator. Reused bacon grease adds flavor to vegetables, eggs, and even popcorn. 2.2 Solidifying and Trash Disposal One of the safest ways to dispose of bacon grease is to let it cool and solidify. Once solid, scrape it into a disposable container or wrap it in foil and place it in your trash. This method prevents spills and keeps your garbage contained. Step-by-Step: Pour grease into a heatproof container. Allow it to cool and harden. Seal the container and dispose of it with your regular trash. 2.3 Use Absorbent Materials For small amounts of grease, you can soak it up with paper towels, coffee grounds, or sawdust. Once absorbed, dispose of it in the trash. 2.4 Recycling Options Some municipalities accept cooking oils and grease for recycling or conversion into biofuel. Check local guidelines to see if how to dispose of bacon grease properly includes drop-off points for household fats. 2.5 Composting Considerations While small amounts of grease can be composted in certain systems, large quantities are not recommended because they can attract pests and create odor issues. Always mix with high-carbon materials like leaves or cardboard. Also Read: How Junk Removal Works  Common Mistakes to Avoid  3.1 Pouring Down the Drain Never pour bacon grease into sinks, toilets, or storm drains. This leads to clogs, sewer backups, and environmental pollution. 3.2 Using Plastic Bottles Unsafely Avoid pouring hot grease directly into plastic bottles—it can melt the container or cause burns. Always allow grease to cool slightly before transferring. 3.3 Forgetting Proper Storage Leaving grease uncovered or at room temperature can lead to bacterial growth. Always store reused grease in a sealed, clean container in the fridge.For households with larger amounts of grease, old cooking oils, or other tricky waste, professional services can provide peace of mind. Junk Masterz, with my residential junk removal, ensures that grease, appliances, and bulky kitchen items are handled safely, efficiently, and in an environmentally responsible manner. Creative Ways to Repurpose Bacon Grease  Cooking – Adds flavor to eggs, sautéed vegetables, and roasted potatoes. Bird Feeders – Mix with seeds to create a high-energy treat for birds during winter. Soap Making – Homemade soaps can include animal fats like bacon grease. Seasoning Cast Iron – Use cooled bacon grease to season your cast iron cookware for a natural, non-stick layer. These repurposing methods reduce waste while giving bacon grease a second life. Professional Help for Kitchen Waste  Sometimes, disposing of large amounts of bacon grease, cooking oils, or other kitchen waste can become overwhelming, especially after cooking for events, holidays, or during home renovations. Attempting to handle this yourself may lead to spills, clogged drains, or even injury. This is where professional help becomes invaluable. Companies like Junk Masterz, with residential junk removal, specialize in safely removing greasy waste, old appliances, and bulky kitchen items. Their team is trained to handle materials that are otherwise difficult to dispose of, ensuring that your home stays clean, sanitary, and free of hazards. Benefits of using professional services include: Safe Handling: Experts use proper containers and protective equipment to manage hot or heavy grease safely. Time-Saving: Professionals can remove large quantities quickly, allowing you to focus on other household tasks. Environmental Responsibility: Junk removal services often recycle or dispose of kitchen waste following local environmental guidelines, reducing pollution. Preventing Plumbing Damage: By professionally removing grease and oils, you avoid costly plumbing repairs caused by clogs and backups. Even if you normally handle kitchen cleanup yourself, having a professional team for occasional large-scale disposal can save money, time, and stress while keeping your household safe and eco-conscious. Conclusion  “Properly disposing of bacon grease is more than just a kitchen habit—it’s an essential step in protecting your plumbing, your home, and the environment. Knowing how to dispose of grease from bacon safely prevents clogged pipes, foul odors, and environmental contamination. By following safe methods

How to Dispose of Old Propane Tanks: A Complete Guide for Homeowners

Old propane tanks are common in many homes, especially for grills, patio heaters, and camping equipment. However, when these tanks become empty, damaged, or outdated, many people are unsure how to dispose of them properly. Throwing them in regular trash is not only unsafe but often illegal because propane tanks are pressurized containers. Learning how to dispose of old propane tanks safely protects both people and the environment. Propane is highly flammable, and improper disposal can lead to leaks, fires, or explosions. Local regulations also require propane tanks to be recycled or handled through specialized waste programs. In this guide, you will learn how to dispose of an old propane tank, the safest disposal methods, recycling options, and when it’s time to replace your tank. Whether you have a small grill cylinder or larger propane containers, this step-by-step guide will help you handle the process responsibly. Why Proper Propane Tank Disposal Matters Environmental Impact Propane tanks are made from steel and other materials that can be recycled. When they are disposed of improperly, they can release residual gas or contribute to landfill waste. Recycling propane tanks allows the metal components to be reused in new products, reducing environmental impact. Safety Risks of Improper Disposal Old propane tanks still contain small amounts of gas even when they seem empty. Placing them in household trash or crushing them can cause: Fires or explosions in garbage trucks Gas leaks in landfills Injuries to sanitation workers Because of these risks, most municipalities treat propane tanks as hazardous or special waste items. Local Regulations and Waste Laws Many cities prohibit propane tanks from being placed in curbside trash or recycling bins. Instead, they must be taken to approved recycling facilities, propane suppliers, or hazardous waste centers. Checking your local regulations ensures you dispose of tanks safely and legally. If you’re unsure where to take them or have multiple items to remove, professional help from Junk Masterz, offering affordable junk removal services, can make the process easier and ensure the tanks are handled responsibly. How to Dispose of Old Propane Tanks: Step-by-Step Guide Understanding the correct process helps ensure safe disposal. Step 1: Confirm the Tank Is Empty Before disposal, ensure the propane tank is completely empty. Signs your tank may be empty include: No flame when the valve is opened on a grill No sound of gas escaping when the valve is slightly opened The tank feels very light Never attempt to puncture or dismantle a propane tank yourself. Step 2: Close the Valve Securely After confirming the tank is empty, tightly close the valve. This prevents any remaining propane vapors from escaping during transportation. Step 3: Identify the Tank Type Different tanks require different disposal methods. Common types include: 20-lb BBQ grill tanks Small camping propane cylinders Large residential propane tanks Knowing the tank type helps determine the correct disposal option. Step 4: Choose an Approved Disposal Method Once the tank is secured, select one of the approved disposal options described below. Best Places to Dispose of Old Propane Tanks Propane Exchange Programs Many retailers offer propane exchange programs where you return your old tank and receive a filled replacement. Common exchange locations include: Hardware stores Gas stations Home improvement retailers These programs recycle or refurbish returned tanks safely. Local Hazardous Waste Facilities Most municipalities operate household hazardous waste collection centers that accept propane tanks. These facilities safely depressurize and recycle the tanks. Metal Recycling Centers Scrap metal recycling facilities often accept propane tanks once they are confirmed empty. Because propane tanks are made of steel, they can be processed and reused. However, some recycling centers require valves to be removed by professionals before acceptance. Junk Removal Services  If you have multiple propane tanks or other bulky items to remove, professional services can make the process easier and safer. Taking the right steps today ensures that potentially hazardous materials are handled responsibly and recycled whenever possible. Also Read: What Are Bulky Items How to Dispose of Old Style Propane Tanks Older propane tanks can present additional challenges because they may not meet modern safety standards. Identifying Old Propane Tanks Older tanks may: Lack modern safety valves Show rust or corrosion Have outdated manufacturing stamps If a tank appears damaged or extremely old, it should never be reused. Disposal Options for Outdated Tanks The safest ways to handle how to dispose of old style propane tanks include: Taking them to hazardous waste facilities Contacting propane suppliers for proper recycling Using professional junk removal services Experts can safely depressurize and dismantle these tanks before recycling. Can You Recycle Propane Tanks? Yes, propane tanks can be recycled because they are primarily made from steel. Recycling typically involves: Safely releasing remaining gas Removing valves Crushing and processing the metal Recycling reduces landfill waste and allows valuable materials to be reused. If you are unsure where to recycle tanks in your area, contacting a recycling center or local waste authority is a good first step. Signs It’s Time to Replace a Propane Tank Not all tanks should be reused or refilled. Replacement is necessary when tanks show signs of wear or damage. Look for these warning signs: Severe rust or corrosion Dents or structural damage Expired certification dates Faulty or leaking valves Propane tanks typically require recertification after about 12 years. After that, they must be inspected periodically to remain safe for use. If a tank fails inspection, it must be recycled or properly disposed of. Common Mistakes to Avoid When Disposing of Propane Tanks Many homeowners unknowingly make disposal mistakes that can be dangerous. Avoid the following: Throwing Tanks in Household Trash This is unsafe and illegal in many areas. Attempting DIY Tank Disassembly Cutting or puncturing propane tanks can cause explosions. Burning or Crushing Tanks Residual propane can ignite under pressure. Ignoring Local Regulations Different cities have different rules for hazardous waste disposal. When in doubt, contacting professionals or waste management authorities is always the safest choice. Professional Junk Removal for Propane Tanks Sometimes the easiest

Color Palette