

You’re standing in the yard, looking up at gutters that are sagging, rusted through, or just plain done. Maybe you’re prepping for a new roof. Maybe you’re finally swapping to seamless gutters. Either way, the question isn’t really whether you can take them off yourself most homeowners can. The real question is whether you’ll take them off in a way that leaves your fascia, siding, and shingles intact, or in a way that turns a simple removal job into a fascia-repair bill.
This guide walks through exactly how to Take Off Gutters safely, how that process changes for seamless gutters, and more importantly, how to do it without damaging the house underneath. That last part is where most DIY guides go quiet, and it’s exactly where people run into trouble.
What You’ll Learn in This Guide
Most gutter removal guides stop at “unscrew it and pull it down.” This one goes further, covering the details that actually determine whether the job goes smoothly:
- Step-by-step removal for standard sectional (K-style) gutters, from downspout to final hanger
- A dedicated walkthrough for seamless gutters, which come apart differently than sectional systems and rarely get covered in general removal guides
- Damage-prevention technique — where to apply leverage, how to protect fascia and siding, and how to keep gutters intact if you plan to reuse or donate them
- A troubleshooting section for rusted, painted-over, or stripped fasteners the single biggest reason DIY removal jobs stall
- A clear DIY-vs-professional framework, so you can make that call with actual criteria instead of guesswork
- What to do with the old gutters once they’re down, and realistic cost expectations either way
If you’ve read other removal guides and come away with more questions than answers, that’s the gap this one is built to close.
Quick Answer
Remove the downspouts first, then work section by section, unscrewing or prying the gutter loose from its hangers while supporting its weight the entire time. Never let a full length of gutter drop free; that sudden weight shift is what tears fascia boards and dents siding. Use a stable ladder, a helper, and gloves, and you can strip a single-story home’s gutters in an afternoon.
Why How You Remove Gutters Matters (Not Just That You Do)
It’s tempting to treat gutter removal as the “easy part” before the real work of installing new ones begins. In practice, it’s where a lot of avoidable damage happens.
Gutters are often original to the house — some have been up there for 20, 30, even 50 years. That means the screws, spikes, or hangers holding them on are rusted, painted over, or both. When people hit resistance, the instinct is to pry harder, and they pry at the middle of the gutter run instead of right at the hanger. That’s the single most common cause of fascia board damage during DIY removal: the leverage point is wrong, not the technique itself.
Get the leverage point right, and the rest of the job is mostly patience.
Signs Your Gutters Are Ready to Come Off
Not sure if it’s actually time? Look for:
- Visible sagging or pulling away from the fascia board
- Rust streaks, pinhole leaks, or flaking paint along the seams
- Water spilling over the sides during rain instead of channeling into the downspout
- Frequent clogging even right after cleaning
- Cracked seams on sectional gutters, or splitting at the crimped joints on seamless ones
If you’re seeing two or more of these, removal (and likely replacement) is probably overdue. According to the Environmental Protection Agency (EPA) Mold Guide, excess moisture around building materials should be addressed quickly to prevent long-term structural and indoor air quality problems.
DIY Gutter Removal vs. Calling a Pro
Most people can do this themselves, but not every situation is equally DIY-friendly.
Good candidates for DIY removal:
- Single-story homes
- Sectional aluminum or vinyl gutters
- No visible fascia rot
Consider hiring a pro if:
- You’re dealing with a two-story-plus home
- You have seamless gutters attached with heavy-duty rivets
- The fascia looks soft, discolored, or rotted underneath
- Your roofline has multiple steep pitches or hard-to-reach sections
While hiring a professional company is the easiest and safest option, taking a few basic measurements beforehand can help you avoid unnecessary costs and get a more accurate estimate.
Tools and Safety Equipment You’ll Need
| Tools | Safety Gear |
|---|---|
| Cordless drill/driver with screw bits | Work gloves |
| Pry bar | Safety goggles |
| Hammer | Sturdy extension ladder, rated for your weight plus tools |
| Tin snips (for seamless gutters) | Ladder stabilizer or standoff |
| Caulk removal tool or utility knife | Hard hat if others are working nearby |
| 5-gallon bucket or tarp for debris and old fasteners | A spotter or helper don’t skip this |
One habit that pays off: never rest your ladder directly against the gutter itself. The gutter can bend under your weight, which throws off your balance and can bend the very piece you’re about to remove. A ladder standoff (a simple bracket that holds the ladder a few inches off the wall) solves this for a small cost.
How to Take Off Gutters From the Roof: Step-by-Step
Clear the gutters first.
Clear leaves and debris before you start so you’re not showered with soggy muck during the job. It’s also important to understand how to get rid of roofing shingles properly before removing them, as they often require approved disposal or recycling
Remove the downspouts first
Work from the bottom up. They’re usually held with screws or rivets; drill out rivets rather than trying to pry them.
Set up your ladder and spotter
at one end of the gutter run before touching a single fastener.
Support the gutter section
with one hand, a shoulder, or a temporary sling before removing the last few fasteners. This is the step people skip, and it’s the one that prevents a section from snapping down and gouging the fascia on its way off.
Remove the hangers, spikes, or brackets
with a drill or pry bar, working steadily along the section rather than yanking from one end.
Lower the section down
to your helper or onto a tarp; don’t let it drop, even from a short height.
Move to the next section
and repeat, relocating the ladder as you go.
Patch and inspect as you go
Fill exposed nail holes in the fascia with exterior caulk, and flag any soft or rotted wood for repair before new gutters go up.
How to Remove Seamless Gutters
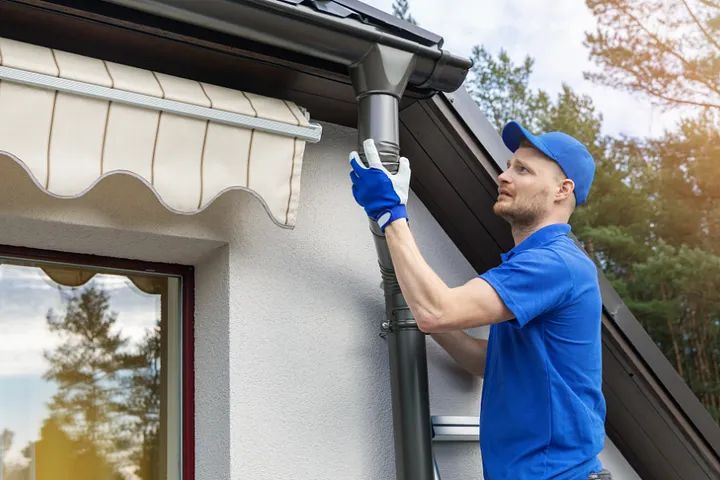
This is where a lot of guides fall short, and it’s worth its own section because seamless gutters come apart differently than sectional ones.
Seamless gutters are custom-rolled on-site as one continuous piece to match your roofline, rather than snapped together from pre-cut sections. That means there are no seams to separate when you remove one; you’re removing the entire run as a single, often heavy, piece.
A few things to know before you start:
- Hidden hangers are typically screwed into the fascia every 24 to 36 inches; there’s no shortcut around removing each one individually.
- Corners and end caps are usually riveted or sealed on-site rather than screwed, so you’ll need a drill to get through rivets, not just a screwdriver.
- Because the whole run comes off in one piece, anything over 15–20 feet really needs a second (or third) helper. This isn’t optional the way it might be for a short sectional run; an unsupported 20-foot length of aluminum is heavier and more awkward than it looks.
- Seamless gutters are cut to the exact dimensions of the house they were installed on, which makes them hard to reuse or resell afterward. Plan on recycling rather than repurposing.
How to Remove Gutters Without Damaging Them (or Your House)
If preserving the gutters for reuse, donation, or resale matters to you or you just want to avoid a fascia repair bill, a few habits make a real difference:
- Work at the hanger points, not the middle of the run. Prying mid-span bends the gutter material and stresses the fascia unevenly.
- Back screws all the way out before pulling. Wrenching a section free with fasteners still partially seated is how gutters bend and fascia splits.
- Use a drill instead of a pry bar wherever you can, especially if you want the gutter intact afterward.
- Protect the siding below your work area with a moving blanket or tarp draped over the ladder’s contact point.
- If a fastener won’t budge, cut around it instead of forcing the whole gutter. Replacing a single stuck hanger later is far cheaper than replacing a bent gutter section.
What to Do With Stuck or Rusted Fasteners
Old hardware is the most common holdup. A few fixes, in order of how much force they require:
- Apply penetrating oil to rusted screws and let it sit 10–15 minutes before attempting removal.
- If a screw head strips, drill it out rather than continuing to fight it with a screwdriver — trying to force a stripped screw usually just makes the hole worse.
- For a hanger that truly won’t release, cut it with an oscillating tool instead of levering the gutter against it. Gutters mounted with hidden hangers are generally easier to remove cleanly than ones held with old-style spikes, since there’s no exposed nail through the gutter face to deal with.
Common Mistakes That Damage Roofs and Siding During Gutter Removal
- Letting a full section drop unsupported once the last fastener is out
- Prying against the fascia board itself instead of the hanger
- Skipping the ladder standoff and resting the ladder’s weight on the gutter
- Removing gutters in freezing temperatures, when aluminum and vinyl both become more brittle
- Working solo on multi-story or seamless sections
What to Do With Your Old Gutters
Once they’re down, you’ve got a few options:
- Scrap metal recycling: aluminum gutters have real scrap value, and most metal recyclers will take them.
- Reuse or donation: sectional gutters in decent shape can sometimes go to a Habitat for Humanity ReStore or get repurposed for garden beds and rainwater catchment projects.
- Standard disposal: check local rules before putting gutters at the curb; many municipalities won’t take them in regular pickup, and you may need a bulk item pickup or transfer station drop-off.
How Much Does Gutter Removal Cost (DIY vs. Professional)?
Doing it yourself, your main costs are tool rental (if you don’t already own a good drill and ladder) and disposal fees, often under $100 total for an average home.
Hiring it out, removal is usually bundled into a replacement job rather than billed alone, but labor-only removal typically runs somewhere in the $1–$2 per linear foot range, varying by region, gutter material, and how accessible your roofline is.
Final Thought
Homeowners rarely search “how to take off gutters” because they’re curious — they’re standing in the yard, ladder already out, wondering if they’re about to make things worse. Taking the time to remove gutters carefully protects more than just the gutters themselves; it protects the fascia, siding, and roofline they’re attached to, which is a lot more expensive to fix than a bent gutter section. Whether you’re about to install new gutters, get a new roof, or just want the old ones gone, a slower, supported removal now saves you a repair project later.
Frequently Asked Questions
How do you safely remove gutters by yourself?
It’s safer with a helper, but if you’re working alone: use a stabilized ladder, remove the downspouts first, and never fully detach a long gutter section without supporting its weight. Working in shorter segments helps if you don’t have a second set of hands.
Do you need to remove gutters before re-roofing?
Yes, in most cases. Gutters are typically detached or removed before roofers install new drip edge and shingles, then reinstalled or replaced once the roofing work is done.
Can you reuse gutters after removing them?
Sectional (K-style) gutters can often be reused if they’re removed carefully and come off undamaged. Seamless gutters are custom-cut to the original house, which makes them difficult to reuse anywhere else.
What tools do I need to take off gutters?
A drill/driver, pry bar, tin snips (for seamless gutters), a sturdy ladder, gloves, and a helper cover most jobs — see the full tools table above for the complete list.
How long does it take to remove gutters?
For an average single-story home, DIY removal typically takes 2–4 hours. Seamless gutters or multi-story homes can take longer, mainly due to the weight and length of the sections involved.
Is it hard to remove seamless gutters?
It’s more labor-intensive than sectional gutters, since a seamless run comes off as one long, heavy piece rather than in separate, manageable sections. A second helper is strongly recommended for anything longer than 15–20 feet.